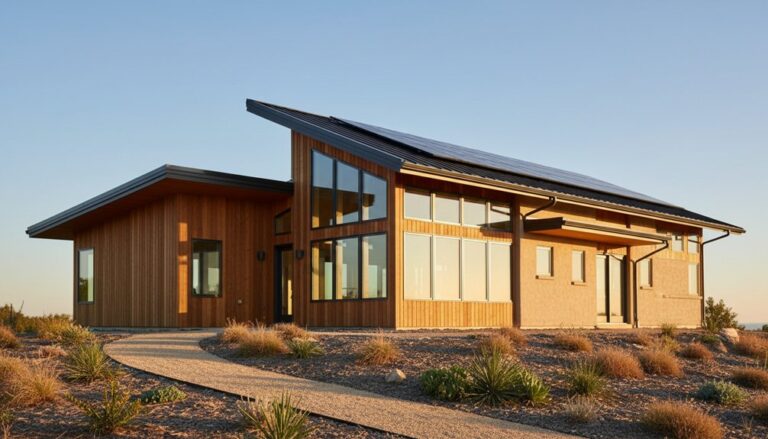
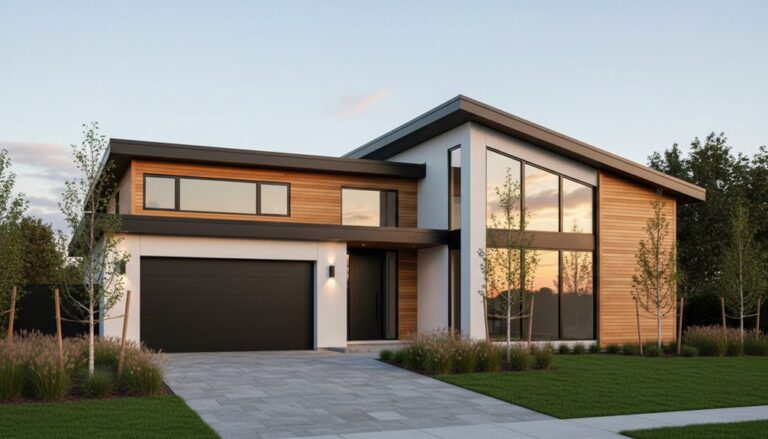
You’ll build a modern eco‑friendly new build by setting clear targets for energy, embodied carbon, water, and waste, then letting the site and fabric do the heavy lifting. Orient the home for winter sun, add seasonal shading and windbreaks, and keep the form simple. Specify low‑carbon insulation, high‑performance glazing, and continuous insulation to cut thermal bridges. Build airtight, commission MVHR if suitable, and size heating for low temperatures. Add well‑sited PV and keep systems maintainable—there’s more ahead.
Key Takeaways
- Set measurable targets for operational energy, embodied carbon, water use, and waste diversion, and budget for commissioning, monitoring, and maintenance.
- Optimize site layout for sun, shade, and wind protection using east–west orientation, seasonal shading, and native windbreaks to improve comfort naturally.
- Build a high-performance fabric: continuous insulation, minimal thermal bridges, and high-quality glazing to cut heat loss while maintaining daylight and durability.
- Achieve airtightness and healthy indoor air with a continuous air barrier, mid-build blower-door testing, and well-commissioned MVHR where suitable.
- Choose low-embodied-carbon, repairable materials with EPDs, reduce concrete and steel, and design with standard sizes to minimize waste and cost.
Set Eco-Friendly New Build Targets and Priorities

Before you sketch layouts or pick materials, set clear eco-friendly targets for your new build so every decision reduces carbon, protects nature, and avoids waste. Define measurable goals: operational energy intensity, embodied-carbon caps, water-use limits, and construction waste diversion. Choose performance-first standards you can verify, then assign responsibilities and a tracking method from day one.
Align priorities with Urban zoning rules early so you don’t design beyond allowable massing, access, or infrastructure capacity. Use Community engagement to surface local climate risks, biodiversity concerns, and mobility needs, then translate feedback into requirements, not slogans.
Specify low-toxicity finishes, circular components, and durability targets that cut replacement cycles. Budget for commissioning, monitoring, and maintenance so your building keeps meeting its targets over time.
Plan the Site for Sun, Shade, and Shelter

You’ll cut energy demand fast when you orient the build for winter sun and limit overheating with smart placement of glazing and rooms.
You’ll add seasonal shading with overhangs, pergolas, and deciduous planting that blocks high summer sun but lets in low winter light.
You’ll also shape a calmer microclimate by using hedges, earth mounds, and existing trees as natural windbreaks and shelter belts.
Optimize Solar Orientation
Because the sun already does the hard work, you can cut heating, cooling, and lighting loads simply by orienting the new build to capture winter sun, block summer glare, and lean on natural shelter. Set the long axis east–west, then place most glazing toward the sunniest side while keeping the coolest elevations tighter and well insulated.
You’ll boost passive warmth, reduce mechanical demand, and protect indoor comfort with fewer materials and lower carbon. Position a solar panel array where it stays unshaded through the core daylight window, and keep roof pitches and dormers simple to avoid self-shadowing.
Use existing trees, landforms, and hedgerows as living windbreaks, and locate outdoor rooms in lee zones. Add fixed shading devices only where orientation can’t solve glare.
Design Seasonal Shading
Once you’ve set the building’s orientation, shape the site so it admits low winter sun and blocks high summer heat with the lightest-touch moves possible. Map sun paths, then place compact patios, pergolas, and external blinds where they’ll shade glazing only when needed. Size overhangs to cut midday summer sun while letting winter rays reach thermal mass for free warmth.
Use seasonal shading to reduce cooling loads without adding carbon-heavy kit: specify retractable awnings, light-colored surfaces, and slatted screens you can tune by angle. Let plant selection do more work—choose deciduous trees for summer canopy and winter clearance, and use shrubs to shade hard landscaping and reduce reflected heat.
Keep roots clear of foundations, and protect existing mature trees you can retain. Avoid deep excavation; work with contours.
Use Natural Windbreaks
Where prevailing winds hit the site hardest, shape shelter with living windbreaks rather than carbon-heavy screens. Place Natural windbreaks on the windward edge: mixed native hedgerows, coppiced willow, or staggered rows of shrubs and small trees. You’ll slow gusts without trapping cold air, and you’ll reduce heat loss around doors and corners.
Keep a permeable structure—about 40–60% density—so air filters through, not over, cutting turbulence. Align breaks to protect outdoor rooms, bike storage, and air-source heat pumps for quieter, more efficient running.
Choose species that support pollinators, fix nitrogen, or provide mulch, and manage them with hand tools and on-site compost. Wind barrier benefits include lower heating demand, better comfort, drier walls, and longer-lasting cladding and paint, too.
Design the Fabric: Insulation, Glazing, Thermal Bridges
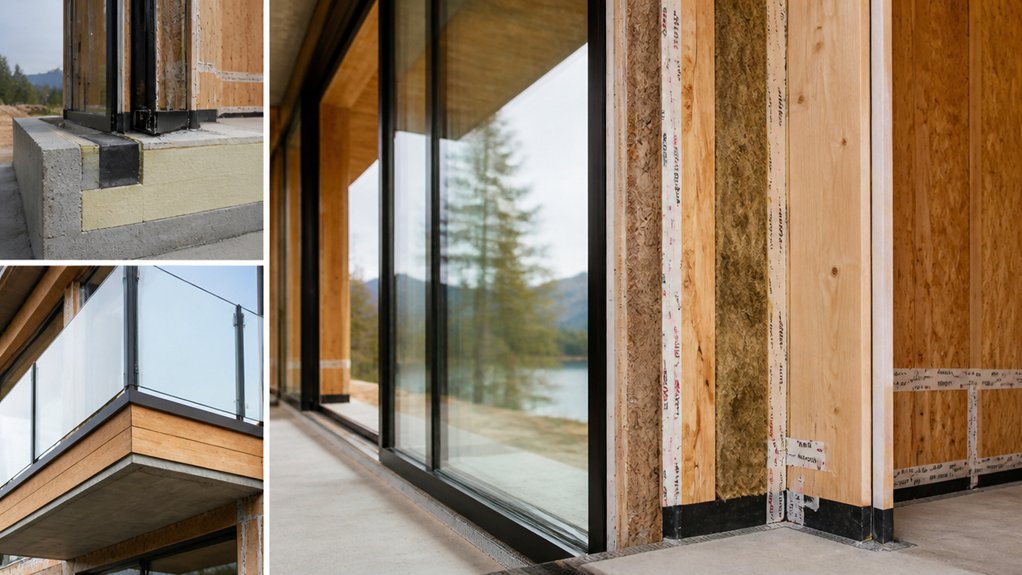
If you want a genuinely low‑energy, low‑carbon new build, you’ll get more impact from the building fabric than from any bolt‑on tech. Start with Fabric design that minimises surface area, aligns openings for daylight, and uses durable, repairable layers.
Choose insulation materials with low embodied carbon—wood fibre, cellulose, cork, hemp-lime—sized to your climate and moisture strategy, and keep the envelope continuous.
Select glazing options that balance heat loss and solar gain: high-performance double or triple glazing, warm-edge spacers, and frames from timber or recycled composites.
Then hunt thermal bridges at junctions—foundations, balconies, lintels, eaves—and eliminate them with continuous insulation, structural thermal breaks, and simple detailing.
You’ll cut demand, keep rooms stable, and reduce material use over the building’s life.
Build Airtight and Choose the Right Ventilation (MVHR?)
You’ll cut heat loss and shrink your system sizes when you build airtight, using a continuous air barrier, taped junctions, and careful detailing around services.
Then you’ll choose ventilation that keeps indoor air clean with minimal energy—MVHR for steady, low-waste heat recovery, or simpler extract fans where airtightness and budgets are lower.
Whatever you install, you’ll commission it properly and keep it tuned with filter changes and airflow checks so performance stays efficient and healthy.
Airtightness: Key Strategies
Although high levels of insulation cut heat loss, airtightness is what stops warm air (and your money) leaking out through gaps and cracks, so it’s a core strategy for a low‑carbon new build. Set clear Airtightness standards early, then design a continuous air barrier you can actually build and inspect.
You’ll get results by simplifying form, aligning layers, and detailing junctions: wall‑to‑floor, roof‑to‑wall, and around openings. Use robust sealing techniques—tapes, gaskets, membranes, and wet plaster—chosen for longevity and low-tox materials.
Keep services inside the airtight layer, or route them through dedicated voids to avoid punctures. Treat windows and doors as critical interfaces, and install with airtight collars and compressible seals.
Test mid-build, fix leaks while access is easy, and protect the barrier from later trades.
MVHR Vs Extract Fans
Once you’ve locked in airtightness, ventilation becomes the controlled “breathing” system that protects indoor air quality without wasting heat. So choosing between MVHR and simple extract fans can make or break your energy and comfort targets.
MVHR suits super-airtight homes because it supplies and extracts continuously, recovering heat and helping keep humidity and pollutants low with minimal energy. You’ll need space for duct runs, careful planning, and quiet fan locations, so decide early for smooth ventilation system integration.
Extract fans cost less and use fewer materials, and they work well in leaky or naturally ventilated builds. However, they dump warmed air outside and can pull in cold, dusty drafts through gaps.
If you prioritise low-carbon comfort year-round, MVHR often wins.
Commissioning And Maintenance
When the last sheet goes on and the seals look perfect, proper commissioning proves the home actually performs as designed. You’ll run a blower-door test to confirm airtightness, then balance your MVHR so every room gets the right airflow without wasted fan power.
Check duct leakage, insulate runs through cold zones, and set humidistat and boost controls for real use patterns, not guesses.
You should document filter grades, change intervals, and access points, so maintenance stays simple and low-carbon. Clean terminals, inspect condensate drains, and verify heat-exchange efficiency each season.
Tie servicing to landscape integration: keep external intakes clear of planting, pollen hotspots, and snow drift lines.
Finally, link performance to material sourcing by logging replacements and choosing durable, recyclable filters and sealants.
Choose Low-Carbon Materials and Simpler Build-Ups
Because your material choices lock in emissions for decades, you’ll get the biggest carbon wins by specifying low-carbon products and keeping build-ups simple. Choose timber, cellulose, cork, hempcrete, or recycled-content insulation where appropriate, and ask suppliers for Environmental Product Declarations.
Cut concrete and steel by using efficient spans, thinner slabs, and low-cement mixes, and design for standard sizes to reduce offcuts.
Prefer vapour-open assemblies with fewer layers, taped airtightness, and accessible service zones, so you avoid complex membranes and hard-to-repair sandwich walls.
Specify durable, demountable fixings so parts can be replaced or reused.
Tie Natural building to Sustainable landscaping by using locally sourced aggregates, permeable paths, and reclaimed edging, keeping soil healthy and runoff slow.
Size Heating and Hot Water (Heat Pump-Ready)
How do you make a new build heat pump-ready without overspending or overcomplicating it? Start by shrinking demand: airtightness, good insulation, and low-temperature emitters let you specify a smaller, quieter system.
Design your heating around 35–45°C flow using generously sized radiators or underfloor loops, and keep pipe runs short and well-insulated to cut losses.
For hot water, choose a correctly sized cylinder with a high-surface-area coil, locate it close to bathrooms, and add a short, timed recirculation loop only if you must.
Build in Water efficiency with low-flow taps, efficient showers, and smart zoning that reduces reheating.
Add Smart home controls that learn occupancy, cap setpoints, and run weather compensation, so you use energy only when comfort actually needs it.
Add Solar PV and Decide if a Battery Pays Back
A heat pump-ready home runs best on clean, predictable electricity, so Solar PV is the next smart layer to add. Size your array to cover daytime baseloads first, then stretch into hot water pre-heat and EV charging. Place panels to avoid shading, keep wiring short, and pair them with smart controls so you use generation on-site instead of exporting it.
A battery pays back when you’ve got evening demand, time-of-use tariffs, or frequent grid constraints. Check your half-hourly data: if you export a lot at midday and import after sunset, storage can lift self-consumption and cut peak-carbon power.
Integrate loads like Rainwater harvesting pumps and greywater recycling systems to run on sun, keeping the whole house quietly regenerative.
Avoid Eco-Friendly New Build False Economies and Overspends
Even with the best intentions, you can waste carbon and cash by cutting corners in the wrong places or over-specifying tech you won’t use. Don’t skimp on airtightness, insulation continuity, or good window installs; you’ll lock in higher heat demand for decades.
Instead, spend first on fabric, shading, and ventilation that delivers measured performance.
Resist shiny add-ons that don’t match your site and habits: oversized heat pumps, complex smart controls, or big batteries with low self-consumption. Model loads, check embodied carbon, and choose repairable, standard parts.
Use Eco friendly certifications as a verification tool, not a shopping list, and treat green building codes as the floor, not the finish.
Keep rainwater, planting, and permeable surfaces in scope so nature does free cooling and flood buffering.
Frequently Asked Questions
How Do Planning Permissions Affect Eco-Friendly New Build Design Choices?
Planning permissions shape your eco-friendly design by setting what you can build, where, and how it must look. You’ll navigate zoning restrictions that limit height, footprint, and setbacks, which can affect solar orientation, green roofs, and rainwater systems.
You must also meet Building regulations for insulation, ventilation, fire safety, and drainage, so you can’t skip performance details.
Engage planners early, justify low-carbon materials, and integrate habitats.
What Warranties or Certifications Should I Get for an Eco New Build?
Get structural warranty, get airtightness and energy performance proof, get peace of mind.
You should secure a 10-year structural warranty (NHBC, LABC, or similar), installer-backed warranties for heat pumps, PV, batteries, and MVHR, and third-party commissioning certificates.
Pursue Sustainable building certifications like Passivhaus, BREEAM, or Home Quality Mark.
Keep MCS certification to access Renewable energy incentives.
Confirm FSC/PEFC timber, low-VOC declarations, and flood resilience documentation too.
How Can I Finance an Eco-Friendly New Build and Access Green Mortgages?
You can finance your eco-friendly new build by combining a self-build mortgage, staged release funds, and grants. Then switch to a green mortgage once you’ve got an EPC A/B or verified performance.
You’ll qualify faster if you specify Renewable energy systems and Sustainable materials, document costs, and commission airtightness and SAP assessments.
Compare lenders’ rate discounts, valuation criteria, and required certifications, and keep contingency cash to avoid delays.
What Maintenance Costs Should I Expect for Eco-Friendly Systems Over Time?
You should expect modest, planned maintenance costs that rise slowly over time.
For Renewable energy systems, you’ll budget for inverter replacement around 10–15 years, occasional panel cleaning, and heat-pump servicing annually.
Batteries may need replacement in 10–12 years.
Ventilation filters need regular swaps.
Sustainable insulation usually stays low-cost, but you’ll inspect for moisture, pests, and settling every few years.
Keep warranties, schedule checkups.
How Do I Ensure Good Indoor Air Quality and Low VOC Finishes?
To keep your air fresh as a forest whisper, you’ll specify low- or zero-VOC paints, sealants, and adhesives, and you’ll demand third-party certifications.
You’ll ventilate with a balanced system and upgrade Air filtration to a high-efficiency filter, then you’ll maintain it on schedule.
You’ll choose hard, cleanable surfaces, avoid fragranced products, and flush out the space after installation.
Add Indoor plants, but don’t overwater.
Conclusion
You’ve set clear eco targets, shaped the site for sun and shelter, and built a warm, airtight fabric with smart ventilation. You’ve kept materials low‑carbon, details simple, and services right‑sized for heat‑pump living. You’ve weighed PV and storage with honest payback, not hype. Now it’s about joining it all up: measure, commission, and tune so your home works with seasons, not against them. What better legacy could you build?
About the Author