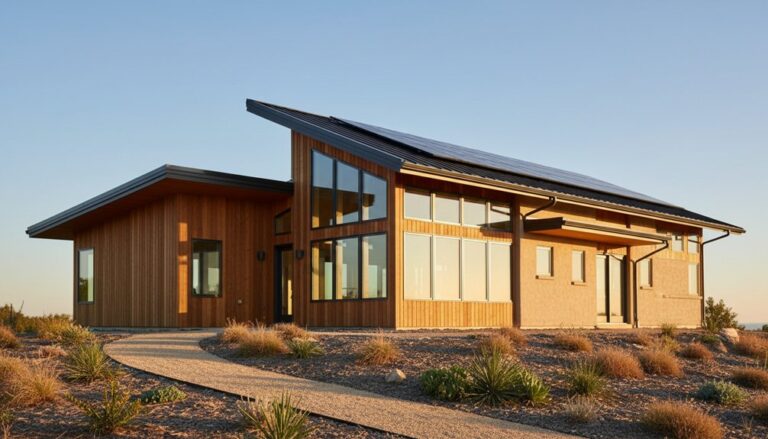
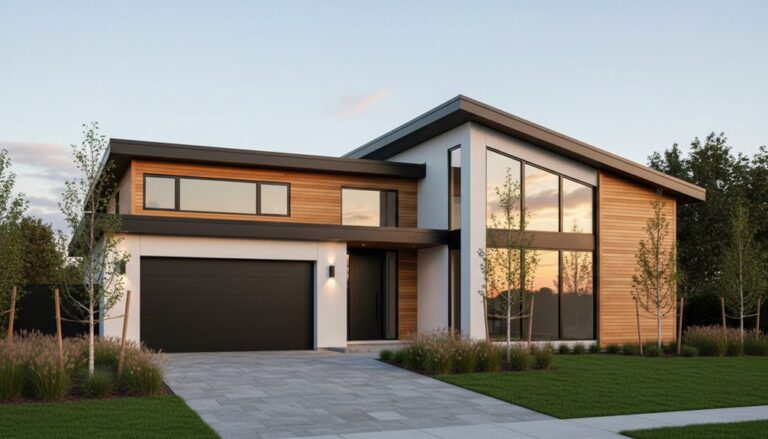
You start by verifying title boundaries, easements, access, services, and ground conditions, then you meet planners early to lock in zoning, setbacks, height, and plot ratio. You set a £/m² budget with contingency, map a critical path, and pick a build route that matches cashflow and decision speed. You orient rooms to sun and views, then build a WRB-led, taped airtight shell with continuous insulation. Next, you right-size heat pumps and ERV, commission airflow, and specify durable low-VOC finishes. Keep going to see how each step connects.
Key Takeaways
- Verify boundaries, easements, access, ground conditions, and solar/wind orientation before buying, to avoid costly redesigns and constraints.
- Confirm zoning, setbacks, height, plot ratio, parking, and impermeable limits early, using pre-application meetings to de-risk planning approval.
- Build a full budget and critical-path timeline, including contingencies, long-lead items, approvals, and clear change-control payment milestones.
- Design layout around daylight, views, and circulation, placing high-use rooms to the best orientations and coordinating structure and services early.
- Prioritize a high-performance envelope: continuous WRB, airtight sealing, insulated continuity, properly flashed openings, and right-sized heat pump plus ERV commissioning.
Find a Plot and Get Planning Approved

Before you draw elevations or price materials, you’ll need a plot that can physically and legally take your contemporary brief. Start land acquisition by reading title boundaries, easements, and rights of way, then walk the site to confirm access, sightlines, and service routes.
Check topography, bearing capacity indications, groundwater, and existing trees, because these drive foundation depth, drainage strategy, and buildable footprint. Map solar path and prevailing wind to place glazing, courtyards, and privacy buffers without overstepping neighbors.
Next, interrogate Zoning regulations: use class, setbacks, height planes, plot ratio, parking, and impermeable-surface limits to test massing. Meet planning officers early, validate design codes, and commission surveys for levels, utilities, and ecology.
Submit a pre-app package, then refine to secure consent.
Set Your New Build Budget, Timeline, and Build Route

With a plot secured and planning parameters defined, you can now lock the numbers and the delivery method that will actually fit the site. Start Budget planning by benchmarking £/m² against your target spec, then map line items: groundworks, structure, envelope, MEP, finishes, fees, and utilities connections.
Add a measured contingency tied to risk: access constraints, drainage runs, retaining walls, and service diversions.
For Timeline management, build a critical path from enabling works to handover, with float on long-lead items and statutory approvals.
Choose your build route: main contractor (single point control), construction management (trade-by-trade flexibility), or DIY/project manager (cost leverage, higher coordination load). Match the route to site logistics, cashflow staging, and your decision latency.
Set payment milestones, change-control, and reporting cadence.
Design a Contemporary New Build for Light and Layout

Although the budget and build route set your constraints, you’ll get the biggest performance gains by designing the plan around daylight path, views, and circulation first, then fitting structure and services to that logic. Map sun angles by season, then zone rooms: put high-use daytime spaces to the brightest orientation, and push utility, storage, and stairs into darker bands.
Use clear sightlines to pull you from entry to living to garden, keeping pinch points wide enough for furniture turns. Set window placement by task and glare risk: higher sill heights for privacy, deep reveals to cut summer gain, and corner glazing only where structure allows.
Layer interior lighting with dimmable ambient, task, and wall-wash circuits to reinforce focal planes at night.
Build a Watertight, Airtight New Build Shell
Once the slab cures and the frame stands plumb, you’ve got a narrow window to lock in the building’s two critical control layers: water shedding outside and air sealing inside.
Start by lapping the WRB shingle-style from sill to roofline, tape all seams, and integrate pan flashing at rough openings. Set windows in a drained plane, then bridge jambs to WRB with liquid flashing.
Inside, run an uninterrupted air barrier: seal top plates, rim joists, and service penetrations with gaskets or tapes before cladding.
Choose insulation techniques that preserve continuity—dense-pack cavities, exterior rigid boards over studs, and insulated headers.
At the roof, align sheathing, underlayment, and flashing at valleys and eaves; select roofing materials and edge metals that shed water past drip lines.
Choose Efficient Heating, Ventilation, and Durable Finishes
A tight, well-flashed shell sets the boundary conditions for your mechanical design, so size heating and cooling to the actual loads and place equipment where ducts and refrigerant lines can run short, straight, and inside conditioned space. Pair a cold-climate heat pump with a dedicated ERV, then commission airflow at each register and balance supply/return to avoid pressure imbalances.
Specify sustainable insulation continuity at rim joists, behind tubs, and at attic hatches so you don’t chase comfort complaints later. Use smart thermostats with room sensors to trim setbacks without short-cycling, and locate outdoor units on vibration pads with clear service access.
For finishes, choose durable, repairable layers: porcelain or sealed concrete floors, moisture-tolerant gypsum in wet zones, and low-VOC coatings. Detail trim reveals to protect edges and simplify repaints.
Frequently Asked Questions
How Do I Choose a Reputable Architect and Builder for a New Build?
Choose a reputable architect and builder by vetting credentials, insurance, and comparable portfolio projects. You should tour completed homes, assess spatial flow, junction details, and tolerances.
Request references, then verify timelines, change-order handling, and budget reporting. During interviews, test how they translate Design inspiration into annotated drawings and coordination notes.
Scrutinize Material selection expertise—specs, supplier accounts, warranties, and mockups. You must review contracts, scope boundaries, and site supervision frequency.
What Warranties and Insurance Should I Have for a Newly Built House?
You should secure a structural warranty (typically 10 years), a defects/liability period for workmanship, and manufacturer warranties for roof, windows, HVAC, and appliances.
You’ll need buildings insurance from completion, plus public liability cover during snagging, and consider title indemnity if surveys flag easements.
Confirm Home security systems are insured and monitored.
Tie Interior design finishes to documented specs, receipts, and maintenance schedules so claims map room-by-room.
How Do I Manage Neighbour Disputes and Party Wall Agreements During Construction?
Like a well-set datum line, you prevent drift by formalising boundaries early. You serve a Party Wall Notice, appoint surveyors, and agree an Award defining access routes, vibration limits, and working hours.
You commission a schedule of condition with dated photos, then log movements against benchmarks.
You coordinate landscaping considerations near shared fences and roots.
You document material selection processes to limit noise, dust, and overhang, and you keep neighbours updated.
What Legal Checks Are Needed Before Exchanging Contracts on a Plot?
Before you exchange, you’ll verify land ownership via title register/plan, boundaries, easements, and restrictive covenants.
You’ll run local authority, drainage, environmental, and highways searches to map constraints across the site.
You’ll confirm planning permissions status, conditions, S106/CIL liabilities, and any enforcement history.
You’ll check access rights, services corridors, wayleaves, and utility capacity.
You’ll review contamination, flood risk, and ground stability reports.
You’ll guarantee the contract includes vacant possession and warranties.
When Should I Apply for a New Postal Address and Utility Connections?
Apply for your Postal address as soon as planning approval and plot numbering exist—ideally before foundations, so the site gains an identity like a lamp on a dark lane.
Start Utility connections at least 8–12 weeks before you need power/water: submit load estimates, service routes, and meter positions once your site layout and finished floor level are fixed.
Coordinate trenching with drainage runs to avoid clashes and rework.
Conclusion
You’ve taken your contemporary new build from a pin on a map to a calibrated volume in space. Planning approval becomes the green light; your budget and timeline, the scaffold. You’ve shaped light with orientation, glazing ratios, and circulation lines. Now the shell—watertight, airtight—acts like a pressure vessel, holding comfort. Efficient heating and balanced ventilation become the lungs, while durable finishes form the skin. Hand over the keys, and the house stays precise.
About the Author