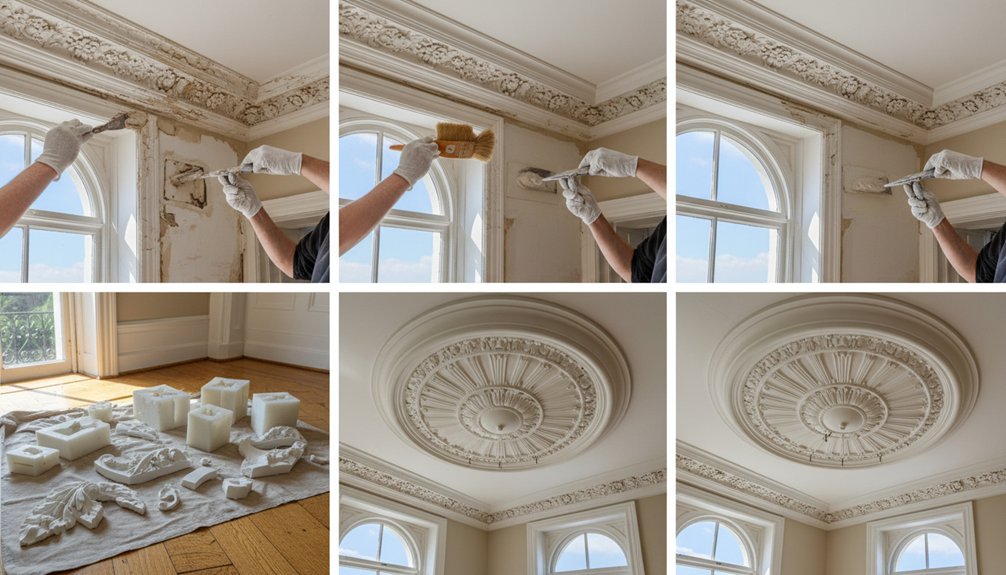
Start by inspecting under raking light for hairline cracks from fixings, hollow patches, rust stains, and salt bloom, then fix leaks and steady humidity before you touch the plaster. Decide what you can do: small cracks and chips are yours, but loose keys, distorted roses, or missing profiles need a specialist. Clean gently with a HEPA vac, prime with breathable size or casein, rake cracks to a shallow V, bed scrim in lime putty, rebuild in thin coats, then feather “green” edges, test-match paint, and check dry under raking light. Keep going to pick up the finer points that make repairs disappear.
Key Takeaways
- Inspect ceilings and roses for cracks, hollow patches, rust stains, and past cement repairs; map moisture staining and movement before touching anything.
- Control causes first: fix leaks, steady humidity and heat, and use dust precautions for lead paint, soot, and other hazardous contaminants.
- Decide DIY versus specialist: fill hairline cracks and small chips yourself, but call a pro for loose keys, distorted roses, or missing profiles.
- Prepare correctly: vacuum loose debris, use breathable primers, and choose compatible materials like lime putty filler, fine casting plaster, scrim, and stainless pins.
- Repair and finish: V-rake cracks, bed scrim, rebuild missing sections in thin coats, feather edges while “green,” then prime and paint to match under raking light.
Check Plasterwork and Ceiling Roses for Hazards

Before you touch a loose moulding or ceiling rose, inspect it for hazards that can turn a careful repair into costly damage or a health risk. Start with hazard identification: look for hairline cracks radiating from fixing points, sagging laths, rust-stained nails, and hollow-sounding areas that suggest delamination.
Check for previous cement patches, modern fillers, or trapped moisture that can stress historic lime plaster. Shine a raking light to reveal distortion and failing arrises, and note powdery surfaces that may indicate salt bloom.
Treat dust as suspect: old paint layers may contain lead, and soot can irritate lungs. Follow safety precautions—switch off nearby electrics, cover furnishings, wear a P3 respirator, gloves, and eye protection, and bag debris promptly.
Decide What to DIY vs Hire a Plaster Specialist

You’ll decide what to tackle yourself by judging how far the damage runs—hairline shrinkage cracks and small chips often suit careful filling and lime-compatible patching, while loose keys, widespread hollow-sounding areas, or a distorted ceiling rose signal deeper failure.
If you see historic mouldings losing crisp detail, earlier cement repairs, or signs of movement around joists and laths, don’t risk further loss with heavy-handed scraping or modern gypsum.
Bring in a plaster specialist when matching period profiles, running moulds, re-fixing roses, or consolidating original work matters more than speed, and you need repairs that stay breathable and reversible.
Assessing Damage And Complexity
Although a hairline crack in a ceiling rose may look alarming, the first step is to judge whether you’re dealing with superficial movement, failed fixings, or loss of original plaster fabric—because that distinction decides what you can sensibly repair yourself and what warrants a plaster specialist.
Start with raking light and a fingertip test: does the crack open when you press, or does it stay tight? Tap for hollows that suggest detachment from laths or a weak key. Check prior repairs—hard cement, silicone, or thick paint films often cause new fractures.
Map staining, salts, and rust marks that point to moisture or ferrous fixings. Photograph profiles and take a paper rubbing of ornament so any fill matches Historical accuracy and supports Artistic restoration.
When To Hire Specialists
When the ceiling rose shows signs of structural distress—sagging, a widening radial crack, a dull hollow sound on tapping, or repeated failure of old patches—it’s time to bring in a plaster specialist rather than “have a go.” You risk dislodging keyed lime plaster, breaking enrichments, and losing crisp undercut detail that can’t be re-carved convincingly.
Hire help when you need consolidation, re-fixing to laths, casting missing leaves, or matching period profiles with lime putty, fibrous plaster, and hessian scrim.
You can DIY gentle cleaning, paint removal tests, and minor hairline filling where the ground is sound.
Factor Cost considerations: specialist work costs more, but it prevents full replacement and protects historical accuracy. Ask for sample mouldings, method statements, and compatible materials.
Tools and Materials for Ceiling Rose Restoration
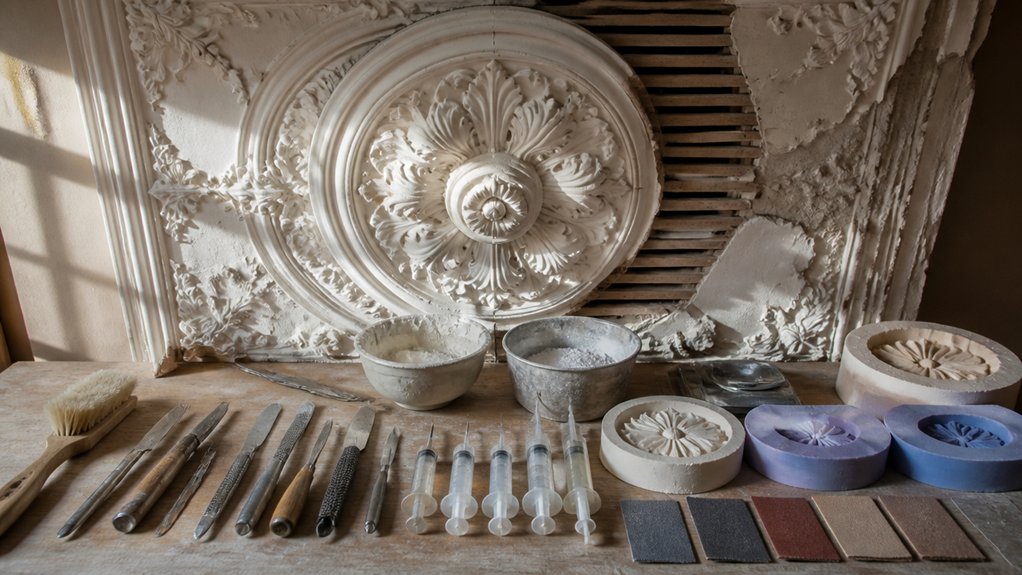
Before you touch a ceiling rose, assemble a kit that respects historic fabric: sharp plasterer’s tools (small trowel, filling knife, and a fine modelling scraper), soft natural‑bristle brushes for dusting, a spray bottle and clean sponges for controlled dampening, and a dependable straightedge for checking profile and level.
Add a head torch, magnifier, and low‑tack tape to map cracks without pulling friable edges. Keep a vacuum with a HEPA nozzle for gentle capture, not abrasion.
Choose lime putty filler and fine casting plaster matched to the original, plus hessian scrim and gauze for discreet reinforcement of decorative elements. Use stainless pins, a small mixing bowl, and measured water for repeatable set times.
Prime only with breathable casein or size where needed to maintain historical accuracy. Keep everything labelled clean.
Re-Secure Loose Plaster and Stop Further Movement
You start by identifying where the plaster’s moving—hairline cracks, hollow-sounding patches, or a rose that shifts under light hand pressure—and you stabilise the cause before you touch the finish.
Once you’ve mapped the loose areas, you re-secure them with discreet mechanical fixings set into sound laths or masonry, keeping the original profiles aligned.
You tighten and dress everything just enough to stop further movement, preserving as much historic fabric as you can for later filling and finishing.
Identify And Stabilize Movement
Although a hairline crack or faint rattle can look superficial, it often signals that the plaster keys behind have loosened and the ceiling has begun to shift. You’ll confirm movement before any repair: lightly press either side of the crack and listen for crunching; tap with a knuckle to map hollow areas; then pencil-mark crack ends and date them to see if they creep.
Check joist direction, past water staining, and nearby vibration sources such as doors or floorboards. Control the environment first—fix leaks, reduce humidity swings, and keep heat gentle—so new work doesn’t fail.
For Historical accuracy and Material compatibility, test the plaster type and lime content, and avoid hard modern fillers that lock in stress. Use temporary support only, if needed.
Reattach Plaster With Fixings
Once you’ve confirmed the plaster is sound enough to save, pull it back into firm contact with the laths using discreet mechanical fixings that won’t introduce hard points or fresh stress. Mark the hollow areas, then pre-drill through plaster at a shallow angle to avoid bursting the face.
Use stainless plaster washers with fine screws into sound laths, tightening only until the surface sits flush—don’t crush the keys. Where access allows, add small timber pads behind weak laths before you fix.
Combine fixing methods with gentle adhesive techniques: inject lime-based slurry or compatible acrylic consolidant into voids, then snug the washers to clamp while it cures.
Remove washers later only if required, and fill holes with lime putty. Leave drying time.
Strip Paint From Ceiling Roses Without Softening Detail
Before reaching for a scraper, assess the ceiling rose’s material (lime plaster, gypsum, or composition) and the paint build-up, because the wrong stripping method will blur crisp acanthus leaves and bead-and-reel mouldings in minutes.
For Paint removal, start dry: vacuum with a soft brush, then lift loose flakes with a wooden skew and stiff hog-hair brush, working with the ornament, not across it.
If layers are stubborn, use a conservation-grade, solvent-free poultice or alkaline gel approved for historic plaster; keep dwell times short and test a small petal first.
Neutralise and wipe with barely damp cotton swabs, changing them often.
Avoid heat guns, soaking water, and metal blades; they soften edges and defeat detail preservation.
Finish by gently rinsing and letting it dry thoroughly.
Fix Cracks and Rebuild Missing Plaster Sections
After you’ve stripped back the paint and can see the true extent of damage, stabilise the plasterwork by dealing with movement and hairline cracks first. Then rebuild losses so new work keys to sound substrate rather than fragile edges.
Rake cracks to a shallow V, vacuum dust, and mist with clean water to control suction. If laths have loosened, secure them and add stainless screws and plaster washers. Then bed a narrow hessian or glassfibre scrim in lime putty to bridge the line without creating a hard ridge.
Undercut missing sections, remove friable arrises, and form a mechanical key with small nibs. Rebuild in thin coats using lime and fine sand matched to existing plaster texture for historical accuracy. Let each coat firm up before the next.
Match Edges, Prime, and Paint for an Invisible Repair
Although the new lime work may feel firm to the touch, you’ll get the most invisible repair by blending the perimeter while it’s still “green” enough to abrade cleanly without tearing. Feather the arris with fine abrasive paper on a cork block, then dust off and check the junction under raking light to spot ridges.
Prioritise surface preparation: remove loose distemper, degrease smoke-stained areas, and seal friable edges with a breathable casein or dilute shellac, used sparingly.
Apply a lime-compatible primer, not vinyl, so moisture can pass. For color matching, mix small test pots and let them dry fully; wet paint lies.
Finish with thin coats, laying off with the light, and keep edges wet to avoid picture-framing.
Frequently Asked Questions
How Do I Date a Ceiling Rose to Match My Home’s Period Style?
You date a ceiling rose by checking its motif, depth, and detailing against your home’s build era, aiming for Period matching and Historical accuracy.
You’ll inspect casting seams, lath-and-plaster backing, and fixing methods: hand-run edges suggest earlier work, crisp repeated patterns suggest later moulds.
You should compare diameters to original room proportions, then cross-check with local pattern books, salvage catalogues, and nearby intact examples before buying replicas.
Will Restoring Plasterwork Improve Property Value or Affect a Survey Report?
Yes—restoring plasterwork can lift value and usually helps a survey, because it signals sound fabric and careful upkeep. Like my neighbor’s 1890s terrace: after repairing cornices and a rose, the buyer called it “uncracked history,” and the survey flagged fewer defects.
You’ll still need breathable lime, proper fixing, and neat joints; poor repairs raise red flags.
Choose wall color and lighting fixtures that flatter profiles, not mask them.
Do I Need Listed Building Consent Before Repairing Original Plaster Features?
You often do need listed building consent before repairing original plaster features if the work goes beyond like-for-like repair or affects character. You should check your listing description and speak to the conservation officer early.
If you strip Historic paint, alter profiles, or replace Plaster moldings with new casts, you’ll likely trigger consent.
Gentle patching in matching lime plaster usually won’t, but you must document materials, methods, and retain historic fabric.
How Do I Clean and Maintain a Ceiling Rose After Restoration?
Like a cameo brooch, you keep a ceiling rose bright with gentle handling. Start with a soft brush or microfibre cloth; vacuum on low through gauze.
For Cleaning techniques, use distilled water with a barely damp sponge, blotting—don’t scrub—then dry promptly. Avoid detergents, steam, and abrasives.
For Maintenance tips, dust monthly, check for hairline cracks, keep humidity steady, and touch in breathable limewash paint as needed.
Can I Replace a Missing Ceiling Rose With an Accurate Replica?
Yes, you can replace a missing ceiling rose with an accurate replica if you match the original’s diameter, relief depth, and period pattern.
You’ll get best results by taking mouldings from surviving roses in the house or sourcing a specialist who casts in lime or fibrous plaster.
Modern replacements can look sharp but often read flat.
If you try DIY alternatives, use a proven mould kit, then finish with breathable paint.
Conclusion
You’ve now coaxed tired plasterwork and ceiling roses back toward their former dignity without inviting any unpleasant surprises overhead. You checked for suspect coatings and loose keys, chose when to enlist a discreet professional hand, and used sympathetic tools and mixes. By gently re-securing, carefully lifting paint, and mending cracks with like-for-like plaster, you’ve kept crisp detail intact. Finish with feathered edges, a breathable primer, and quiet coats of paint for a truly invisible repair.
About the Author