You’ll create seamless outdoor flow by walking the site at peak use, flagging desire lines, and checking grade breaks, runoff, and sightlines. Keep primary paths 36–42 inches wide, hold running slopes under 5%, and add level landings at doors and driveway shifts. Repeat one walk surface and one drive surface, plus the same edge restraint, joint rhythm, and banding at every junction. Match undertones, wet/dry color, and texture so passages disappear. Keep going to refine details.
Key Takeaways
- Observe and mark desire lines during peak use to align patios, paths, and driveways with real movement patterns and sightlines.
- Set consistent layout rules: 36–42 inch path minimums, under 5% running slopes, and level landings at doors, gates, and driveway shifts.
- Repeat core hardscape materials across zones, using one primary surface for walks and a complementary, distinct one for drive areas.
- Coordinate color, undertone, and texture; check wet and dry samples to avoid unintended contrast and visual striping between surfaces.
- Standardize edges and transitions with consistent curbs or banding, aligned joints, continuous base support, and proper drainage to prevent settling.
Map the Route for a Seamless Outdoor Flow

Before you pick pavers or pour concrete, map how people will actually move between the patio, driveway, entries, and yard zones. Walk the site at peak use times, then trace desire lines with flags or chalk to reveal true circulation.
Note grade breaks, door swings, garage clearances, and where runoff concentrates so the route avoids puddling and frost heave.
Confirm sightlines for vehicles and visitors, especially at driveway edges and porch steps.
Plan landscape lighting as a wayfinding system: mark fixture locations early to protect conduit runs and prevent glare into windows.
Coordinate plant placement with movement, keeping corners open, preserving turning radii, and using low plant masses to frame, not pinch, the flow.
Set Layout Rules for Paths and Key Zones

Once you’ve traced the real desire lines, lock in a set of layout rules that keeps every path and zone buildable, code-aware, and comfortable to use.
Set minimum clear widths: 36–42 inches for primary paths, wider at turns and pinch points. Hold running slopes under 5% where possible, and manage cross-slope to shed water without tripping edges.
Define landing zones at doors, gates, and driveway shift so you’re not stepping into planting beds. Establish turning radii and passing bays if you expect carts or wheelbarrows.
Place outdoor furniture on level pads sized to chair pull-back and circulation. Coordinate garden lighting locations early: keep fixtures outside travel lines, plan conduit routes, and avoid glare at eye level.
Use sightlines to frame destinations and reduce dead ends.
Repeat Hardscape Materials to Connect Spaces
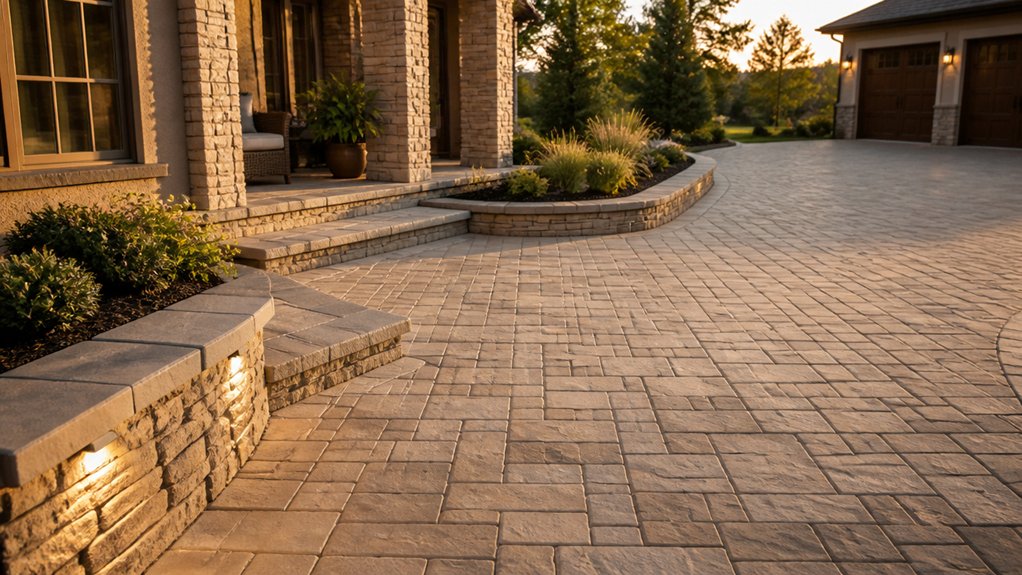
With your widths, slopes, and landings set, you can start tying the patio, paths, and driveway into one readable system by repeating a tight palette of hardscape materials. Specify one primary surface for all “walk” zones and a second for “drive” zones, then reuse the same edge restraint, joint treatment, and banding detail at every junction.
Carry the identical paver module, slab size, or aggregate type through connectors so alignment lines continue across spaces. Use Decorative accents sparingly as consistent markers—like a soldier course, inset strip drain, or header band—so they read as intentional wayfinding, not clutter.
Prioritize Material durability by matching base thickness, compaction spec, and freeze-thaw rated units across the site’s load conditions. This repetition simplifies maintenance and keeps contractors’ tolerances consistent across phases.
Match Colors and Textures to Prevent Visual Breaks
Although you can shift formats between patio, path, and driveway, you’ll keep the site reading as one system by matching color temperature and texture scale across every surface. Use Color coordination to align undertones—cool grays with cool, warm buffs with warm—so adjacent zones don’t clash under changing daylight.
Confirm choices wet and dry, since sealers and rain deepen value and can create unintended contrast bands. Manage reflectance too: similar LRV reduces “striping” between slabs, pavers, and aggregate.
Then lock in Texture balance. Pair comparable grain sizes and joint rhythms so the eye reads continuity: fine-sawn concrete beside tight-joint pavers, or exposed aggregate beside coarse stone. If you need contrast for function, keep it controlled by repeating the same micro-texture elsewhere on site.
Finish Edges and Transitions With Consistent Details
Because edges define where one surface system ends and the next begins, you’ll keep patios, paths, and driveways reading as a single composition by repeating the same shift logic everywhere. Set one edge module—soldier course, cut-stone band, or poured curb—and hold its width, reveal, and elevation datum across the site.
Where grades change, keep the same edge detailing but step it in measured risers so drainage and accessibility stay predictable. Use consistent connection techniques at material junctions: sawcut control joints aligned to paver grids, flush thresholds at door landings, and compacted base continuity under every interface.
If you need separation, specify the same restraint (steel, concrete, or plastic) and the same setback dimension. You’ll get clean lines, stable corners, and fewer cracks.
Frequently Asked Questions
Do I Need Planning Permission for Connecting Patios, Paths, and Driveways?
You don’t usually need planning permission to connect patios, paths, and driveways, but you’ll need it if you alter highway access, add significant walls/railings, or work in conservation areas/listed properties.
You must comply with permeable surfacing rules for front gardens over 5m², or you’ll require permission and drainage design. Specify falls, soakaways, and edging.
Integrate Landscape lighting conduits and Plant integration zones without blocking infiltration.
What Is the Average Cost per Square Foot for Seamless Outdoor Hardscaping?
You’ll pay about $15–$45 per square foot for “seamless” hardscaping—because apparently concrete needs a spa day.
Use modular pavers for predictable unit costs; expect higher rates for cut-in curves, grading, and base compaction.
Add decorative borders (+$2–$8/sq ft) to lock geometry and manage edge restraint.
Integrate landscape lighting (+$15–$50/linear ft) for conduit planning, transformer loads, and fixture spacing.
Material availability swings totals fast.
How Do I Ensure Proper Drainage When Linking Patio Surfaces to a Driveway?
You guarantee proper drainage by setting continuous slopes (1–2%) away from structures, then directing water runoff to collection points.
You’ll install a trench drain or channel drain at the patio-driveway interface, tie it into solid pipe, and discharge to daylight or a dry well.
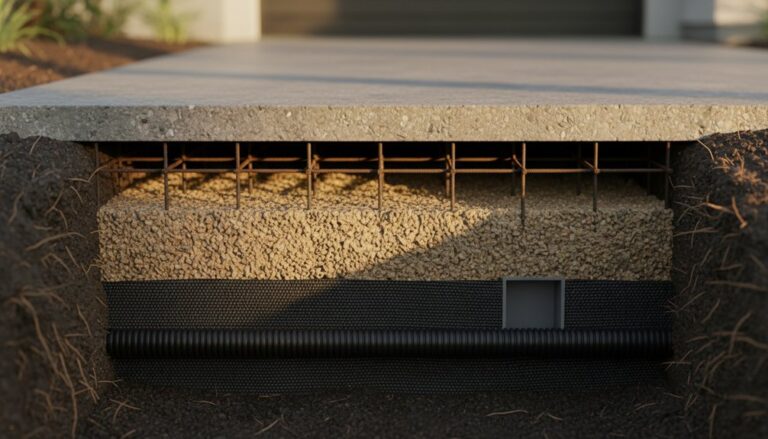
You ought to separate base layers with geotextile, compact in lifts, and use permeable joints where feasible.
These drainage solutions prevent ponding, freeze-thaw damage.
Which Hardscape Options Are Most Slip-Resistant for Wet or Icy Climates?
You’ll get the best traction with broom-finished concrete, flamed or bush-hammered granite, and rough-textured pavers that keep high microtexture under water film and ice.
Choose Textured surfaces with a tested COF rating, and avoid polished stone or sealed smooth slabs.
Add Anti slip coatings on concrete or stone where retrofits matter, and specify permeable joints to reduce refreeze by draining meltwater quickly.
In shaded zones, prioritize grit additives.
How Often Should Patios, Walkways, and Driveways Be Resealed or Maintained?
You’ll typically reseal patios and walkways every 2–3 years, and driveways every 1–2 years; adjust Sealing frequency for traffic, UV, and freeze-thaw exposure.
For example, you install a stamped concrete patio in a snowy zone: you’ll reapply a penetrating sealer in year two after salt etching appears.
Maintenance tips: wash annually, clear joints, patch cracks early, and avoid deicers on fresh sealers.
Conclusion
You map the route, set layout rules, and repeat hardscape like it’s rigid engineering—yet the result feels effortless. You match colors and textures to avoid “breaks,” and suddenly the spaces finally breathe. You finish edges, tighten joints, and align grades, because nothing says seamless like obsessive detail. Ironically, the more you standardize progressions, the more your patio, path, and driveway act like one continuous site system—clean lines, clear zones, no visual stutter.
About the Author