Start your smart energy-efficient remodel with a pro energy audit and blower-door test, then use ACH50, infrared, and duct-leakage results to rank upgrades by payback and comfort while tracking IECC and ASHRAE 62.2 targets. Seal attic bypasses, rim joists, and ducts, then add code-level insulation to cut heating/cooling loads 10–20% before you touch HVAC. Replace windows only if modeled savings beat repair costs. Right-size an inverter heat pump and commission it. Next, you’ll see how to avoid costly missteps.
Key Takeaways
- Start with a professional energy audit and blower-door test to identify leaks, prioritize fixes, and estimate ROI and comfort gains.
- Air-seal and insulate first, then re-test duct and envelope tightness and verify ASHRAE 62.2 ventilation for indoor air quality.
- Replace windows only when repairs won’t restore performance; choose IECC/ENERGY STAR units with verified NFRC U-factor and SHGC.
- Right-size HVAC with Manual J/S and Manual D, using high-efficiency inverter heat pumps and commissioning tests to avoid oversizing and short-cycling.
- Add smart thermostats, sensors, and demand-response controls after envelope upgrades to cut HVAC energy 8%–15% and track savings.
Get a Home Energy Audit (and Blower Door Test)

Before you buy new HVAC equipment or add insulation, get a professional home energy audit paired with a blower door test so you can quantify where your house is wasting energy. You’ll receive ACH50 leakage results, infrared images, duct leakage data, and a prioritized defect list tied to measured savings.
Ask the auditor to reference your local energy code (IECC or state amendments) and document ventilation targets (ASHRAE 62.2) so air-sealing won’t create indoor air-quality risks.
Use the report to set a baseline for ROI: utility bills plus modeled kWh/therm reductions after fixes. Export findings into Smart home integration plans—thermostat schedules, humidity control, and alerts—so performance stays verified.
Finally, validate renewable energy options sizing with accurate load data, avoiding oversized solar or heat pumps.
Rank Energy-Efficient Upgrades by Payback and Comfort
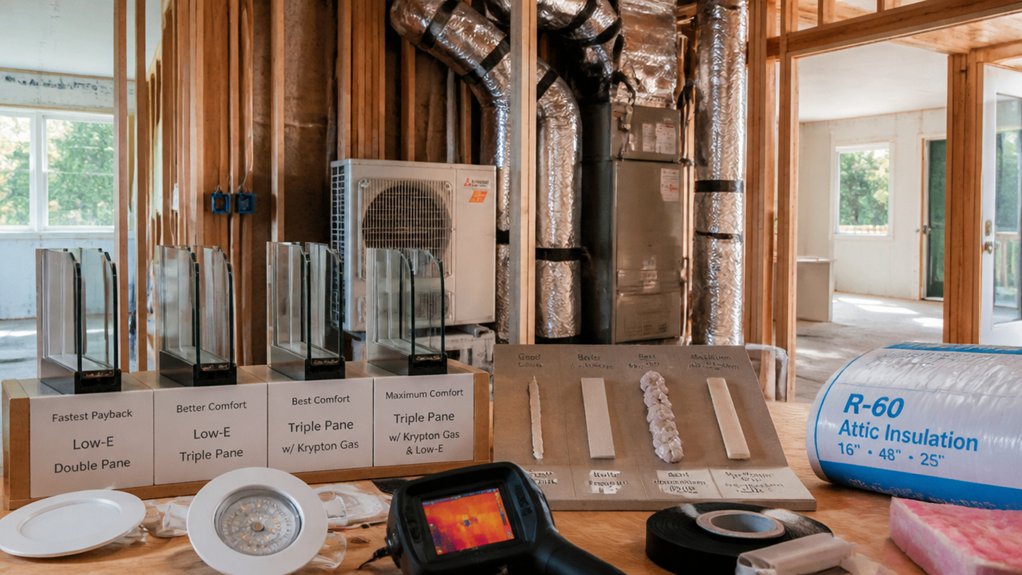
Now you’ll rank upgrade options by simple payback period using your audit numbers, local utility rates, and available rebates. Then, you’ll prioritize the shortest-payback measures that also meet current code requirements.
Next, you’ll score comfort impact—air sealing, insulation, HVAC sizing, and controls—based on temperature stability, drafts, humidity, and noise reduction.
With both rankings side by side, you can fund high-ROI wins first while sequencing bigger comfort upgrades for the best total return.
Payback Period Rankings
Five upgrades usually deliver the fastest, most code-aligned ROI when you rank projects by simple payback *and* day-to-day comfort: air sealing, attic insulation to local IECC R-values, smart thermostats, high-efficiency heat pumps (or HVAC tune-ups where replacement isn’t justified), and heat-pump water heaters.
Air sealing and insulation often pay back in ~1–4 years by cutting heating/cooling loads while protecting Indoor air quality via controlled ventilation.
Smart thermostats typically hit ~1–3 years when you verify schedules, setback limits, and sensor placement.
HVAC tune-ups can pay back in months; right-sized heat pumps commonly land ~5–10 years, faster with rebates.
Heat-pump water heaters often return in ~3–7 years.
After these, Renewable energy like solar usually pencils out at ~6–12 years, depending on net metering and rate escalations.
Comfort Impact Rankings
How much more comfortable will your home feel per dollar and per month of payback? Rank upgrades by “comfort ROI”: comfort points gained divided by monthly savings, then verify local energy-code compliance (IECC/ASHRAE targets, permit requirements).
Top tier: air sealing + attic insulation. You’ll cut drafts fast, stabilize room temps, and typically see 15–25% HVAC savings with 2–5 year payback.
Next: variable-speed heat pump with zoning; you’ll boost humidity control and reduce hot/cold spots, often 3–7 year payback.
Third: smart thermostats and sensors for Smart home integration; you’ll tighten setpoint control and capture 5–15% savings.
Lower comfort lift: LED lighting.
For renewable energy options like solar, comfort rises mainly when paired with heat pumps, battery backup, and load management.
Seal Air Leaks and Add Insulation First
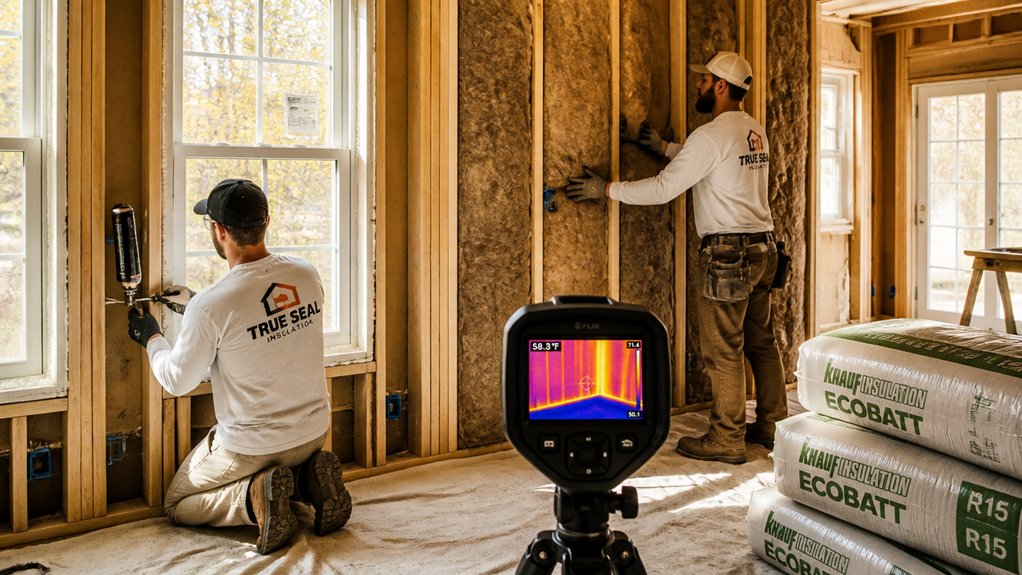
Before you invest in new HVAC equipment or smart controls, seal air leaks and upgrade insulation because they deliver some of the fastest, code-aligned energy savings per dollar. Start with a blower-door test to find attic bypasses, rim joists, and duct leaks; then seal with foam, caulk, and mastic. Aim for tightness targets that meet local energy code and keep combustion appliances safely vented.
Next, bring insulation to code minimums (often R-38+ in attics, climate-dependent) and install proper air barriers and vapor control. You’ll cut heating and cooling loads 10–20% in many homes, improving ROI and right-sizing future equipment.
Better sealing also stabilizes humidity and boosts Indoor air quality when paired with controlled ventilation and high-MERV filtration. Lower loads make renewable energy systems cheaper because you can offset fewer kilowatt-hours overall.
Decide if New Windows Are Actually Worth It
After you’ve sealed leaks and upgraded insulation, you should compare the modeled energy savings from replacement windows against your current utility bills and local code-required U-factors/SHGC.
Next, assess each window’s condition—failed seals, rot, sticking sashes, and air leakage tests—to confirm you’re fixing a performance problem, not just aesthetics.
Then calculate the payback period using installed cost minus incentives versus annual kWh/therm savings so you can prioritize only upgrades with a clear ROI.
Compare Energy Savings
Ultimately, new windows only pay off when the numbers beat the retrofit cost and the upgrade meets current energy-code targets.
Start with your utility bills: calculate annual heating and cooling kWh/therms, then model savings using your climate zone, existing U-factor/SHGC, and the replacement rating.
Compare projected dollar savings at today’s rates and at a conservative escalation (2–3%/yr).
If payback exceeds the window’s warranted life, you’re buying comfort, not ROI.
Run a simple NPV: cost minus rebates, minus avoided energy, discounted 4–6%.
Use time-of-use pricing if you’re on a Smart grid plan; peak-demand cuts can matter more than total kWh.
If you offset power with renewable sources, value reductions against your marginal grid imports, not gross usage.
Assess Window Condition
Payback math only holds if your existing windows can’t be brought back to near–code performance at retrofit cost, so inspect condition first.
Start with air leakage: if you feel drafts or see daylight at the sash, measure with a smoke pencil and verify weatherstripping and locks can restore compression.
Check glazing: failed seals, condensation between panes, or cracked glass often means replacement, not repair.
Evaluate frame materials for rot, corrosion, warping, or soft spots; probe wood with an awl and inspect aluminum for pitting and broken thermal breaks.
Confirm operation and egress: stuck sashes, broken balances, or noncompliant bedroom openings flag deeper issues.
If you can’t meet tightness, safety, and water-management basics, window durability drops and upgrades make sense.
Calculate Payback Period
Because window replacements can cost five figures fast, you should run a simple payback calculation before you sign: estimate annual energy savings from the U‑factor/SHGC delta (using your local HDD/CDD or a credible energy model), subtract any added maintenance costs, then divide the net yearly savings into your all‑in installed price minus rebates and tax credits.
Use code-referenced targets (IECC/ENERGY STAR) to validate performance claims and require NFRC labels on bids.
If payback exceeds your planned holding period, prioritize air sealing, attic insulation, or low-e storms first.
Also account for demand savings: tighter windows can reduce peak HVAC loads, improving TOU billing and smart grid responsiveness.
If you’re adding heat pumps or solar, better envelopes aid renewable integration by lowering required capacity.
Document assumptions, then re-run with utility rate escalation.
Upgrade to a Right-Sized Heat Pump System
If your HVAC equipment is oversized or nearing end-of-life, a right-sized heat pump can cut heating and cooling energy use by 20%–40% while improving comfort and humidity control.
Start with a Manual J load calculation and verify duct sizing (Manual D) so your design meets local code, airflow, and ventilation requirements.
Choose an inverter-driven unit with a high SEER2/HSPF2 rating and confirm cold-climate performance if you’re in Zone 5+.
Pair it with a Smart thermostat and integrate Home automation to schedule setbacks, lock out resistance heat, and track runtime for commissioning.
Ask for AHRI-matched equipment, permits, and a refrigerant charge test.
ROI improves when you reduce short-cycling, lower peak kW, and qualify for rebates and tax credits.
Install a Heat-Pump Water Heater Without Problems
Once you’ve cut space-conditioning loads with a right-sized heat pump, your next big electric-to-efficient upgrade is domestic hot water. A heat-pump water heater (HPWH) can reduce water-heating energy by roughly 50%–70% compared with standard electric resistance tanks.
To avoid call-backs, confirm Heat pump compatibility: provide required air volume (often 700–1,000 ft³), keep ambient temps in the manufacturer’s range, and plan condensate drainage to an approved receptor.
Follow code for T&P relief discharge, seismic strapping where required, and a properly sized expansion tank if you’ve got a check valve/PRV.
Put the unit near the highest draws, seal ducts if you use louver kits, and upgrade Water heater insulation on hot-water pipes to cut standby losses and improve ROI.
Add Smart Thermostats and Controls That Save Energy
Even after you’ve upgraded the major equipment, smart thermostats and load controls can typically cut HVAC energy another ~8%–15% by tightening schedules, setback/setup, and eliminating simultaneous heating and cooling.
Pick models that support heat pumps, multi-stage systems, and humidity control, and verify they meet local electrical and mechanical code requirements.
Prioritize Smart thermostat integration with your utility’s demand-response program so you can capture rebates and reduce peak rates.
Use room sensors to avoid over-conditioning unused spaces, and lock out conflicting modes to protect compressor life.
Add remote control functionality so you can adjust setpoints when you’re away, preventing wasted runtime.
Track savings in the app against baseline bills; in many climates, the payback can land in 1–3 seasons.
Avoid the Biggest Energy Upgrade Mistakes in Remodels
Because remodel timelines move fast and trades work in parallel, you can erase 20%+ of the savings from high-efficiency gear by making a few common, preventable mistakes: skipping a whole-house load calculation (Manual J/S), oversizing HVAC, adding insulation without a verified air-seal strategy, trapping moisture by ignoring ventilation requirements (ASHRAE 62.2/local code), and upgrading equipment before tightening the envelope.
Lock in ROI by sequencing: air-seal, then insulate, then right-size heat pumps and ducts, then commission. Demand blower-door and duct-leakage tests, and verify ventilation cfm meets code after tightening.
In Historical renovations, protect assemblies with hygrothermal modeling when you add insulation. Don’t forget Interior lighting: LED retrofits plus occupancy/daylight controls cut loads and shrink HVAC sizing.
Document specs, submittals, and inspections to prevent expensive rework.
Frequently Asked Questions
Can Solar Panels Be Added During Renovation, and When Is the Best Time?
Yes, you can add solar panels during renovation, and you’ll get the best results when you schedule solar panel installation early—ideally during roof replacement or before final electrical rough-in.
That renovation timing cuts rework, supports permit sequencing, and keeps you aligned with NEC and local structural/load requirements.
You’ll maximize ROI by pairing panel layout with roof life (25–30 years) and by preplanning conduit runs, inverter placement, and interconnection approvals.
How Do Energy-Efficient Upgrades Affect Home Resale Value and Appraisals?
Energy-efficient upgrades typically raise resale value and improve appraisals when you document verified performance.
You’ll boost Energy savings, which buyers price into monthly cost reductions, and you’ll strengthen Appraisal impact by supplying permits, code-compliant inspections, and utility-bill history.
You should expect higher valuation when upgrades are market-standard (HVAC, insulation, windows) and carry warranties.
You’ll maximize ROI by prioritizing measures with short payback and local incentive stacking.
What Rebates, Tax Credits, or Financing Options Are Available for Upgrades?
You can stack federal tax credits (e.g., IRA 25C) with state, utility, and local rebates for HVAC, insulation, heat pumps, and a Smart thermostat, cutting net costs 10–50% in many programs.
You can also use low-interest financing like PACE, utility on-bill loans, or green HELOCs to preserve cash flow.
Use code-compliant Weatherproofing techniques to qualify and boost ROI by reducing measured energy use.
Do Smart Energy Upgrades Require Electrical Panel or Wiring Upgrades?
Sometimes—your panel and wiring act like a highway system, and smart loads can create traffic. If you add a smart thermostat and LED lighting, you usually don’t need upgrades; they’re low-draw and fit most code-compliant circuits.
You’ll likely need a panel/service upgrade for EV chargers, heat pumps, or solar, especially if you’re near 80% load per NEC. An electrician’s load calculation protects ROI by avoiding rework.
How Can I Monitor Energy Use Room-By-Room After Renovations?
You can monitor room-by-room energy use by pairing circuit-level Energy monitoring with plug-in smart outlets and per-room CT submetering where loads share circuits. You’ll map breakers to rooms, then tag devices in the app for clean data.
Add a Smart thermostat with remote sensors to correlate HVAC runtime with room demand. Use UL-listed, NEC-compliant devices and electrician-installed panels.
You’ll quantify kWh savings, verify payback, and target upgrades.
Conclusion
Wrap your remodel like a system: audit, prioritize, seal, insulate, then electrify. When you fix the envelope first, your HVAC load drops, so you can right-size a heat pump and meet code-required ventilation without wasting kWh. Skip “shiny” upgrades with weak payback; choose measures with verified savings, rebates, and short ROI. Like a spreadsheet that sings, your comfort rises as bills fall—and your home performs, not just looks.
About the Author