Start by sketching your floor plan and tracing daily routes, then fix pinch points at door swings and tight corners. Keep 36-inch primary walkways, 24–30-inch secondary paths, and 18 inches beside seating, using painter’s tape to test moves. Open sightlines with slatted or ribbed-glass dividers and ceiling-track screens under 12 inches deep. Add built-in storage where clutter forms, swap swing doors for sliding, and use light, continuous finishes with layered, dimmable lighting. Next, apply these upgrades room by room.
Key Takeaways
- Map daily routes on a floor plan, then adjust furniture to maintain 36-inch primary walkways and eliminate door-swing collisions.
- Improve sightlines with partial partitions, slatted panels, or ribbed glass, keeping divider depth under 12 inches to preserve daylight.
- Create flexible zones using rugs, furniture orientation, and layered lighting, and choose multi-purpose pieces like drop-leaf tables and storage ottomans.
- Add built-in storage at clutter hotspots—entry, kitchen, closets—using shallow cabinets, labeled bins, and full-extension drawers to clear surfaces.
- Swap swing doors for pocket or sliding doors, and unify light finishes and glare-free dimmable lighting to make small spaces feel larger.
Audit Your Layout: Paths, Pinch Points, Priorities
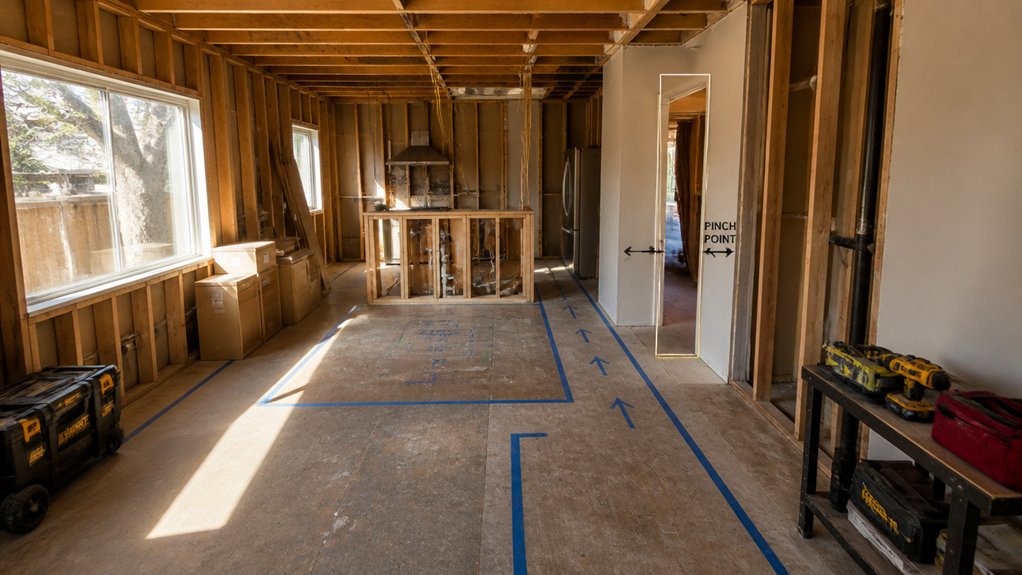
Before you pick finishes or buy new furniture, audit your layout so every square foot supports how you actually move and live. Sketch a simple floor plan and trace daily routes: entry to kitchen, bed to bath, sofa to desk.
Mark where traffic flow collides—tight door swings, narrow passages, corners that snag bags or knees. Measure clearances: 36 inches for primary walkways, 24–30 for secondary, and at least 18 inches beside seating.
Then set spatial hierarchy: keep the largest, most-used zone centered and unobstructed, and push low-frequency functions to edges. Reassign underperforming areas—swap a bulky console for wall hooks, rotate a table, or shift storage to vertical surfaces.
Test changes with painter’s tape before committing.
Open Sightlines With Dividers That Keep Privacy
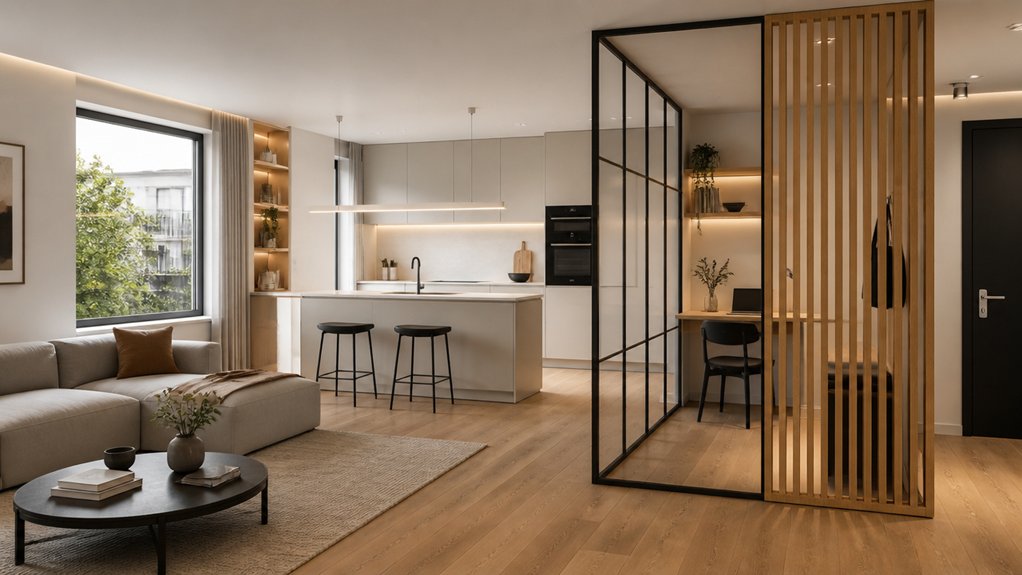
Once your traffic paths feel clean, focus on what you can see from each zone—long sightlines make a compact home read larger, but you still need privacy where you dress, work, or sleep. Replace solid walls with partial-height partitions, slatted wood, or ribbed glass so light travels while views soften.
Use Privacy screens that slide or fold, and mount them to ceiling tracks to avoid floor clutter. Position dividers perpendicular to windows to preserve daylight and maintain visual continuity to the far wall.
Add a narrow console, bookcase, or plant rail as a divider that also stores essentials without blocking the upper third of the room. Keep divider depths under 12 inches, align edges with door casings, and you’ll control sightlines precisely.
Create Zones So One Room Can Do Two Jobs
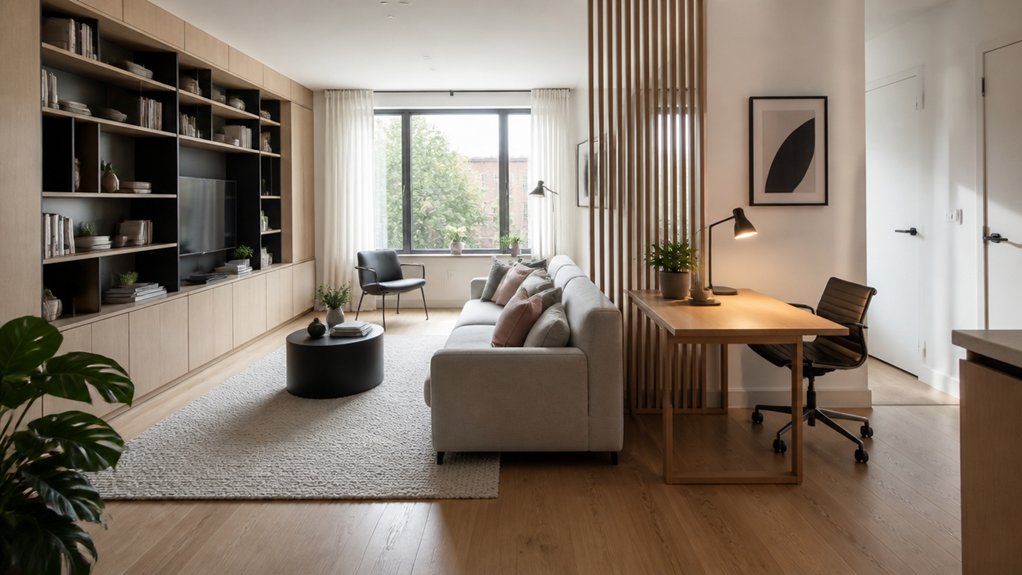
Although your floor plan may read as a single open area, you can make it work like two rooms by defining clear zones with layout, lighting, and storage. Start with your primary path of travel, then anchor each zone with one key piece: a sofa for lounging, a desk for work, or a table for dining.
Use zoning strategies like aligning rugs to furniture footprints, turning seating to face inward, and keeping 30–36 inches for walkways. Layer lighting: a focused task lamp at the desk, a dimmable floor lamp for the lounge.
Choose multi-purpose furniture—a drop-leaf table, ottoman that doubles as seating, or a bench that works for dining and entry tasks. Keep boundaries consistent.
Build in Storage Where Clutter Actually Forms
You’ll cut clutter fastest when you build storage exactly where it lands: a tight entryway drop zone with hooks, a bench, and a mail slot.
You’ll keep kitchen counters clear by adding shallow drawers, a dedicated appliance garage, and charging storage near outlets.
You’ll make the bedroom feel larger by maximizing the closet with double-hang rods, vertical cubbies, and pull-out bins for small items.
Entryway Drop Zone Storage
Where does clutter pile up first in a compact home? Right at the door, where keys, mail, bags, and shoes land.
Fix it with a tight drop zone sized to your habits: a 10–12″ deep bench, hooks mounted 60–66″ high, and a tray or narrow shelf at 40–44″ for daily carry items.
For true entryway organization, add labeled cubbies or a slim cabinet that keeps categories separate.
Prioritize shoe storage with a vented tilt-out, low cubbies under the bench, or a vertical rack that holds pairs toe-out for quick grabs.
Add a mirror panel to bounce light and a boot mat to trap grit.
Keep one rule: nothing touches the floor except shoes.
Kitchen Counter Clutter Control
Once the counters become the default landing zone for small appliances, mail, and “I’ll deal with it later” items, your compact kitchen starts feeling half its size.
Fix it by building storage exactly where clutter forms. Add a slim appliance garage beside the outlets so the toaster and blender vanish behind a lift-up door. Install a shallow drawer under the counter edge for mail, takeout menus, and charging cables, and pair it with a dedicated recycling pull-out.
For Counter organization, swap one upper cabinet for open shelves plus labeled bins, then keep only daily-use items visible.
For Clutter concealment, specify full-extension drawers with dividers for utensils, foil, and spices, and add a vertical tray slot near the oven. You’ll clear prep space fast.
Bedroom Closet Maximization
Clear counters help a compact kitchen work, but the next clutter hotspot usually sits behind the bedroom door. Start with a full purge, then measure every wall, return, and door swing so you don’t waste inches.
For closet organization, install a double-hang zone for shirts and pants, a high shelf for bins, and a lower drawer stack for socks and tees. Add a narrow vertical tower for handbags and folded items.
Use slim, matching hangers to reclaim width and keep lines straight. Treat corners with angled shelves or a pull-out basket.
For storage solutions, mount hooks on the side panels for belts, scarves, and jewelry, and add labeled bins for seasonal rotations. Put a hamper on slides to keep floors clear.
Swap Doors to Save Space and Smooth Traffic
When swing doors pinch your floor plan, you can swap in pocket doors to reclaim clearances in tight halls, baths, and closets. You’ll free up wall and floor space while keeping access points usable.
In higher-traffic zones, you can use sliding doors to prevent door-swing conflicts and keep circulation smooth.
Pocket Doors For Tight Spaces
If your swing doors keep colliding with furniture or blocking walkways, swap them for pocket doors that slide into the wall and free up usable floor space. You’ll gain clearances beside beds, vanities, and kitchen runs while keeping rooms easy to close off.
Plan the cavity early: confirm the wall isn isn’t load-bearing and relocate wiring, plumbing, or switches out of the pocket. Choose a solid-core slab for better sound control, and use heavy-duty rollers plus a rigid track to prevent racking. Add a soft-close kit to reduce slams.
Specify recessed pulls and a privacy latch so hardware stays flush. In interior design, Pocket doors read as clean architectural features that support space saving without changing the room’s footprint. Paint and trim matchings.
Sliding Doors Improve Circulation
Because sliding doors travel parallel to the wall instead of arcing into the room, they instantly smooth traffic in compact layouts and stop door panels from stealing aisle width. You gain cleaner sightlines through halls, kitchens, and entry zones, so your circulation flow stays predictable even during busy moments.
Use sliding doors on closets, laundry nooks, and bathrooms that open onto tight corridors. Specify a soft-close track to prevent slams, and choose recessed pulls so you don’t snag hips or bags passing by. Keep the track header aligned with adjacent trim for a continuous datum line, and confirm you’ve got clear wall “pocket” or bypass space for the panel to park.
If privacy matters, select solid-core panels and add perimeter seals to cut sound transmission.
Pick Light, Continuous Finishes to Feel Bigger
Although you can’t add square footage without moving walls, you can make a compact home feel larger by choosing light, continuous finishes that keep the eye moving. Use one flooring material through connected zones, or match tones closely to reduce visual breaks. Keep trim, doors, and built-ins in the same light value so edges don’t chop up the volume.
Plan color schemes around warm whites, pale greiges, or soft neutrals, then repeat them on walls and ceilings to blur boundaries. Limit high-contrast patterns; if you use one, keep it small-scale and consistent.
Upgrade lighting options with layered, glare-free sources: recessed or slim surface fixtures for general light, under-shelf strips for task light, and dimmers to avoid harsh pools. Choose satin or eggshell finishes to bounce light without highlighting flaws.
Room-by-Room Fixes for Kitchens, Baths, Hallways
Light, continuous finishes set the stage, then smart, room-specific adjustments make a compact home work day to day.
In the kitchen, tighten the work triangle: move the trash pullout by the sink, add a slim prep ledge, and swap swing doors for drawers. Use Color coordination on fronts and backsplash to reduce visual breaks, and add under-cabinet lighting to cut shadows.
In baths, choose a wall-hung vanity, recessed medicine cabinet, and a glass panel instead of a curtain; keep towel storage vertical.
In hallways, treat them like utility zones: add shallow cabinets, hooks, and a bench only if furniture arrangement preserves a 36-inch clear path. Mirror one wall to bounce light.
Frequently Asked Questions
What Permits Are Required for Renovating a Small Home in My Area?
You’ll typically need a building permit for structural changes, electrical, plumbing, HVAC, window/door replacements, and additions.
If you change walls or use load-bearing beams, you’ll need plan review.
You may need separate trade permits for contractors.
Check Historical zoning overlays for design approvals, and confirm Environmental regulations for wetlands, tree removal, stormwater, or asbestos abatement.
Call your city/county permit office, and request a permit checklist.
How Much Should I Budget per Square Foot for a Compact-Home Remodel?
Budget $100–$250 per square foot for a compact-home remodel, with premiums for kitchens and baths.
U.S. remodel spend topped $567B in 2022, so pricing stays competitive and variable.
You’ll control costs by locking scope early: pick an interior color plan that minimizes repaint cycles, and compare flooring options (LVP, engineered wood, tile) by durability and install method.
Reserve 10–20% for surprises.
How Long Does a Typical Small-Home Renovation Take From Start to Finish?
A typical small-home renovation takes about 8–16 weeks start to finish, but you’ll stretch to 4–6 months if you change layout, permits, or utilities.
You’ll move faster when you lock Material selection early, order long-lead items, and schedule trades tightly.
Use Decorating tips during the final 1–2 weeks: paint first, install lighting, then add storage, mirrors, and compact furniture to finish efficiently.
Should I Hire an Architect, or Can a Contractor Handle Design Decisions?
Yes—hire an architect if you’re changing layout or systems; let a contractor handle it if you’re doing straightforward updates.
About 30% of remodel budgets go to change orders, often from unclear plans, and that stings.
An architect locks down interior lighting plans, clear material selection, and code details upfront.
If you skip one, demand a contractor who provides scaled drawings, a lighting schedule, and a written finish spec sheet.
What Renovation Upgrades Add the Most Resale Value in a Small Home?
You’ll add the most resale value by upgrading kitchens and bathrooms first: refaced cabinets, durable counters, efficient layout, and luxury fixtures.
Next, improve energy performance with insulation, airtightness, high-efficiency HVAC, and windows.
Add smart technology—thermostat, lighting, locks, leak sensors—for buyer appeal.
Create flexible space with built-ins, closets, and clean storage walls.
Boost curb appeal with lighting, paint, and a low-maintenance entry.
Keep finishes cohesive.
Conclusion
When you renovate a compact home, you don’t chase more square footage—you uncover better flow. You measure paths, you remove pinch points, you set priorities. You open sightlines, you keep privacy, you let light travel. You zone one room for two jobs, you build storage where clutter lands, you swap swinging doors for sliders. You choose continuous, light finishes to stretch space. Then you fine-tune kitchens, baths, and halls—so every step feels easier.
About the Author