Start by defining your smart home goals (security, energy, automation) and set budgets with acceptance criteria per subsystem. Pick your platform early—local-first, cloud, or hybrid—with Matter/Thread/Zigbee/Z-Wave/Wi‑Fi support and solid voice latency during outages. Before drywall, run Cat6A and 1–1.5″ conduit to a central rack, then home-run PoE to each camera and ceiling AP. Model Wi‑Fi coverage and lock channels/power after surveys. Next, you’ll map lighting, HVAC zones, audio, and control points.
Key Takeaways
- Define smart home goals, budget, and acceptance criteria, then pick a platform early supporting Matter/Thread/Zigbee/Z-Wave with local-first options.
- Plan structured cabling before drywall: conduits with pull strings, Cat6A to every room, and labeled homeruns to a central rack.
- Design PoE power and networking: PoE runs for cameras/APs/touchscreens, managed switches, and dedicated UPS-backed circuits for critical gear.
- Model and validate Wi‑Fi coverage using floorplans, ceiling-centered APs, and post-build surveys, targeting reliable roaming thresholds for IoT and voice.
- Map zones and controls for lighting, HVAC, security, and audio, placing interfaces at decision points and documenting everything for maintenance and expansion.
Define Your Smart Home Goals and Budget Early
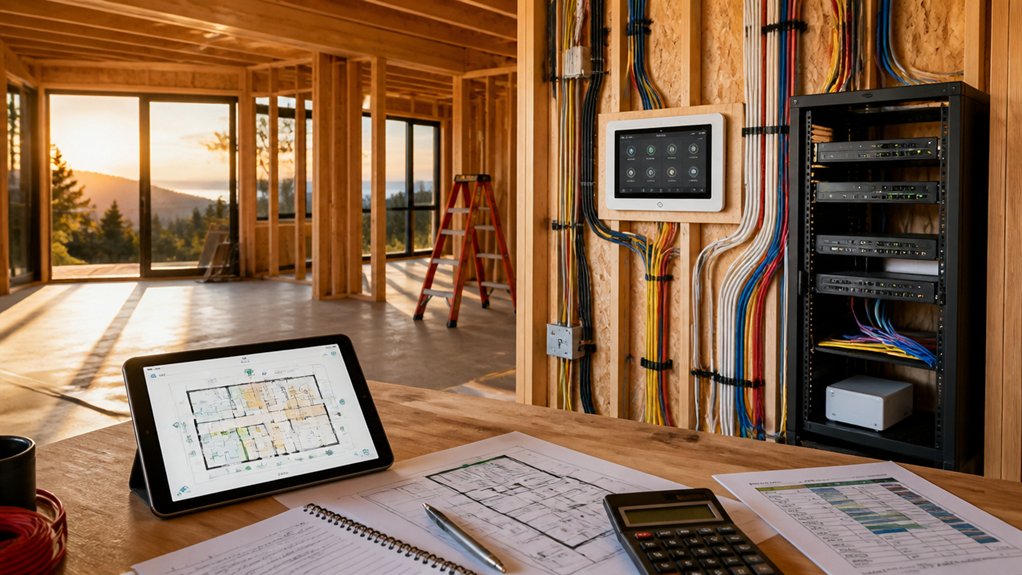
Before you pick devices or pull low-voltage cable, you should define what “smart” needs to accomplish in your new build and what you can realistically fund. Start by listing priority outcomes: Smart home security (entry sensors, camera coverage, monitored alarm, access control) and energy management (HVAC zoning, occupancy-based lighting, load shedding, solar/ESS integration).
Decide what must be local-first versus cloud-dependent, and specify uptime requirements, notification rules, and data retention. Map each goal to measurable acceptance criteria, then assign a cost ceiling per subsystem: hardware, licenses, installation, and ongoing monitoring.
Reserve contingency for commissioning and software updates. Finally, choose a platform strategy (single ecosystem vs best-of-breed) that fits your tolerance for integration work and vendor lock-in.
Plan Future-Proof Wiring: Conduit, PoE, and a Central Rack

Once you’ve set your smart home goals and cost ceilings, lock in the infrastructure that lets those systems scale without opening walls later: structured wiring, conduit paths, and a centralized rack.
Use conduit planning to run 1–1.5″ smurf tube from the central rack to key zones: attic, basement, garage, TV walls, and doorbell and gate locations, with gentle bends and pull strings.
Pull Cat6A to every room, plus extras to ceilings, exterior eaves, and AV niches, and terminate on a patch panel.
Power cameras, access points, and touchscreens with PoE from a managed switch, and reserve dedicated circuits for UPS and network gear.
Label everything, document routes, and leave slack loops for future pulls.
Map Wi‑Fi and Network Coverage Room by Room

Although you’ll run Cat6A everywhere, you still need to model Wi‑Fi like a deliberate RF system—room by room—so coverage, capacity, and roaming behave predictably under real loads.
Start with scaled floorplans and do Network mapping: mark construction materials, appliance bays, mirrors, and exterior walls that attenuate or reflect RF.
Place tentative APs ceiling‑centered, then plan overlap at -67 dBm for voice/IoT and -60 dBm for high‑density spaces like offices and media rooms.
Budget clients per room, not per house, and reserve 5 GHz/6 GHz for throughput while keeping 2.4 GHz for reach.
Validate with a pre‑drywall and post‑finish site survey, then lock channel plans, transmit power, and minimum RSSI thresholds for Wi Fi optimization and clean roaming.
Choose a Smart Home Platform for Seamless Integration
Because your network, electrical plan, and low‑voltage runs will outlive any single gadget, you should pick a smart home platform early and design every subsystem to integrate through it. Decide whether you’ll run a local controller, cloud-first hub, or hybrid, then verify protocol coverage (Matter, Thread, Zigbee, Z‑Wave, Wi‑Fi) and API openness for long-term device support.
Choose one identity plane: a single app, consistent room model, and unified automation engine with reliable scenes, schedules, and webhooks. Validate Voice command compatibility across assistants and confirm latency targets when the internet drops.
Require secure onboarding, signed firmware, role-based access, and audit logs. Plan Energy monitoring centrally via smart panel CTs, smart meters, or circuit sensors, then route telemetry into the platform’s database and dashboards.
Plan Smart Lighting, Shades, and Switch Placement
If you treat lighting and shading as a control system—not a collection of fixtures—you’ll place switches, keypads, and motors where they support predictable scenes and manual override in every room. Start by mapping circuits to use-cases: task, ambient, accent, and egress, then align loads with dimming compatibility and neutral availability.
Put primary controls at room entries, add bedside and sofa reach points, and guarantee a hardwired path still works if the hub fails. Use multi-button keypads to trigger Lighting schedules (wake, evening, away) while preserving local on/off and raise/lower.
For shade automation, specify window groups, motor power routing, and quiet-limit calibration. Plan low-voltage to each opening for sensors, and label every run to match your scene matrix precisely.
Design Smart HVAC Zoning, Thermostats, and Air-Quality Sensors
You’ll map HVAC zones around thermal loads and occupancy patterns, then spec dampers and returns so each zone can modulate independently without starving airflow.
You’ll place smart thermostats where they sample representative conditions (not sun, supply drafts, or exterior walls) and integrate them with your equipment’s staging, variable-speed control, and runtime limits.
You’ll add air-quality sensors (CO₂, PM2.5, VOC, humidity) to drive ventilation and filtration setpoints, turning IAQ data into closed-loop control instead of alerts.
Smart HVAC Zoning Strategies
While you’re finalizing your mechanical plan, design HVAC zoning as a coordinated system of dampers, variable-speed equipment, and sensor feedback rather than a set of standalone thermostats.
Start by mapping loads: solar gain, glazing ratios, insulation levels, and occupancy schedules. Then group spaces with similar profiles into zones.
Keep duct trunks short and balanced, and size branch runs for low static pressure so your blower can modulate efficiently.
Use pressure relief or bypass control to prevent overpressurization when multiple dampers close.
Specify damper authority with proper duct velocities to avoid noise and hunting.
Your Zoning strategies should include setback-compatible zones for bedrooms versus daytime areas.
Prioritize airflow optimization by commissioning: verify CFM per zone, validate damper response curves, and tune PID parameters.
Thermostats And Air Sensors
Where should sensing live in a zoned system so your equipment actually modulates correctly? Put primary thermostats in representative rooms, not halls, kitchens, or exterior walls, and use remote sensors in bedrooms to capture true load.
Tie each zone’s thermostat to its damper and airflow minimum so staging logic can avoid short-cycling.
For Temperature customization, enable per-zone setpoints and schedules, but cap demand deltas so the air handler stays within static-pressure limits.
Add return-duct temperature sensors to verify delivered capacity and detect reheat or bypass issues.
For air quality, place PM2.5/VOC sensors away from supply registers and bathrooms, then trigger ventilation or filtration modes.
Do sensor calibration at commissioning, and recheck annually to prevent drift and control oscillations.
Plan Security, Cameras, Audio, and Everyday Control Points
You’ll map security and camera coverage by defining sightlines, mounting heights, lighting conditions, and cable paths back to a centralized PoE switch and NVR location.
You’ll plan distributed audio by specifying speaker zones, amp locations, impedance loads, and conduit runs to racks or in-wall enclosures.
You’ll place everyday control points—keypads, touch panels, and smart switches—at entry/exit paths and high-use rooms, aligned to occupancy sensors, scene logic, and network drops.
Security And Camera Placement
How do you want your home to detect, record, and respond when something happens? Start by mapping your Security system around entry points and likely approach paths. Specify door/window contacts, glass-break sensors, and motion zones that avoid HVAC vents and ceiling fans to reduce false alarms.
Plan Camera placement with overlapping fields of view: cover each exterior door, driveway, and side yard, but avoid aiming at neighbors or public streets where regulations apply. Mount exterior cameras 9–10 feet high, tilt down 15–30 degrees, and keep lenses away from soffit reflections.
Run PoE Cat6 to each camera homerun to a network closet, label both ends, and budget UPS runtime for recording continuity. Choose NVR retention targets before you pour drywall.
Audio And Control Points
In practice, audio and control points work best when you design them like a low-latency I/O layer for the house: define zones, place endpoints, and wire for power, network, and future service access before insulation and drywall.
Map Audio zones by function (kitchen, patio, primary suite) and by acoustic boundaries, then home-run speaker wire to a centralized rack with labeling, slack loops, and conduit for upgrades.
Specify PoE where possible for in-ceiling amps, streamers, and touch panels to reduce wall-warts and failure points.
Place control interfaces where decisions happen: entries, bedside, kitchen prep, and media seating, with consistent height and glare-free sightlines.
Back each location with deep boxes, Cat6A, and low-voltage mud rings so you can swap keypads, tablets, and sensors later.
Frequently Asked Questions
Do Smart Home Devices Increase My Home’s Insurance Premium or Lower It?
Smart home devices can lower your home’s insurance premium if you install monitored security, leak sensors, or smoke/CO detection; you may qualify for Insurance discounts.
If devices add high-value electronics, automated locks, or complex wiring, some insurers may rate higher replacement risk, nudging premiums up.
You should document certifications, monitoring contracts, and maintenance logs.
Confirm Device compatibility with approved hubs and standards to avoid failure modes insurers won’t credit.
What Permits or Inspections Are Required for Smart Home and Low‑Voltage Work?
You’ll typically need an electrical permit for any line‑voltage changes, plus low‑voltage permits where your AHJ requires them; expect rough‑in and final inspections.
Like a checklist before launch, you’ll document cable types, stapling, fire‑stopping, box fill, and separation from mains to prove Installation safety.
For in‑wall PoE, speakers, and alarms, follow NEC/CEC and local codes.
Confirm Smart device compatibility and label runs.
Pull permits early.
How Do I Protect Privacy When Using Cloud-Based Smart Home Services?
Protect your privacy by minimizing what you send to the cloud and hardening every account. Choose vendors with end‑to‑end Data encryption in transit and at rest, then verify their Privacy policies for retention, sharing, and subpoena handling.
Use unique passwords, a password manager, and MFA.
Segment IoT devices on a separate VLAN, block outbound traffic you don’t need, and disable remote access.
Prefer local‑control hubs and rotate API tokens regularly.
What Happens to My Smart Home if the Internet Goes Out?
If your internet goes out, cloud-dependent automations, voice assistants, and remote access won’t work, but local controls may keep running. You’ll still toggle lights or locks if you’ve got local hubs, Bluetooth, Zigbee, or Z-Wave.
Check Smart device compatibility for local fallback.
Maintain Wireless signal strength for LAN reliability: your router, switches, and Wi‑Fi stay up only if they’ve got power and UPS.
Cameras may record locally.
How Much Maintenance and Ongoing Subscription Costs Should I Expect?
Like winding a pocket watch, you’ll budget ongoing costs: $0–$30/month for cloud features, $5–$15/month per camera, and optional $10–$25/month for pro monitoring.
You’ll also plan maintenance: quarterly firmware updates, battery swaps (6–18 months), and periodic sensor calibration.
To protect energy efficiency, you’ll review automation logs and HVAC schedules annually.
Verify device compatibility before upgrades to avoid replacing hubs, bridges, or radios.
Conclusion
You’ll finish your new build with a smart system that’s stable, scalable, and secure because you set goals, set a budget, and spec’d standards early. You ran conduit, pulled PoE, and centralized gear in a clean rack for consistent connectivity. You mapped Wi‑Fi room by room, then matched a platform to your protocols. You placed switches, shades, and sensors deliberately, tuned HVAC zones, and tied cameras, audio, and control points into one cohesive, configurable control layer.
About the Author