You spot renovation potential fastest by triaging structure and water first: check grading, downspouts, trim rot, foundation cracks, straight roof lines, flashing/kickout flashing, and attic staining/venting. Inside, note stair-step cracks, sloped floors, sticky doors, and ceiling stains or damp smells. Then confirm systems: panel amperage, labeling, double-taps, GFCI/AFCI coverage, HVAC age, and plumbing materials. Favor simple layouts with stacked wet rooms and clear chases. Next, you’ll see which upgrades pay off.
Key Takeaways
- Prioritize homes with strong water management: proper grading, downspout discharge, intact flashing, and no standing water or foundation cracking.
- Look for structural warning signs: stair-step cracks, sloped floors, sticking doors, and mismatched baseboards suggesting movement or settlement.
- Assess major systems quickly: roof age, attic staining/ventilation, electrical panel amperage and double-taps, HVAC age, and plumbing materials.
- Identify renovation-friendly layouts: stacked kitchens/baths, accessible chases or soffits, and simple rectangular footprints that reduce plumbing and framing costs.
- Favor high-impact cosmetic wins: paint, lighting, hardware, flooring, cabinet refresh, and improved curb appeal that boosts photos and resale with minimal permits.
A Quick Showing Checklist for Renovation Potential
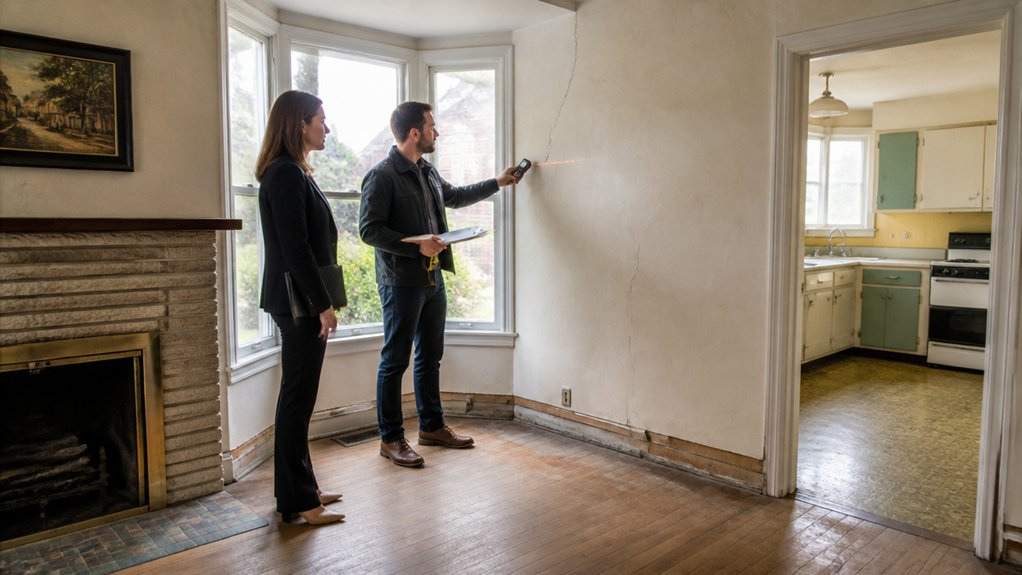
How do you tell, in a 15‑minute showing, whether a house is a cosmetic refresh or a money pit? Run a fast checklist with your agent.
Start outside: note grading, downspout discharge, and any rot at trim; price Landscaping improvements, but flag standing water and foundation cracks for inspection. Look at roof lines and flashing; missing kickout flashing can mean hidden moisture.
Inside, sniff for damp, scan ceilings for stains, and test a few outlets for proper grounding/GFCI where required. Open the electrical panel: you want clear labeling, no double‑taps, and adequate amperage.
Check water pressure and under‑sink shutoffs; avoid active leaks. Evaluate Interior lighting: flicker can hint at wiring or cheap fixtures.
Document everything with photos and timestamps.
Layout Clues That Make Renovations Easier
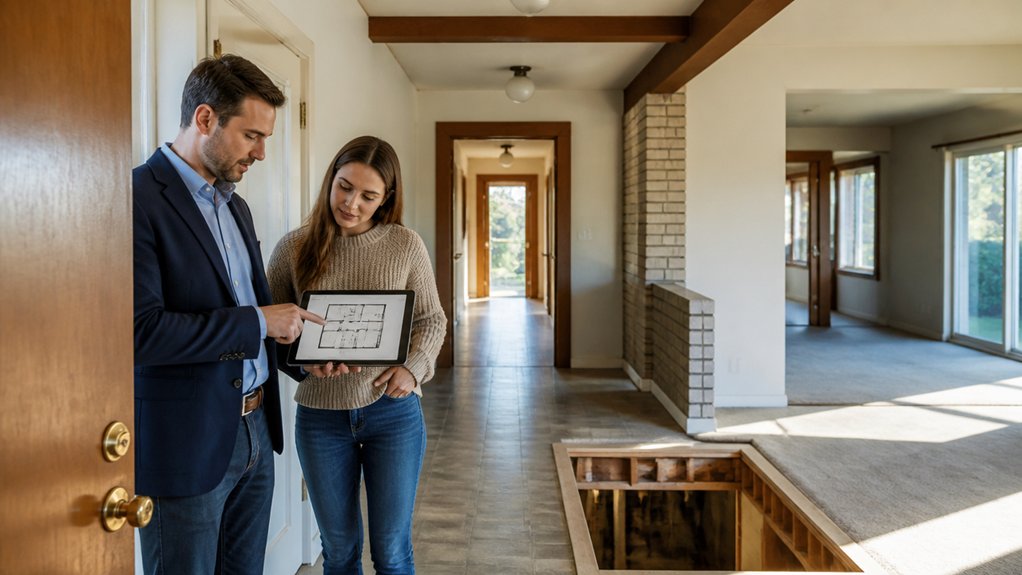
Even if you don’t plan to move walls, the existing layout can tell you whether a renovation will stay in “permit-light” territory or snowball into structural and MEP work. Favor homes with stacked “wet” rooms (kitchen, baths, laundry) because short drain and vent runs usually mean fewer code-triggered upgrades.
Check for clear chases, soffits, or a straight path to the main stack—those cues simplify re-routing without opening every ceiling. Look for generous, code-compliant egress widths and stair geometry; if they’re already tight, even trendy open concepts can force expensive corrections.
Prioritize simple rectangles over chopped-up angles; they accept Design trends without awkward framing.
Finally, note Material quality in existing trim and cabinetry—good bones mean you can refinish instead of replace.
Inspect Foundation, Roof, and Major Systems First

Before you price paint and fixtures, you should triage the big-ticket elements that can erase any “good deal”: foundation, roof, and the home’s major MEP systems.
Start outside: evaluate Exterior condition—grading, downspouts, and soil contact at siding—because water drives settlement and rot.
Inside, scan for stair-step cracks, sloped floors, stuck doors, and mismatched baseboards; these can signal structural movement that complicates any Interior layout changes.
On the roof, check age, flashing, valleys, and attic staining; confirm ventilation meets code and that sheathing isn’t soft.
For systems, locate the electrical panel, note amperage, aluminum wiring, GFCI/AFCI coverage, and unpermitted splices.
Test HVAC age and condensate routing, inspect plumbing supply/drain materials, and ask for permits, receipts, and inspection reports.
Cosmetic Upgrades With the Best Resale Payoff
Where should you spend first once the structure and systems clear the risk check? Prioritize high-visibility, low-permit work: paint, lighting, hardware, and flooring. Choose modern, neutral color schemes that photograph well and won’t trigger HOA or historic-district rules.
Swap outdated fixtures for LED, verify any bathroom fan or range hood vents outdoors, and confirm GFCI/AFCI protection where your local code expects it.
In kitchens and baths, refinish cabinets, replace pulls, add a new faucet, and re-caulk cleanly; avoid moving plumbing lines.
Outside, curb appeal often yields the fastest multiple: tidy beds, mulch, edge, and add simple landscaping ideas like drought-tolerant shrubs and defined walkways.
Run a quick ROI “diff”: cost, time, disruption, buyer impact.
When Big Structural Changes Are Worth the Cost
Cosmetic upgrades can lift photos and first impressions, but they can’t fix a floor plan that turns buyers off or a structure that limits how the home functions.
Big structural changes pay when they remove functional bottlenecks: adding a legal bedroom by egress sizing, relocating stairs to open circulation, or combining kitchen and dining with properly engineered beams.
You’ll want costs that track to comps, not wishful value. Ask your agent which layouts sell fastest locally, then confirm feasibility with a licensed engineer and permit office.
Structural work also earns when it frees up energy efficiency—air sealing, new framing for insulation depth, or right-sized mechanicals.
In older homes, factor historic preservation rules early so approvals, materials, and timelines don’t erase ROI.
Red Flags That Turn Fixer-Uppers Into Money Pits
Even if you’ve budgeted for the obvious upgrades, certain defects can quietly erase your margin because they trigger code-required scope creep, specialty trades, and long permit timelines. Watch for active foundation movement, sagging ridgelines, and widespread rot; structural fixes cascade into engineering letters and inspections.
Flag any knob-and-tube, aluminum branch wiring, or an undersized service panel—once you open walls, you’ll likely need AFCI/GFCI, smoke/CO, and CO upgrades, and full rewires.
Evidence of chronic moisture (efflorescence, moldy odors, patched ceilings) can force drainage, waterproofing, and remediation.
If a home has Historical significance, confirm restrictions on windows, siding, and additions.
Finally, compare rehab costs to neighborhood trends; over-improving turns “value-add” into unrecoverable spend fast.
Frequently Asked Questions
Can My Agent Estimate Renovation Costs During the Showing?
Yes, your agent can give a rough cost estimation during the showing, but it won’t replace contractor bids.
You should ask for line-item ranges (roof, HVAC, kitchen) and tie them to renovation budgeting thresholds you’ve set.
Treat their numbers like pseudocode: `total = sum(allowance[item]) + contingency(10-20%)`.
You can validate assumptions with recent comps, permit history, and a quick call to a trusted GC.
Do I Need Permits for Minor Renovations Like Removing a Wall?
Yes—you often need permits to remove a wall, even if it feels minor, especially if it’s load‑bearing or touches electrical/plumbing. About 30% of residential remodels trigger code-required approvals, so don’t assume you’re exempt.
Check local Building permits rules early in your Renovation planning. Treat it like a dependency graph: structure, MEP, fire ratings, egress.
When in doubt, pull permits or get an engineer’s letter.
How Do I Compare Renovation Loans Versus a Traditional Mortgage?
Compare renovation loans to a traditional mortgage by modeling total cost, timeline, and constraints.
With Renovation financing, you’ll bundle purchase + rehab, accept stricter appraisals, contractor bids, inspections, and staged draws; you’ll pay fees and possibly higher rates.
Traditional Mortgage options close faster and cheaper, but you must fund upgrades separately (cash, HELOC, refinance later).
Build a simple spreadsheet: APR, fees, draw schedule, contingency, and delay risk.
What Renovation Changes Could Violate HOA or Historic District Rules?
Measure twice, cut once: you’ll violate rules when you alter exterior appearance, structure, or common elements. HOA restrictions often ban unapproved paint colors, roofs, fences, satellite dishes, window replacements, decking, and landscaping changes.
Historic district regulations can block façade alterations, new siding, window type swaps, porch removal, signage, and visible mechanicals like mini-splits.
You should review covenants, design guidelines, and permitting triggers, then get written approval before bidding.
When Should I Hire a Contractor to Attend a Home Viewing?
Hire a contractor to attend a viewing when you spot structural red flags, plan major layout changes, or need fast pricing before making an offer. Bring them for older homes, visible water damage, settling, outdated electrical, or when DIY projects might exceed your skill.
They’ll flag code issues, permit risks, and rough timelines, and align feasibility with your interior design goals. Schedule after the first tour, before contingencies expire.
Conclusion
When you tour with your agent, you’ll spot renovation potential by thinking like a debugger: verify the “core” first—foundation, roof, plumbing, electrical—then profile the layout for clean load paths and easy reroutes. Cosmetic wins (paint, lighting, floors, kitchens) usually deliver the fastest resale ROI. Green-light structural changes only when comps justify them and permits pencil out. If water, cracks, or hacks show up, treat them like smoke in the server room.
About the Author