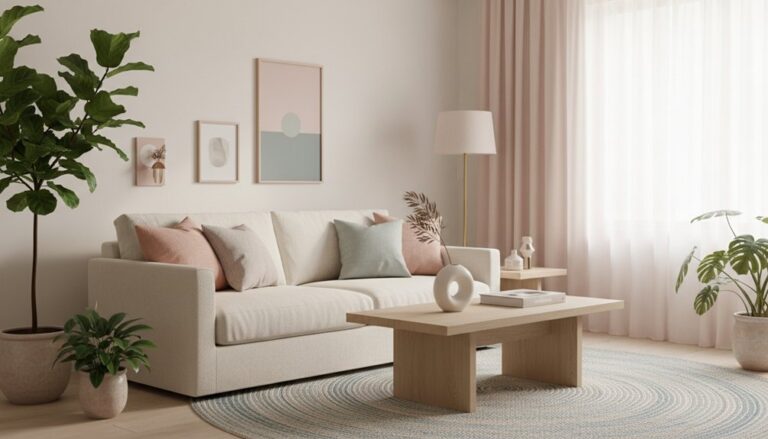
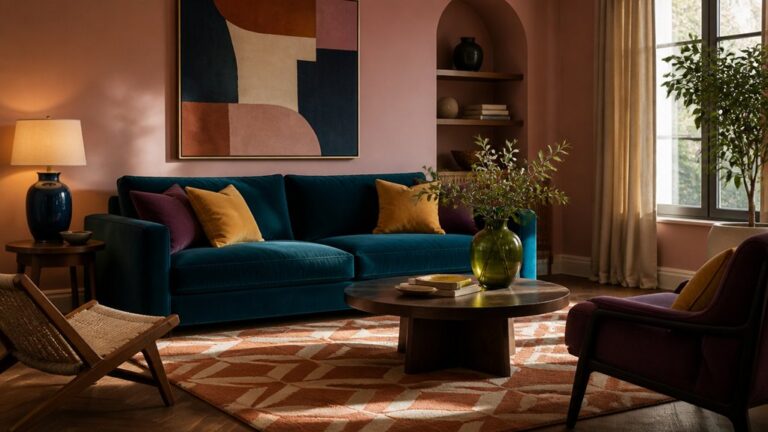
Start by sketching your open plan and tracing daily routes, then protect 36-inch paths and fix pinch points. Assign clear zones—cook, dine, lounge, work—based on utilities, and use furniture groupings to separate spaces without walls. Anchor each zone with correctly sized rugs and tables, float the sofa to define edges, and control first sightlines with consoles or low shelving. Layer dimmable task, pendant, and accent lighting, and unify floors, paint, and materials. More refinements follow.
Key Takeaways
- Sketch your floor plan, map daily routes, and keep main circulation paths at least 36 inches wide to prevent pinch points.
- Assign clear zones for cooking, dining, lounging, working, and storage, using furniture placement to reinforce function and flow.
- Define spaces without walls by anchoring zones with properly sized rugs, floating sofas, and aligned furniture edges for clean sightlines.
- Create cohesion with consistent flooring direction, a repeated core wall color, and a tight palette of one neutral, one mid-tone, one accent.
- Layer lighting with pendants, task lamps, and dimmers, using separate circuits or scenes to set moods and clearly signal each zone.
Map Zones and Traffic Flow First
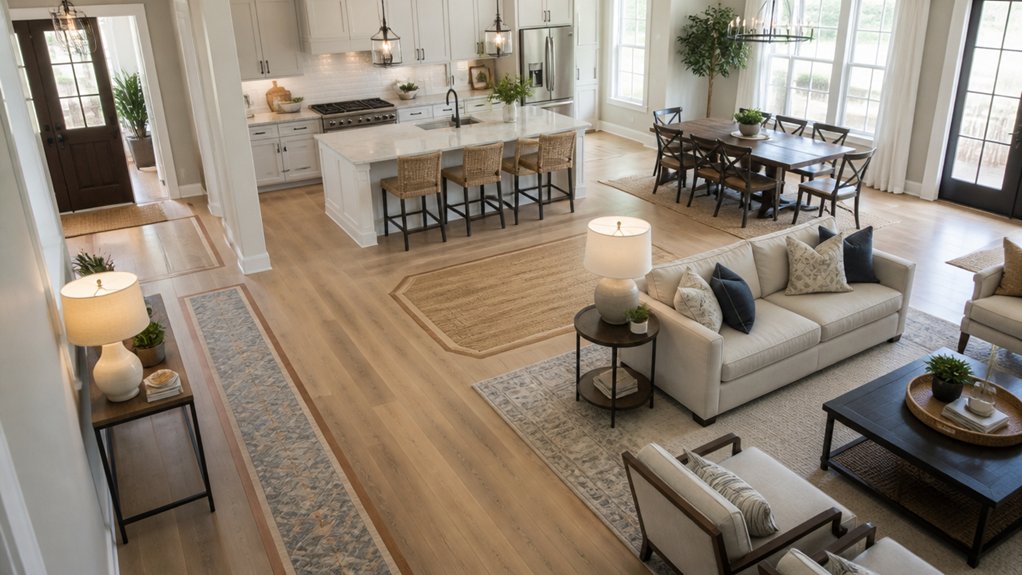
Where do you naturally enter, pause, and move next in each room? Start by sketching a simple floor plan and tracing daily routes: front door to drop zone, kitchen to table, sofa to hallway. Mark pinch points where bodies and doors conflict.
Assign clear zones for cooking, dining, lounging, working, and storage based on proximity to power, light, and plumbing. Then size each zone by real clearances: 36 inches for primary paths, more where two people pass.
Use furniture placement to reinforce routes, not block them; align sofas and consoles parallel to movement lines. Calibrate spatial perception by keeping sightlines open to windows and anchoring focal points, so circulation feels effortless.
Separate Spaces Without Adding Walls

You can separate functions without building walls by giving each activity a clear visual boundary. Define zones with rugs sized to anchor key pieces, then use layered lighting—pendants, floor lamps, and task lights—to signal where one area ends and the next begins.
Arrange furniture groupings to create natural edges and face-to-face layouts, keeping circulation paths open and intentional.
Define Zones With Rugs
Even if an open-plan layout feels spacious, it can read as shapeless without clear visual boundaries. Use area rugs to create zone definition instantly, anchoring furniture groups so each function feels intentional.
In the living area, place the rug’s front edge under the sofa and chairs to lock the conversation zone in place.
Under dining, choose a rug large enough that pulled-out chairs still sit on it, preventing visual drift and improving circulation.
In a work nook, a smaller rug signals focus without consuming walking paths.
Keep pile height low where doors swing and traffic runs.
Coordinate rugs through shared undertones, then vary texture to differentiate zones.
Align rug edges to major sightlines for a cleaner plan.
Use Lighting To Divide
Rugs set clear footprints on the floor, and lighting can draw equally clear boundaries overhead. Start by mapping tasks: prep, dine, lounge, work. Then assign each zone its own light “ceiling,” so your eye reads separate volumes without walls.
Layer an ambient glow for overall comfort, but control it with dimmers so it doesn’t wash zones together. Use tighter beams where focus matters: a pendant over the table, under-cabinet strips at counters, and a directed floor lamp near reading.
Prioritize fixture placement: center pendants on the zone, not the room; align cans in rows that stop at zone edges; keep color temperature consistent for cohesion. Add wall washers to visually extend one area, and keep circulation paths slightly darker to stay unobtrusive.
Arrange Furniture Groupings
Where does one area end and the next begin when walls don’t? You define edges with Furniture placement that signals purpose. Float a sofa to face the room, not the wall, and let its back become the living boundary. Anchor it with a rug sized to catch front legs, then add a coffee table and two chairs to complete the conversation zone.
For Space zoning, align pieces to circulation: keep a clear aisle from entry to kitchen, then turn a console table or low bookcase perpendicular to that path to mark changeover without blocking light.
In dining, center the table under a focal point and allow equal pull-out clearance on all sides. Repeat materials and heights to keep the plan cohesive, not chopped.
Anchor Zones With Sofa, Table, and Rugs

Because an open-plan room can feel scattered without clear boundaries, you’ll want to anchor each zone with a deliberate trio: sofa placement, a correctly scaled table, and a rug that defines the footprint.
Start with furniture placement: float the sofa to outline the living area, keeping consistent walkways behind it so circulation stays effortless.
Choose a coffee table or dining table that matches the zone’s use and clears knees and chairs comfortably; tight clearances make the whole plan feel cramped.
Then size the rug to capture front legs of seating, or all dining chair legs when pulled out, so the boundary stays stable.
Finish with color coordination—repeat one or two tones across upholstery, tabletop, and rug pattern to visually lock the zone together.
Use Sightlines to Control What You See
Once each zone has a clear footprint, you can fine-tune how the whole room reads by managing sightlines—what you see first, what gets framed, and what stays out of view. Stand at key entry points and identify your “first read”: a focal wall, art, or the best window. Then align furniture edges to guide Visual flow toward that target, keeping circulation lanes visually open.
Use Sightline barriers to hide clutter-prone functions without closing the plan. Float a console behind the sofa to screen the dining chairs, or angle a bookcase to block a view of the kitchen prep zone. Keep barrier heights below eye level when seated, and above countertop level when you need concealment.
Edit surfaces so the framed views stay calm.
Layer Lighting by Task, Mood, and Accent
You’ll get a room that works harder when you layer light with intent: task lighting to lock in clear zones, mood lighting on dimmers to tune the atmosphere, and accent lighting to carve depth.
Place task fixtures exactly where hands and eyes work—counters, reading chairs, and desks—so you don’t waste lumens on empty space.
Then set dimmer-ready ambient circuits and add focused accents on art, texture, and architectural lines to build hierarchy without clutter.
Task Lighting For Zones
Where does each activity actually happen in your home—and is the light there doing the job? In an open plan, you’ll get the cleanest results by assigning task lighting to clear zones: prep, dining, lounging, and work. Start by reading the room’s Ambient glow and natural illumination, then add focused fixtures that don’t fight them.
Over the kitchen run, mount under-cabinet LEDs to erase counter shadows and keep backsplash lines crisp.
At the dining table, center a pendant to define the zone and keep faces evenly lit.
For the sofa, place a swivel-arm floor lamp beside the primary seat for reading without spill.
At a desk or console, use a shielded, adjustable lamp aimed across the surface to cut glare and highlight texture.
Mood Lighting With Dimmers
Task lighting handles the “can you see it?” problem, but dimmers solve the “how should it feel?” question. In an open plan, you’ll want one consistent mood across sightlines, not competing brightness islands. Put dimmers on ambient fixtures so you can drop levels for conversation, raise them for cleanup, and keep transitions smooth between kitchen, dining, and lounge areas.
Use Smart controls to save scenes: “Dinner” at 30%, “Movie” at 10%, “Reset” at 70%. Pair dimming with the right color temperature—warmer in the evening to relax, cooler earlier to stay alert—so the room’s tone matches your schedule.
Choose LED-compatible dimmers to prevent flicker, and balance settings so countertops stay usable without making the sofa zone feel overlit.
Accent Lighting For Depth
Even if your ambient lights and dimmers nail the overall vibe, accent lighting adds the depth that keeps an open plan from reading flat. Use it to separate zones without walls and to steer sightlines through the space. Aim beams at vertical surfaces—art, a textured wall, shelving, or drapery—so you build depth perception with layered highlights and shadows.
Place slim uplights behind a sofa, toe-kick LEDs under cabinets, and a picture light over a focal piece to create a clear hierarchy. Keep fixtures low-profile so you preserve openness, and choose narrow beam angles to prevent spill into adjacent areas.
Put accents on separate circuits or smart scenes, then tune brightness to 10–30% for glow, not glare. This is Accent lighting that edits your plan.
Unify Floors, Paint, and Materials Across Zones
If you want the whole home to read as one cohesive space, you’ve got to coordinate flooring, paint, and key materials across every zone before you pick accent pieces.
Start with Flooring consistency: run the same plank direction through living, dining, and kitchen, or seamlessly at true thresholds with a slim profile. Keep sheen and undertone aligned so light doesn’t fracture the plan.
Then lock in a paint system: one core wall color, one trim color, and one ceiling finish, repeated to simplify sightlines and boost perceived square footage.
Finally, enforce Material coordination by limiting hard finishes to two or three: one wood tone, one metal, and one stone or solid surface. Repeat them on cabinetry, hardware, and shelving for clean continuity.
Add Softness With Textiles, Curves, and Color
Once your hard finishes stay consistent, you can soften the plan without breaking cohesion by layering textiles, rounding silhouettes, and tightening your color edits.
Use a few repeatable textile textures—bouclé, linen, wool, or velvet—to cue comfort while still defining zones. Anchor seating with a large rug that reaches under front legs, then add smaller layered runners to steer circulation and absorb sound.
Swap sharp-edged tables for an oval coffee table or a pedestal dining base to ease pathways and reduce visual clutter. Keep color palettes disciplined: choose one neutral field, one mid-tone, and one accent, then echo them across pillows, art, and ceramics.
Warm metals and wood grain round out the scheme.
Open Plan Mistakes to Avoid (and Quick Fixes)
Soft finishes make an open plan feel inviting, but a few common layout and editing mistakes can still leave it looking busy, echoey, or oddly disconnected. One of the biggest open plan mistakes is floating every piece without anchors. Fix it by defining zones with rugs sized to catch all front legs and by aligning furniture to a clear axis.
Another issue: underscaled lighting. Layer a statement pendant over dining, task lights at seating, and dimmers everywhere. If sound bounces, add quick fixes like lined drapery, upholstered dining chairs, and a textured rug pad.
Don’t scatter décor across every surface; edit to repeated materials and a tight palette. Finally, watch circulation: keep 36-inch pathways and clear sightlines to focal points.
Frequently Asked Questions
How Do I Manage Open-Plan Noise and Improve Acoustics?
You manage open-plan noise by layering absorption, blocking, and zoning. Start with rugs, thick curtains, and upholstered seating to soften reflections.
Add bookshelves or slatted screens to break sightlines and create quieter micro-areas.
Apply soundproofing techniques like sealing gaps, adding door sweeps, and using underlayment.
Choose acoustic panel options—fabric-wrapped, wood-slat, or ceiling baffles—placed at first-reflection points to tighten clarity without shrinking the space.
What’s the Best Way to Hide Clutter in an Open-Plan Home?
Hide clutter best by pairing open surfaces with closed storage: display less, store more.
Start with furniture arrangement that blocks sightlines—float a sofa or console to create a “backstage” zone.
Add decorative screens to mask workstations or toy corners without shrinking light.
Choose benches with lift-up lids, nesting tables, and media units with doors.
Edit daily: trays for drop-zones, labeled bins inside cabinets, and one “reset” basket.
How Can I Create Privacy for Working From Home in an Open Plan?
Create privacy by carving out a dedicated work zone with Furniture arrangement: float a desk behind a sofa, angle it to block sightlines, and anchor it with a low bookcase.
Add a folding screen or ceiling track curtain for instant separation.
Use lighting strategies to signal “office” mode—task lamp, focused overhead, and dimmable ambient light.
Lay a rug to absorb sound and define boundaries.
Which HVAC or Vent Changes Help Open-Plan Comfort and Airflow?
You’ll boost open-plan comfort by adding HVAC zoning with smart dampers, so you can tune temperature by area instead of over-conditioning the whole volume.
Balance your supply and return vents: add returns on the far side of the space and increase throw with directional registers.
Upgrade Ventilation systems with an ERV/HRV for steady fresh air.
Seal duct leaks, resize undersized runs, and calibrate airflow.
Do I Need Permits or Structural Approval to Convert to Open Plan?
Yes—you’ll usually need permits and, often, structural approval, even if you think “it’s just one wall.”
If the wall is load-bearing or hides plumbing, electrical, or HVAC runs, you can’t skip engineering or inspections.
You’ll submit drawings, beam specs, and sometimes energy or fire notes.
Plan space-optimizing alternatives too: use Decorative partitions and targeted lighting solutions to define zones without triggering major structural work.
Conclusion
When you redesign an open-plan interior, you’re really choreographing movement, sightlines, and comfort. Start with a clear path, then define each zone with anchors—sofa, table, rug—without blocking flow. Layer task, mood, and accent lighting to “pin” activities in place. Keep floors and finishes consistent so the space reads calm. One stat to picture: rugs can cut perceived echo by up to 30%, making openness feel instantly more intimate.
About the Author