You’ll get the biggest style upgrade when you match hardscape choices to your budget and map traffic paths, door swings, grill clearances, and furniture footprints first. Plan for demolition, base prep, drainage, edging, and hauling, and run lighting conduit and irrigation sleeves before setting anything. Replace tired slabs with concrete pavers, brick, or bluestone on a compacted base, lock joints with polymeric sand, and frame with soldier-course borders. Next, add seat walls, steps, and lighting for a finished look.
Key Takeaways
- Start with a layout and budget plan covering demolition, base prep, drainage, edging, and hauling before choosing materials.
- Upgrade worn slabs with concrete pavers or natural stone on a compacted base for cleaner lines and easy repairs.
- Correct slope and drainage by regrading, adding steps, and using retaining walls with gravel and perforated pipe behind them.
- Add built-in seat walls and planter borders using matching caps, slight overhang, and a pitched top to shed water.
- Define edges and nighttime style with steel edging and low-voltage lighting, running conduit and irrigation sleeves before final backfill.
Choose Patio Hardscaping by Budget and Layout

Whether you’re working with a tight footprint or a wide-open slab, you’ll get the best-looking patio upgrades by matching hardscape choices to both your budget and your layout.
Start with Budget planning: price out demolition, base prep, drainage fixes, edging, and hauling—those line items often outrun the finish materials. If you’re keeping an existing slab, you can allocate more to seat walls, steps, or a low retaining edge that defines zones and controls grade.
With Layout considerations, map traffic paths, door swings, grill clearances, and furniture footprints before you commit to walls or borders. Use compact features in narrow yards, and reserve larger elements for corners where they won’t choke circulation. Plan lighting conduit and irrigation sleeves now.
Upgrade the Patio With Pavers or Natural Stone

If you want an instant visual upgrade that also fixes minor slope and drainage issues, swap a tired slab or patchwork surface for pavers or natural stone set on a properly compacted base.
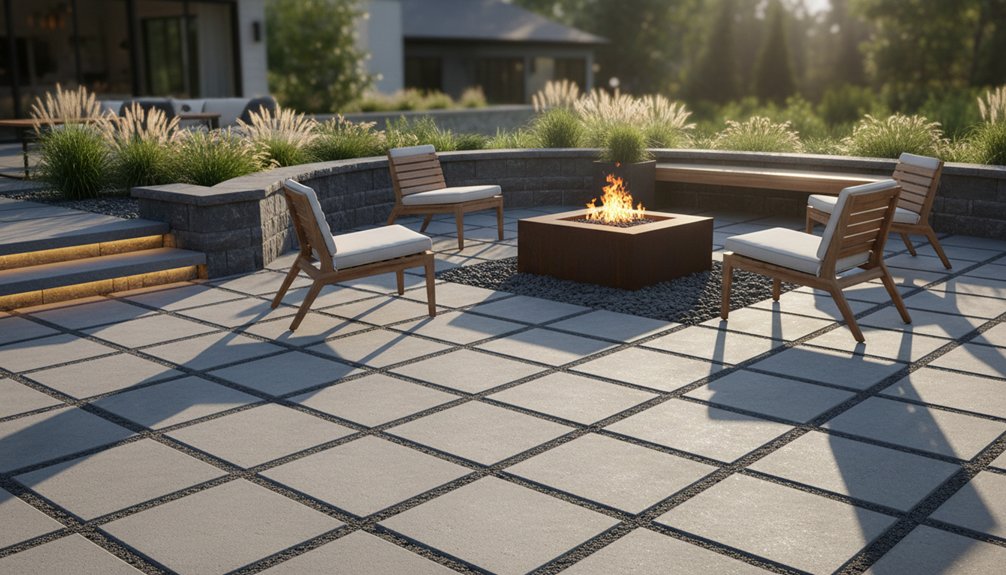
Choose concrete pavers for tight joints, clean edges, and easy replacement; pick clay brick for warm color; use bluestone, travertine, or granite for crisp, durable texture.
Match thickness to use—60mm pavers for dining zones, thicker stone where you’ll place heavy garden furniture.
Specify polymeric sand or groutable joints to lock units and deter weeds.
Add a soldier-course border to prevent creep and frame outdoor art.
Seal porous stone if you’ll grill often, and keep finishes slip-resistant near planters.
Lay patterns to guide traffic, not clutter.
Fix Slope and Drainage With Walls and Steps

A fresh paver or stone surface looks sharp, but it won’t perform well until you correct the grade that feeds runoff and creates soft spots underfoot. Rework the subgrade so water moves away from the house, then lock it in with a compacted base and a consistent fall.
If your yard drops fast, build retaining walls to terrace the patio footprint. Choose segmental concrete block, mortared stone, or boulder walls, and set them on a crushed-stone footing with proper compaction.
Add steps where the grade changes, keeping risers uniform and treads deep for safe circulation.
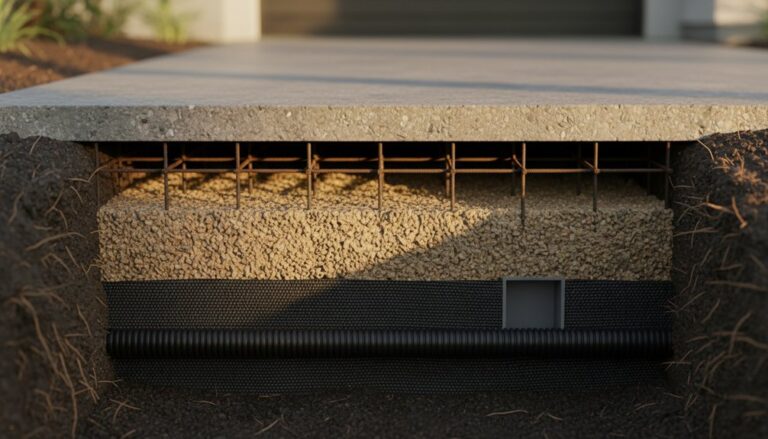
Behind walls, install drainage solutions: free-draining gravel, filter fabric, and a perforated pipe daylighted to a safe outlet. Tie downspouts into solid pipe so you don’t overload the patio edge.
Add Built-In Seating and Planter Borders
Once you’ve locked in the grade and drainage, built-in seating and planter borders give the patio a clean edge and a purposeful layout.
Set seat-wall height around 18 inches with a 16–18-inch cap for comfort, and dry-fit your units to confirm corner lines before you set them in mortar. Use the same stone or concrete cap as your paving to keep joints tight and finishes consistent.
Add a slight cap overhang and pitch it 1/8 inch per foot to shed water away from faces.
Behind borders, line planting beds with geotextile and free-draining aggregate so soil doesn’t stain the wall. Leave pockets for conduit sleeves and irrigation.
You’ll use less garden furniture, and gain durable, integrated places to sit.
Define the Patio With Edging and Low-Voltage Lighting
After you’ve set the field pavers, lock the perimeter with edging and you’ll keep lines crisp through freeze-thaw and foot traffic. Choose aluminum or steel edging for tight radii, or concrete curb edging where soil moves. Spike it into a compacted base, then backfill with polymeric sand or crushed fines so joints stay closed and weeds can’t creep in.
Then layer low-voltage lighting to define the edge after dark. Run 12/2 direct-burial cable under the bedding layer, leave service loops at fixtures, and use a 60–150W transformer with a timer and photocell.
Aim shielded path lights downward to cut glare and protect Wildlife habitat, while subtle uplights on screens and shrubs improve Garden privacy without overlighting. Test voltage drop before you bury.
Frequently Asked Questions
How Long Does Patio Hardscaping Installation Typically Take?
Patio hardscaping installation typically takes 2–7 days for a standard 200–400 sq ft area, but complex layouts can run 2–3 weeks.
You’ll move faster with dry weather, easy access, and stable subgrade.
You’ll wait longer if you add paver borders, natural stone, drainage, or concrete curing time.
You can stage garden lighting conduits early and place outdoor furniture after final compaction and joint sand sets properly.
Do I Need a Permit for Patio Hardscaping Upgrades?
You might need a permit, depending on permitting requirements and local regulations in your area.
You’ll usually need approval if you change drainage, build retaining walls, add steps, extend the footprint, or pour a thick concrete slab.
Paver overlays on existing bases often don’t.
Check setbacks, impermeable-surface limits, and utility easements.
If you excavate near gas or electric lines, call for locates.
Your installer should submit drawings and base specs.
How Do I Maintain Pavers or Stone Through Winter Freeze-Thaw Cycles?
To maintain pavers or stone through freeze-thaw, you’ll keep water out and joints tight—because winter weather loves turning tiny puddles into demolition crews.
Clean debris, guarantee slope drains, and top up polymeric sand so joints don’t pump.
Seal porous stone with a breathable penetrating sealer.
Use calcium magnesium acetate or sand, not rock salt, to reduce ice damage.
Shovel with plastic blades, and avoid metal chisels.
Reset any lifted units.
What Patio Hardscaping Options Are Safest for Pets and Children?
You’ll get the safest results by choosing smooth, slip-resistant Pet friendly materials and Child safe surface options.
Use tumbled concrete pavers, clay brick, or honed natural stone with a textured finish and tight joints to reduce trips.
Avoid sharp-edged flagstone, high-gloss sealers, and loose gravel that can choke or scratch paws.
Specify low-VOC, non-toxic sealers, rounded coping, and permeable joints for better drainage and cleaner play.
Can I Install Patio Hardscaping Features Myself or Hire a Professional?
You can install some patio hardscaping yourself, but you should hire a pro for complex builds. DIY challenges include proper base prep, drainage slope, compaction, and cutting pavers or natural stone cleanly.
If you’re setting edging, joint sand, or small paver pads, you can DIY with rented tools. Cost considerations favor DIY on labor, yet pros reduce rework, warranty materials, and handle permits safely.
Conclusion
You’ve sized your budget, mapped the layout, and picked pavers or natural stone that won’t quit. You’ve corrected slope with tight retaining walls and crisp steps, then tucked in built-in benches and planter borders that feel custom, not added-on. Now comes the part that changes everything: edging and low-voltage lighting. Set the steel or aluminum line, drop the warm LEDs, and wait until dusk—your patio won’t just look finished; it’ll reveal itself.
About the Author