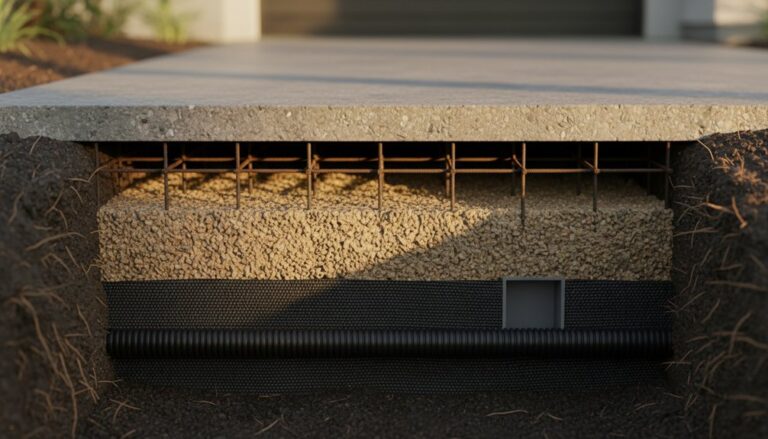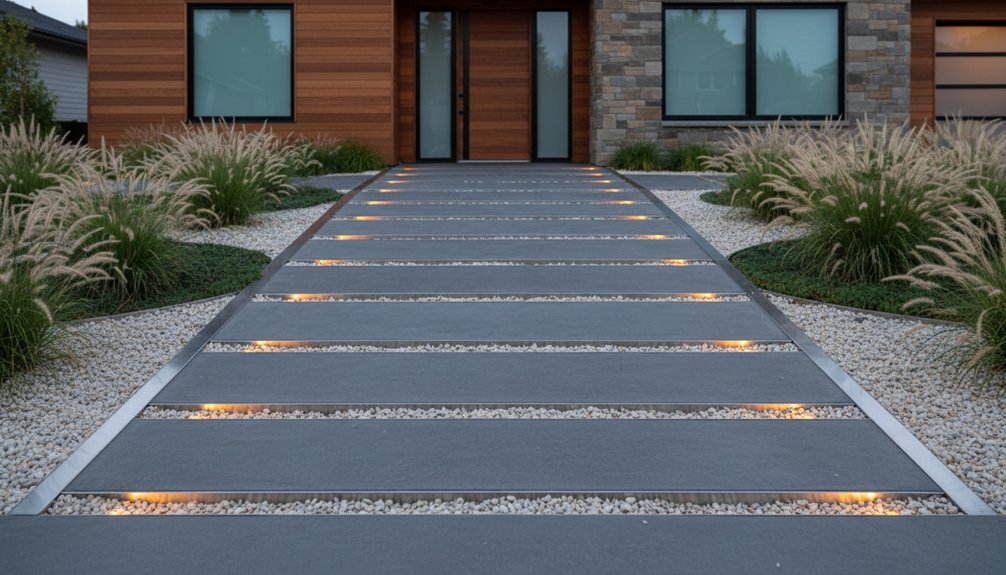
Start by walking your driveway after rain so you can spot low areas, then set a clean 2% slope away from the garage to a safe outlet. Choose a contemporary surface like large-format concrete pavers, natural stone, or permeable pavers over an open-graded stone base to handle freeze–thaw and runoff. Lock everything in with steel or stone edging, pre-run conduit for lighting, and soften edges with gravel bands or planted pockets—you’ll find more ways to refine the finish next.
Key Takeaways
- Choose a modern layout with clean geometry, suitable turn radii, and a consistent edge detail that frames the driveway and guides arrival.
- Regrade for drainage: aim about 2% slope from garage to an outlet, fixing low spots and adding cross-slope where needed.
- Upgrade materials to contemporary options like large-format pavers, pervious concrete, or porous asphalt, balancing cost, durability, and repairability.
- Build a long-lasting base with compacted subgrade, geotextile as needed, and well-graded crushed stone to prevent heave and joint failure.
- Add crisp edging and layered lighting: flush steel/stone borders, low-glare LEDs set back 18–24 inches, plus motion downlights for safety.
Choose a Modern Driveway Hardscape Style and Layout
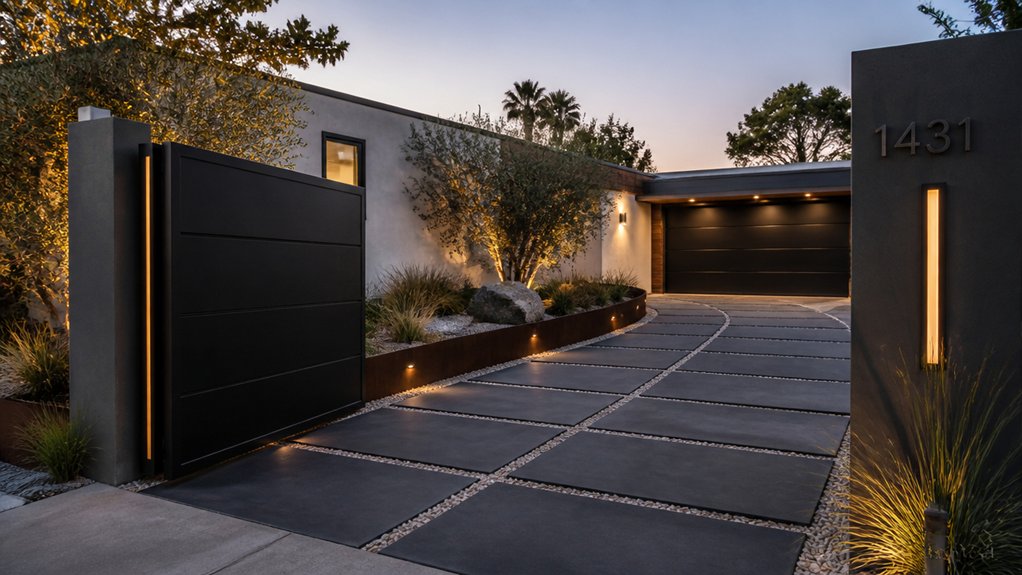
Before you order pavers or pour concrete, pin down a modern driveway style and layout that fit your site’s slope, soil, and drainage path. Walk the grade after rain, flag low spots, and plan subtle cross-slope so water sheets to a trench drain, swale, or rain garden instead of your garage slab. Keep turn radii honest to your vehicle and set clear edges with steel, stone, or crisp curb lines.
Use large-format geometry, tight joints, and restrained bands to create aesthetic patterns without visual noise. Break up the field with a permeable strip, gravel bay, or planted island for landscape integration and snow storage. Align seams to your entry walk, setbacks, and door sightlines, and hide utilities with removable panels or cleanouts.
Compare Driveway Hardscaping Materials and Costs
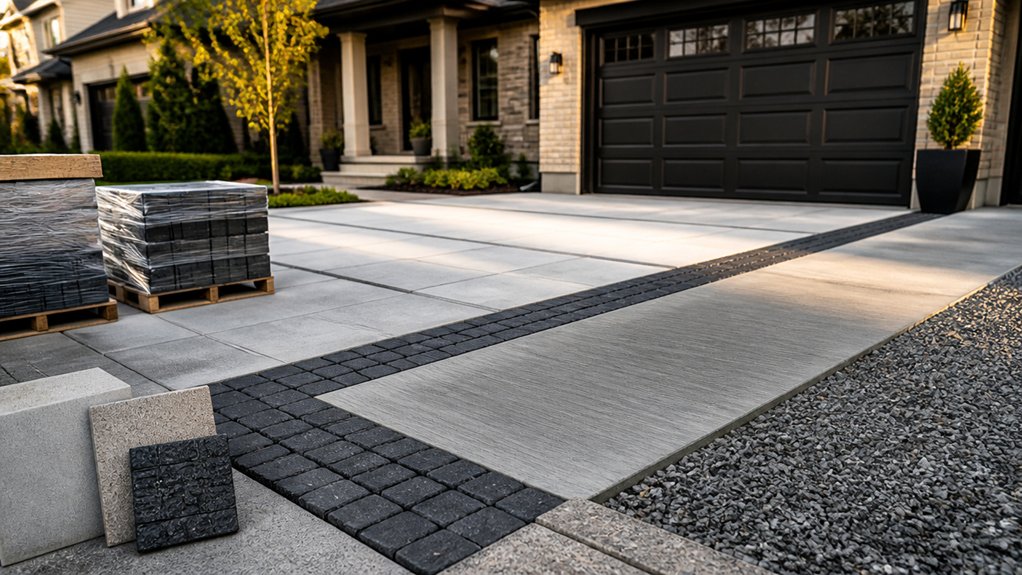
Once you’ve locked in the driveway’s geometry, drainage pitch, and edge details, match that plan to a material that can handle your climate, soil movement, and maintenance tolerance without blowing the budget.
Poured concrete pencils out lowest per square foot, but control joints, fiber, and a broom finish matter in freeze-thaw zones.
Asphalt costs less upfront, yet you’ll reseal and watch edges deform if your base is thin.
Clay brick and concrete pavers run higher, but you can spot-repair heave and keep crisp soldier-course borders.
Natural stone sets the premium ceiling; specify thickness for vehicle loads and tight joints to curb raveling.
Add conduit now for landscape lighting and driveway security devices, so sawcuts don’t scar finishes later.
Pick Permeable Driveway Hardscaping for Runoff Control
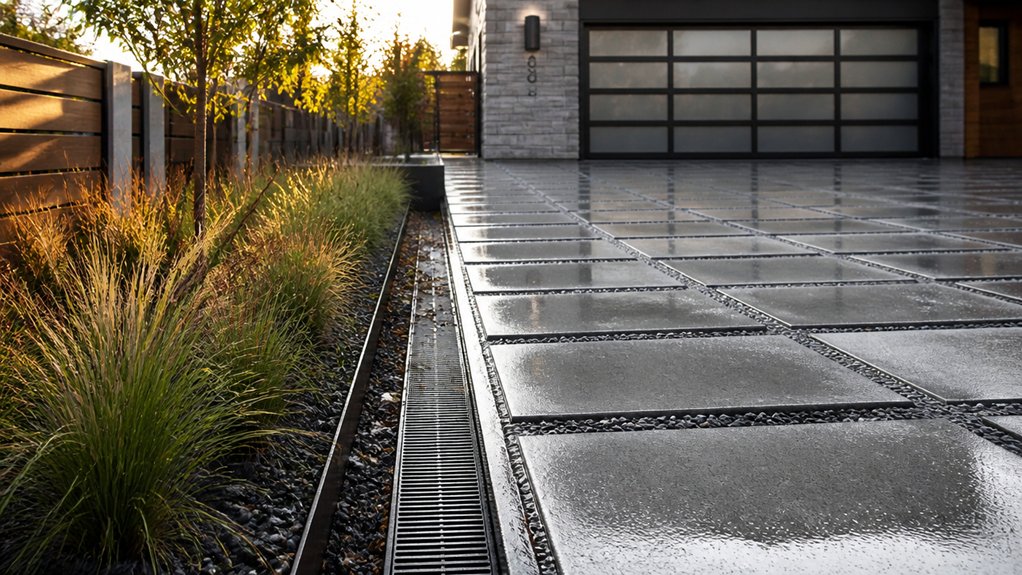
You can cut driveway runoff by choosing permeable hardscaping that lets water slip through paver joints into a clean, open-graded stone base instead of sheeting toward the street or garage.
Specify materials built for infiltration—permeable concrete pavers with chip-stone infill, porous asphalt, or pervious concrete—based on your soil, slope, and local stormwater rules.
You’ll get the best performance when you install edge restraints, keep fines out of the base, and maintain the surface with periodic vacuum sweeping and joint stone top-ups.
How Permeable Pavers Work
Although a traditional asphalt or concrete drive sheds rain like a roof, permeable pavers handle stormwater at the surface by letting it pass through widened joints and into a layered base. You set the slope to guide sheet flow into the joints instead of toward the street, then rely on open-graded aggregate layers to store water temporarily before it soaks into subsoil. The joint fill stays porous, so puddles don’t linger at tire paths or apron edges.
You’ll notice permeable paver durability comes from the interlock and the load-spreading base, not a sealed topcoat. As water drops through, the base acts as one of your runoff filtration methods, trapping sediment within voids while protecting nearby planting beds and catch basins.
Maintenance stays simple: periodic vacuum sweeping keeps joints open year-round.
Materials For Runoff Control
Because stormwater management starts with what’s under your tires, choose driveway materials that keep void space open and stable: concrete grid pavers infilled with gravel, permeable interlocking concrete pavers with #8 or #9 stone in the joints, or resin-bound aggregate where a firm, fully porous surface matters.
Match the material to your site’s load and soil: grid pavers suit flat parking bays and turning radii; PICPs handle daily traffic while keeping infiltration consistent; resin-bound aggregate works well on tight grades where loose stone would migrate.
Specify angular, washed stone so fines don’t choke pore space, and select edge restraints that won’t heave.
Tie the driveway into garden pathways using the same joint stone for continuity, and coordinate landscape lighting bases with permeable zones to avoid sealed collars.
Installation And Maintenance Tips
When runoff control drives the design, install permeable driveway systems like a miniature pavement assembly—not a thin top layer—so water can drop through the surface and store in a clean, open-graded stone base.
Excavate to undisturbed soil, set final grades away from your garage slab, and compact subgrade only enough to prevent rutting. Place geotextile on weak soils, then 2–4 inches of #2 stone and 4–8 inches of #57, screeded level for pavers or a porous asphalt course.
Keep joints open: sweep in washed chip stone, not sand, and edge with concrete or aluminum restraints for driveway security.
Maintain permeability by vacuuming fines annually, clearing leaves after storms, and refreshing joint stone.
Add decorative accents with contrasting borders, inlaid bands, or permeable lighting sleeves.
Build the Right Driveway Base and Slope
You can’t get a crisp paver or slab driveway finish unless you build a stable base: compacted subgrade, a geotextile where soils are weak, then well-graded crushed stone in tight lifts.
Set the slope as you go—about 2% away from the garage and toward a planned outlet, trench drain, or swale—so water moves off the surface instead of undercutting it.
When your base layers and pitch are right, the hardscape stays flat, joints stay tight, and freeze-thaw heave has less to grab onto.
Choose Stable Base Layers
Even the best-looking pavers will heave and rut if the base goes soft, so start by building a compacted, free‑draining foundation that matches your site’s soil and runoff pattern.
Strip organics, then proof-roll to find pumping spots and cut them out. In clay or frost zones, lay a woven geotextile, then place 6–10 inches of dense-graded crushed stone (¾-inch minus) in 2–3 inch lifts, compacting to refusal with a plate compactor.
Add a 1-inch screeded bedding layer of concrete sand for pavers, or a 2-inch choker layer for permeable grids.
If you’re tying into existing blacktop, square-cut edges, do asphalt repair at cracks and ruts, then apply driveway sealing after progressions cure for longevity.
Set Proper Drainage Slope
Although a driveway base can feel rock-solid underfoot, it still has to shed water fast, so lock in drainage slope before the first stone lift goes down. Set a consistent fall of about 2% (1/4 inch per foot) away from the garage and toward a defined outlet, not your neighbor’s yard.
Use stringlines and a laser level to grade the compacted crusher-run, then proof it with a hose test before you place bedding sand or open-graded aggregate for permeable pavers.
Keep the slope continuous across apron transitions so tires don’t pond water at the street. Tie runoff into a trench drain, rain garden, or swale for clean landscape integration.
Done right, drainage supports long-term stability and subtle aesthetic enhancements.
Add Driveway Edging and Borders for Crisp Lines
Once the base and surface go down, edging locks the whole driveway into clean, intentional lines. Set your garden border where tires won’t ride it, then snap stringlines and check squareness from the garage slab or street curb.
Choose an edging material that matches your hardscape: steel for razor-thin modern seams, concrete curbing for a monolithic edge, or cut stone for a crisp, architectural reveal. Bed the edging on compacted crusher fines or concrete, and pin steel with stakes at tight intervals to prevent wave.
Keep tops flush with pavers or 1/4 inch proud of asphalt to stop raveling. Backfill, compact, and finish with a tight gravel shoulder or planting strip.
Upgrade Driveway Lighting for Safety and Curb Appeal
After you’ve defined crisp edges, layer in driveway lighting to make the approach safer and the hardscape read cleanly at night. Set low-voltage LED path lights 18–24 inches back from the edge so tires won’t clip fixtures, and aim beams across pavers, concrete, or stone to highlight texture without glare.
Use step lights on grade changes and a tight wall-wash on a retaining curb to eliminate shadow pockets.
Choose Smart lighting with photocells, dimming, and motion zones so you’re not overlighting.
As Security tips, place motion-activated downlights near the garage door, gates, and keypad, and keep fixtures shielded to prevent light spill into windows.
Run conduit under control joints, seal penetrations, and use corrosion-resistant housings for de-icing salt exposure.
Soften Driveway Hardscaping With Plants and Gravel Accents
Because a long run of concrete, pavers, or stone can feel visually hard, you can soften the driveway by cutting in narrow planting pockets and clean gravel bands that break up the field without compromising wheel paths.
Set pockets on the outside edge or between parking bays, then line them with steel edging so aggregate stays crisp against slabs. Fill with drought-tough, low mounding plants—sedum, thyme, dwarf mondo—so doors clear and sightlines remain open.
Use 3/8-inch washed gravel over compacted fines, and stabilize it with a honeycomb grid where tires track. Let gravel bands echo joint lines for a tailored rhythm.
For garden integration, carry the same species to nearby beds. For landscape framing, repeat pockets at the apron and gate to guide arrival.
Frequently Asked Questions
Do I Need a Permit to Replace or Widen My Driveway?
You often do need a permit to replace or widen your driveway, especially if you change width, add curb cuts, or alter drainage.
You’ll submit a site plan showing dimensions, setbacks, and surface type—concrete, asphalt, or permeable pavers—and details like base thickness and edge restraints.
If work affects the right-of-way, you’ll need extra approval.
Fence installation or Tree removal near the drive can trigger separate permits too.
Check your city.
How Long Will the Driveway Be Unusable During Installation?
You’ll typically lose access for 3–10 days, depending on material and cure time.
For example, when you install a 4-inch broom-finished concrete slab with saw-cut joints, you can walk on it in 24–48 hours, but you shouldn’t drive on it for 7 days.
Asphalt often opens to cars in 2–3 days, with sealing options later.
Pavers may reopen in 1–2 days, boosting driveway aesthetics.
Can I Keep Using My Driveway While the Hardscaping Cures?
You can’t keep using your driveway while the hardscaping cures; you’ll risk ruts, cracking, and ruined driveway aesthetics.
With hardscaping materials, timing matters: poured concrete needs about 7 days before light vehicle traffic (longer for full strength), while pavers often allow foot traffic after compaction but require 24–48 hours before cars if bedding and joints stabilize.
Ask your installer for a cure schedule based on mix, sealer, and weather conditions.
What Maintenance Schedule Keeps Pavers or Concrete Looking New?
You keep pavers or concrete looking new by sticking to a tight routine—because dirt won’t politely excuse itself. Sweep weekly, rinse monthly, and do Concrete cleaning each spring with a mild detergent and low-pressure wash.
Spot-treat oil immediately with an absorbent and degreaser.
Refill joint sand yearly after winter.
Do Paver sealing every 2–4 years once dry and stain-free.
Inspect edges and drainage every fall, or cracks will “decorate.”
How Do I Prevent Oil Stains and Tire Marks on Modern Driveways?
Prevent oil stains and tire marks by sealing your driveway and cleaning spills fast.
For oil stains prevention, apply a penetrating paver sealer or concrete densifier, then top with a stain-resistant guard; recoat per product specs.
Place drip trays under parked vehicles, and keep absorbent granules on-site.
For tire mark mitigation, choose a matte, non-film-forming sealer, rinse weekly, and spot-scrub with a pH-neutral cleaner and nylon brush.
Conclusion
You thought a driveway was just a strip to park on—until you lay clean lines of concrete pavers or broom-finished slab, set on a compacted crushed-stone base, pitched to a slot drain or permeable joints. Funny how “simple” takes edging restraint, corten or granite borders, and low-glare LED path lights to feel effortless. Then you soften the hardness with river gravel, thyme, and sedges, and the hardest surface becomes the calmest arrival.
About the Author