Start by locking your layout, budget, and work zones, then map the sink–cooktop–fridge triangle with clear prep, cleanup, and landing counters. Plan electrical, plumbing, venting, and layered lighting rough-ins early. Choose full-overlay, flat-front cabinetry with deep drawers, pull-outs, and integrated trash for a seamless look. Add a slim island with 42-inch clearances and quiet, panel-ready appliances. Finish with durable quartz or sintered stone, easy-clean flooring, and a full-height backsplash—next, you’ll see how to refine every detail.
Key Takeaways
- Finalize layout, budget, and work zones first, optimizing the sink–cooktop–fridge triangle with clear prep, landing, and cleanup counters.
- Define open-plan boundaries using slim islands, ceiling lines, or flooring shifts while maintaining efficient traffic paths and balanced circulation.
- Choose modern cabinetry with full-overlay doors, tight reveals, integrated pulls, and deep drawers, plus concealed trash, pull-outs, and dividers.
- Specify durable, low-maintenance materials like quartz or sintered-stone counters, large-format backsplash slabs, and easy-clean flooring with sealed seams.
- Plan layered lighting and coordinated fixtures: recessed ambient, under-cabinet task LEDs, dimmers, quiet appliances, and consistent hardware projections for smooth workflow.
Plan Layout, Budget, and Work Zones
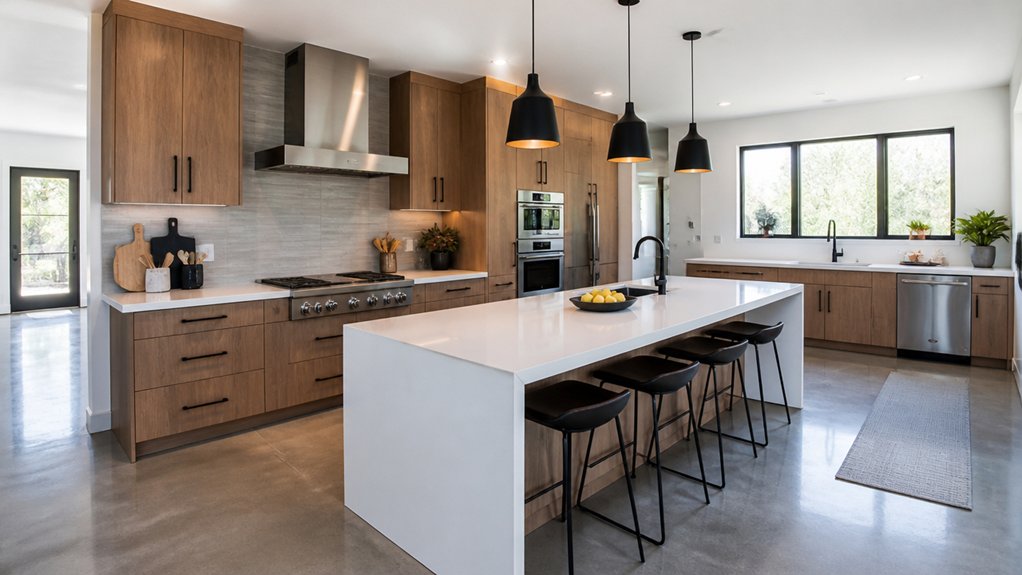
Before you pick finishes or fixtures, lock in the layout, the budget, and the work zones so every modern upgrade fits the way you actually cook. Map your triangle—sink, cooktop, fridge—then add prep, cleanup, and landing zones with clear counter runs and 42-inch aisles where possible.
If you’re working with open floor plans, define boundaries using ceiling lines, flooring shifts, or a slim island that preserves sightlines and traffic flow.
Set your budget by prioritizing infrastructure: electrical circuits, venting, plumbing moves, and lighting rough-ins. Then calibrate material allowances for durable counters, slip-resistant flooring, and wipeable wall finishes near heat and water.
Finally, preselect color schemes early so lighting temperature and appliance finishes stay consistent throughout the plan.
Choose Modern Cabinets and Hidden Storage

With your layout, aisle widths, and rough-ins set, you can size cabinetry to the work zones and use storage to keep counters visually clean. Choose Contemporary cabinetry with full-overlay doors, tight reveals, and integrated pulls to maintain a flat, continuous plane. Specify durable finishes—matte lacquer, thermofoil, or rift-sawn veneer—so glare stays low and wear is manageable near sinks and ranges.
Use taller uppers to reduce dust ledges and align crown heights across the room. Inside, prioritize deep drawers for pots, plates, and small appliances, with adjustable dividers to lock in categories. Add concealed compartments: a pull-out pantry behind a panel, toe-kick drawers, and appliance garages with lift-up doors.
Pair soft-close slides with LED task strips for quiet, precise access daily.
Add a Hardworking Island (Seating + Storage)
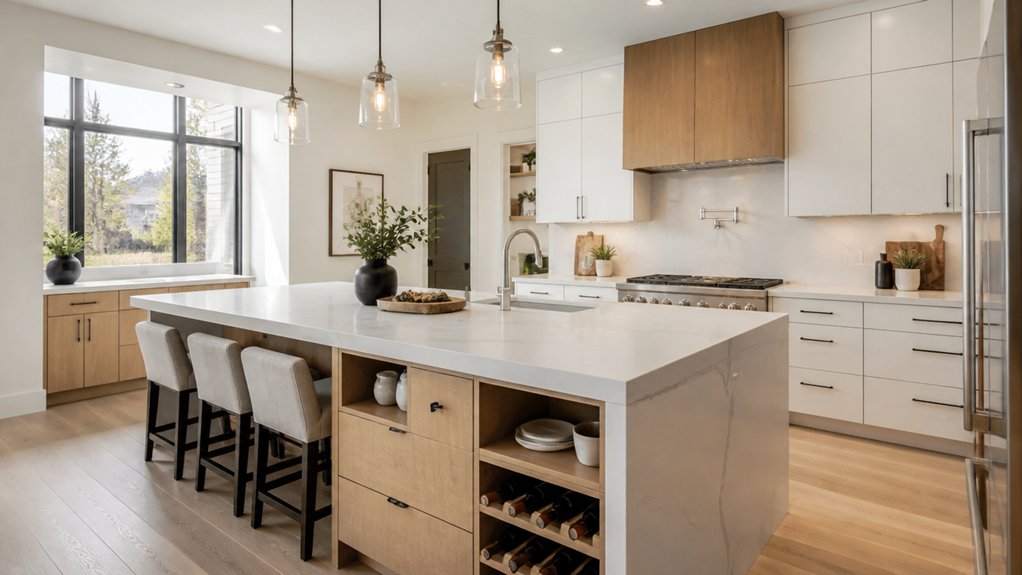
Center your layout around a hardworking island that balances circulation with a multifunctional seating run—stools on the living-side, clear prep space on the working-side.
Build in hidden storage with deep drawers, pull-outs, and an integrated trash/recycling cabinet so the countertop stays clean.
Specify durable materials like a quartz or sintered-stone top over a moisture-resistant plywood box, and protect high-wear edges with tight miters or metal trim.
Multifunctional Seating Layout
Even if your kitchen footprint feels tight, a hardworking island can anchor the seating layout while doubling as serious storage. Size it to preserve 42 inches of circulation on working sides, then add a 12–15-inch overhang for comfortable knee clearance. Specify a durable quartz or compact-laminate top with softened edges where elbows land, and wrap the base in stain-resistant cabinetry to balance visual weight.
Plan seating in zones: two stools for quick breakfasts, plus a slim banquette to catch corners. Use custom upholstery in performance fabric or leatherette, and keep the back angle supportive for ergonomic design. Coordinate stool frames with faucets or pulls, and choose foot rails in brushed stainless to protect the finish. Keep sightlines open.
Hidden Storage Solutions
Once you’ve mapped out where stools and banquettes land, make the island work harder by hiding storage in every face of the base. Put deep drawers on the cook-side for pots and sheet pans, then reserve the seating side for shallow push-latch cabinets that keep knees clear and sightlines clean.
Add innovative storage with a pull-out tray for oils and spices near prep, and a vertical slot for cutting boards beside the sink run. Specify concealed compartments: a toe-kick drawer for linens, an end-panel cubby for chargers, and a lift-up hatch for small appliances you want off the counter.
Keep clearances tight—align reveals with surrounding cabinetry, and route outlets discreetly within the island’s interior for cordless docking and power strips.
Durable Island Materials
Because the island takes the most abuse—sliding stools, dropped pans, wet prep, and daily wipe-downs—you’ll get better longevity by specifying materials that handle impact and moisture without constant babying. Choose a 3 cm quartz, sintered stone, or dense butcher block top with sealed edges; keep overhangs to 12 inches unless you add concealed steel brackets.
Wrap the base in rift-sawn white oak, laminate, or powder-coated steel for dent resistance, then use Eco friendly finishes like waterborne polyurethane or low-VOC oil.
Plan seating on the traffic-light side: 42 inches clear behind stools, 24 inches per seat.
Build storage where hands land—deep drawers, tray dividers, and a pull-out trash—so the island works harder without clutter.
Pair it with Artistic backsplash designs nearby for cohesion.
Choose Appliances That Blend In (and Work Smarter)
You’ll get a cleaner sightline when you spec panel-ready appliances that sit flush with your cabinet fronts and match your door style, veneer, or paint system.
Plan the layout around door swings, ventilation clearances, and service access so the integrated fridge, dishwasher, and wall ovens don’t interrupt your work zones.
Then choose smart, efficient models—induction, convection, and Energy Star-rated units with app-based monitoring—so your kitchen looks seamless and runs with less waste.
Panel-Ready Appliance Integration
When you want a kitchen to read as one continuous composition, panel-ready appliances let the cabinetry take the lead while the tech stays quietly in service. You’ll plan panel integration early, aligning door widths, reveals, and toe-kick heights so the fridge and dishwasher sit flush with adjacent bases and tall units.
For clean appliance concealment, match veneer grain direction or paint sheen to surrounding fronts, and specify edge banding that mirrors your door profile. Confirm hinge swing and handle placement to avoid clashes at corners, islands, and traffic lanes.
Add filler strips where needed to maintain consistent gaps and protect panels from heat and moisture. Finish with coordinated end panels and a continuous plinth so the run reads built-in.
Smart, Efficient Appliance Selection
Panel-ready fronts give you the clean facade; smart, efficient appliances make the kitchen perform behind it. Start by mapping appliance doors and handles to your cabinet reveals so clearances stay tight at corners and islands. Specify counter-depth refrigeration, low-profile microwaves, and induction to keep sightlines calm and ventilation ducts shorter.
Prioritize Energy efficient upgrades: ENERGY STAR dishwashers with soil sensors, variable-speed compressors, and convection ovens that preheat fast. Choose quieter decibel ratings so open plans feel finished.
For Smart home integration, pick platforms that share one app, support voice control, and send maintenance alerts before failures. Add leak-detection shutoff under the sink, and select modular filters you can swap without tools. Match stainless, matte, or integrated panels to your hardware and toe-kick lines.
Pick Durable Countertops for Daily Use
Because your countertops take the brunt of chopping, spills, heat, and constant wipe-downs, prioritize materials that balance scratch resistance, stain protection, and low-maintenance care.
If you cook hard, choose quartz for consistent color, tight tolerances at seams, and strong stain resistance; specify eased edges to reduce chipping at traffic corners.
For a pro-grade surface, consider sintered stone or stainless steel near the range and sink, where hot pans and splashes cluster.
If you want Eco friendly options, look at recycled-glass composites or paper-based resin slabs, and confirm VOC certifications.
Manage aesthetic considerations by matching slab movement to cabinet scale and keeping a 1–1.5 inch overhang for comfortable prep and seating.
Plan cutouts to protect sink rails.
Build a Layered Lighting Plan (Task + Ambient)
Although a kitchen can look finished with a single ceiling fixture, you’ll work better and see truer color with a layered lighting plan that separates ambient light from task light.
Start by mapping work zones: sink run, prep stretch, cooktop, and pantry wall.
Use even ambient light from recessed cans or a slim ceiling panel, spaced to avoid scallops on tall cabinets.
Then add task lighting where hands meet surfaces: under-cabinet LEDs with diffusers, aimed forward to cut shadow lines on countertops.
Specify 2700–3000K for warmth or 3000–3500K for cleaner whites, and keep high CRI to judge produce and finishes.
Put each layer on dimmers so you can shift from bright prep to softer evenings.
Choose Faucets, Sinks, and Modern Hardware
Once you’ve locked in cabinet layout and counter heights, choose your sink, faucet, and hardware as a coordinated set so the clearances, hole pattern, and finishes align without last-minute compromises. Confirm the faucet’s reach lands over the bowl center and that the handle swing clears your backsplash and window trim.
Pick sink geometry to match workflow: single-bowl for sheet pans, divided for prep plus rinse, and low-radius corners for a modern look. Choose stainless (16–18 gauge) or fireclay based on dent resistance, noise control, and cabinet support.
Specify Water saving fixtures with an aerated 1.5 gpm rating and a pull-down sprayer. For Eco friendly options, select lead-free brass, PVD finishes, and recycled-content pulls.
Keep knob and pull projections consistent to avoid aisle snags.
Pick Easy-Clean Flooring and Backsplash Materials
After you’ve mapped your work zones and traffic paths, choose flooring and backsplash materials that handle grease, grit, and frequent wipe-downs without showing every mark.
In the prep and sink runs, specify porcelain tile or luxury vinyl with sealed seams, then add a washable mat at the main pivot points to protect high-traffic lanes.
For the backsplash, run the surface from counter to uppers to eliminate ledges, and favor large-format slabs or tiles with minimal grout. If you use grout, pick epoxy or stain-resistant, and align joints with cabinet lines for a calmer grid.
Consider Eco friendly options like recycled-glass tile or FSC cork flooring with tough finishes. Choose textured finishes that disguise smudges while still letting you squeegee clean daily.
Frequently Asked Questions
Do I Need Permits for a Kitchen Remodel in My City?
Yes, you often need permits for a kitchen remodel, depending on scope in your city. If you move plumbing, add circuits, alter walls, or change ventilation, Building codes usually trigger approvals.
Start the Permit process by calling your local building department and submitting drawings that show layout, fixture locations, wiring routes, and materials like cabinetry, countertops, and fire-rated assemblies.
Even “cosmetic” swaps can require permits for gas appliances. Ask.
How Long Will My Kitchen Renovation Take From Start to Finish?
You’re typically looking at 6–12 weeks start to finish, like watching a blank canvas turn into a working hearth.
If you keep the Kitchen layout, plumbing, and walls intact, you’ll finish closer to 4–8 weeks; if you move utilities, expect 10–16.
You’ll spend 1–2 weeks on design and ordering, 1 week on demolition, 2–4 on rough-ins, then cabinets, counters, tile, paint, and Lighting fixtures.
Can I Live at Home During the Remodel Without a Full Kitchen?
Yes, you can live at home, but you’ll need planned living arrangements and reliable temporary cooking.
Set up a mini “galley” in a dining room: microwave, induction burner, electric kettle, and a compact fridge on a washable mat.
Seal doorways with plastic and painter’s tape to control dust.
Choose durable floor protection and confirm water shutoff windows.
Schedule dumpster placement and nightly cleanup.
Protect adjacent finishes with ram board.
How Do I Choose a Reliable Contractor and Avoid Common Scams?
Don’t hire “Captain Cash-Only”; you choose a reliable contractor by verifying contractor credentials, then auditing details like a cut sheet.
You check license, insurance, bond, references, and recent permits; you confirm subs match the bid.
You demand a line-item scope for demo, framing, MEP, cabinets, tile, and finishes, with material allowances.
You watch scam warning signs: pressure, vague specs, big deposits, no address, or “leftover” materials.
What Should I Do With Old Cabinets, Appliances, and Construction Debris?
Sort items by material and condition.
For cabinets, prioritize Cabinet refurbishment: remove doors, label hinges, and store flat to prevent warping. Salvage panels for fillers or toe-kicks.
For appliances, schedule appliance donation or retailer haul-away, and document serials.
Separate metal, clean wood, and drywall for recycling.
Bag insulation and dust.
Keep debris lanes clear, use covered bins sized to your access path, and schedule pickups to match demolition phases.
Conclusion
You’ll pull your modern kitchen together when you treat space planning and materials as one system: tighten work zones, hide storage behind clean cabinetry, and let a hardworking island add seating without clutter. Choose panel-ready appliances, durable counters, and an easy-clean backsplash so daily use stays effortless. Layer task and ambient lighting, then finish with precise hardware, faucets, and flooring. Here’s the payoff: efficient layouts can cut cooking time by up to 30%.
About the Author