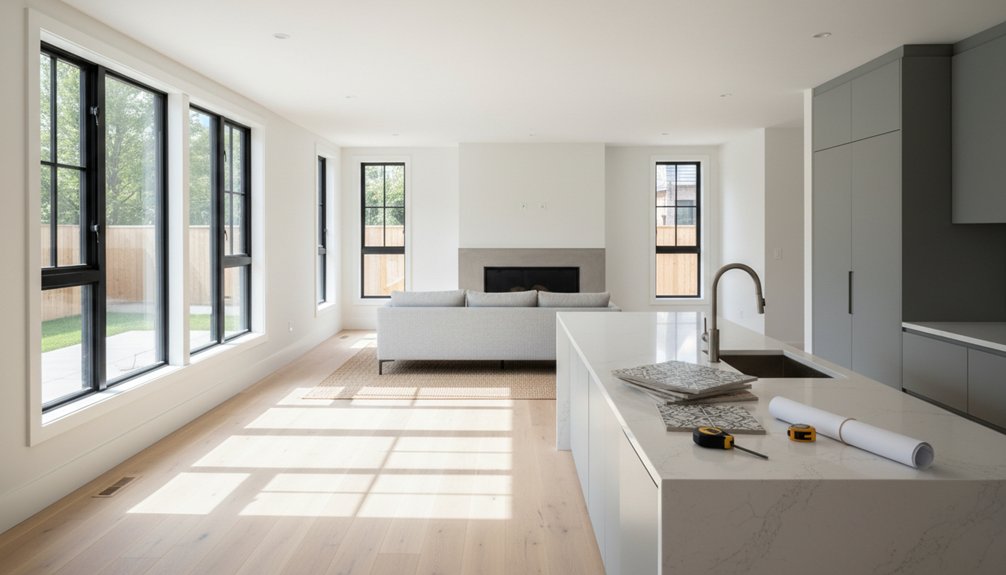
Start by spotting what dates the space—yellowed paint, bulky trim, scuffed floors, brassy stains, and tired fixtures—then fix the fabric first: damp, wiring, insulation, and windows. Plan the layout around your daily flow, open key walls with proper structure, and protect sightlines with screens or pocket doors. Add flush built-ins and closed shoe storage to cut clutter. Finish with wide-plank oak, warm stone, layered lighting, and linen textures—next, you’ll see how to sequence it smoothly.
Key Takeaways
- Start with a full assessment: identify dated finishes, structural issues, moisture risks, and salvage-worthy original features.
- Fix the fundamentals first: dry out damp, upgrade electrics, add insulation, and improve windows before any cosmetic work.
- Replan for modern living: optimize circulation, add smart drop zones and storage, and open or widen spaces where structurally feasible.
- Create a warm contemporary palette: soft neutral walls, wide-plank oak, honed stone or warm porcelain, and low-glare metals with blackened accents.
- Layer lighting and textiles: combine ambient, task, and accent lighting with rugs, linen drapery, and tactile upholstery to add depth and comfort.
Assess What’s Dating Your Tired Property

Before you start picking finishes, walk the space room by room and pinpoint what’s making it feel stuck in another decade: worn flooring shifts, bulky trim profiles, glossy honey-oak cabinetry, yellowed paint, dated light fixtures, and heavy window treatments.
Note how each surface catches light—scuffed polyurethane reads dull, while orange-toned stain turns brassy under LEDs.
Check ceiling lines for uneven planes, sagging plaster, or taped seams that telegraph.
Open and close doors to spot racked jambs and binding hinges.
Map circulation choke points where oversized casework or half-walls break sightlines.
Identify Historical features worth protecting—arched openings, original brick, intact millwork—and separate them from faux add-ons.
Flag Structural issues early: cracks, sloped floors, moisture, and undersized headers.
Plan the Renovation Around How You Live Now

Once you’ve identified what’s dragging the house back in time, plan the renovation around your daily rhythms instead of defaulting to a generic “open concept.” Track how you actually move—where bags get dropped, who cooks, where you charge devices, how guests enter, and which rooms need acoustic separation—then shape the layout, storage, and lighting accordingly.
Start with thresholds: add a durable tile or terrazzo landing, a shallow oak bench, and closed shoe cabinetry so clutter doesn’t migrate. In the kitchen, place prep zones beside the sink, specify matte quartz for low-glare tasks, and tuck outlets into an under-cabinet rail.
Let Furniture arrangement drive wall locations: keep clear sightlines, but use a slatted timber screen or pocket door to buffer noise. Your Lifestyle needs should dictate built-ins, dimmable LEDs, and washable paint.
Set a Budget and Timeline for a Tired Property

Because tired properties hide surprises behind every skirting board and soffit, you’ll set a smarter budget and timeline by pricing the unknowns upfront. Build a contingency line (10–20%) and ring-fence it, so finishes don’t get downgraded midstream.
Start Budget allocation with a room-by-room schedule: flooring, plaster, joinery, paint, lighting, ironmongery, and built-ins. Price materials by square metre, then add waste factors for tiles and timber boards. Lock your “must-have” contemporary moves—flush skirting, shadow gaps, large-format porcelain, concealed storage—before you spend on decorative extras.
For Timeline management, map dependencies: design sign-off, lead times, delivery windows, and access routes. Batch dusty work, then protect new surfaces with ram board and edge tape to prevent rework.
Fix Damp, Wiring, Insulation, and Windows First
Although sleek finishes sell the “contemporary” look, you’ll get a cleaner, longer-lasting result by tackling damp, electrics, insulation, and windows first.
Start with moisture mapping: check skirting lines, chimney breasts, bay corners, and subfloor vents, then improve Moisture management with repaired gutters, breathable plaster, and a proper DPM where appropriate. Keep timber dry before you box it in.
Next, prioritise electrical safety: replace outdated consumer units, test earthing, and reroute cluttered surface cabling into wall-safe zones so future lighting and AV don’t scar new finishes.
Upgrade insulation at loft, party walls, and suspended floors, and seal penetrations with fire-rated foam.
Finally, fit low‑E double glazing with airtight trickle ventilation and insulated reveals to stop condensation and drafts.
Open the Layout to Boost Light and Flow
With the building fabric dry, warm, and electrically sound, you can start reshaping the plan so the house feels brighter and easier to move through. Map daily routes, then remove non-structural partitions that choke circulation between kitchen, dining, and living zones.
If a wall is loadbearing, swap it for a steel beam with padstones, keeping spans tight and ceilings level. Widen openings to 900–1200mm and align doorways so sightlines pull you forward.
Use glazed doors, internal screens, or a borrowed-light clerestory to push natural light deeper without losing acoustic control. Tie new thresholds with continuous flooring—engineered oak or polished concrete—and hide progressions with shadow gaps.
Done well, open floorplans feel intentional, not empty.
Build in Smart Storage to Reduce Visual Clutter
Once you’ve opened up the plan, clutter shows faster, so you’ll want storage that disappears into the architecture rather than piling up as freestanding furniture. Run full-height cabinets flush to the wall, use push-latch doors, and match panels to plaster or timber veneer so joins read as shadow lines.
Design every junction as a storage moment: a bench with a lift-up seat at the entry, toe-kick drawers under base units, and Hidden compartments behind sliding art panels for routers, keys, and chargers.
Add Vertical shelving in dead zones—beside chimney breasts, over door headers, and within widened stud walls—so you store more without eating floor area. Finish interiors in durable melamine or birch ply for clean, wipeable performance.
Modernize a Tired Property With Layered Lighting
You’ll modernize a tired property fastest when you layer light: clean ambient illumination to even out the room, targeted task fixtures over work zones, and crisp accent lighting to graze texture on brick, timber, or plaster.
You’ll place each layer where it supports circulation, countertops, and focal walls, so the space reads intentional instead of patchy.
Add dimmers and smart controls so you can tune color temperature and brightness from bright daytime functionality to softer evening atmosphere without changing a single fitting.
Ambient, Task, Accent Layers
Although fresh paint and new finishes help, layered lighting does more to modernize a tired property because it reshapes how each room feels and functions. Start with ambient lighting: a clean ceiling plane of recessed LEDs or a slim flush mount that washes walls evenly, reducing shadows that age plaster and textured ceilings.
Add task light where work happens. Put under-cabinet strips on a matte backsplash to sharpen prep zones, swing-arm sconces at bedside for reading, and a focused pendant over a peninsula to define circulation.
Finish with accent layers to bring architecture forward: grazing light on brick, a picture light over art, toe-kick LEDs along cabinetry, or uplights on a textured curtain. Use warm metals, black trim, and accent colors in shades and cords to tie the palette together.
Dimmers And Smart Controls
When you put your layered lighting on dimmers and smart controls, the same fixtures shift from crisp, high-output work light to a softer, evening-ready glow without changing a bulb. In a tired property, that flexibility makes old rooms feel intentional and contemporary.
Use trailing-edge dimmers for LED downlights, and set low-end trim so light fades smoothly instead of flickering on painted plaster or glossy tile. Add scene keypads at entries to toggle “Cook,” “Clean,” and “Wind Down,” balancing under-cabinet strips with pendants over quartz or timber.
With lighting automation, you’ll schedule wake-up ramps and vacancy shutoff in hallways. Prioritize control integration so switches, smart hubs, and shades speak the same protocol, keeping wall plates clean and finish-matched.
Choose Warm Modern Finishes, Color, and Texture
To pull a tired property into the present without turning it cold, lean on warm modern finishes that add depth at eye level and underfoot. Start with a calm base: soft white walls, greige microcement, or matte oat-toned paint that flattens visual noise.
Add Warm wood accents in door casings, a slatted oak panel, or walnut shelving to break up large planes. Choose cabinetry in matte lacquer or stained veneer, then pair it with brushed nickel or champagne bronze hardware for low-glare polish.
Ground rooms with wide-plank engineered oak, honed stone, or large-format porcelain in warm concrete tones. Layer plush textiles—bouclé seating, wool rugs, linen drapery—to soften acoustics and edges.
Finish with blackened steel details for contrast, not chill.
Frequently Asked Questions
Do I Need Planning Permission for a Contemporary Renovation?
You might, but it depends on what you’re changing. If you alter the building’s footprint, add storeys, change use, or modify street-facing elevations, you’ll likely need planning permission.
Even for internal reworks, you must meet Building codes and check local Permit requirements.
Talk to your council early, especially for glazing upgrades, steel beams, or insulation build-ups that affect room sizes, fire separation, and structural load paths.
How Do I Choose an Architect or Interior Designer?
You choose an architect or interior designer like you’re sending a telegram: be brief, demand clarity.
Review portfolios for space planning, daylight control, and material joins; ask to see drawings, specs, and site photos.
Interview for process, then confirm Budget planning methods, fee structure, and how they manage variations.
Check references on buildability and deadlines.
Guarantee they’ll support Contractor selection with tender docs, scopes, and on-site coordination.
Can I Live in the Property During Renovations?
You can live in the property during renovations, but you’ll need strict zoning and realistic expectations. If you’re moving walls, rewiring, or replacing plumbing, plan temporary accommodation for the noisiest, dustiest phases.
Map rooms by function: keep one sealed bedroom, a functioning bathroom, and a basic kitchenette. Use zip walls, floor protection, and negative-air filtration.
Your renovation timeline should sequence messy trades first, finishes last.
What Renovation Upgrades Add the Most Resale Value?
You’ll see the biggest resale lift from “thoughtful enhancements”: a kitchen refresh, updated baths, and improved layout flow.
Prioritize durable, appealing Material selection—quartz counters, quality cabinetry, and wide-plank flooring—over fussy finishes.
Add Smart technology like thermostats, lighting control, and keyless entry for modern convenience.
Don’t ignore curb appeal, windows, and HVAC; buyers pay for comfort and efficiency.
Keep upgrades cohesive, space-efficient, and easy to maintain.
How Can I Make the Renovation More Eco-Friendly and Low-Carbon?
Start by tightening the building envelope: air-seal gaps, add high-performance insulation, and specify low-e windows sized for daylight.
Choose Sustainable materials like FSC timber, recycled-content drywall, low-VOC paints, and reclaimed flooring that fits each room’s wear zone.
Electrify: install a heat pump, induction cooktop, and efficient ventilation with heat recovery.
Add Renewable energy via rooftop solar or a solar-ready panel upgrade, and reuse fixtures to cut embodied carbon.
Conclusion
You’ve taken your once “well-loved” property and quietly ushered it into a cleaner, contemporary chapter. By tackling damp, tired wiring, and heat loss first, you’ve given the structure a fresh backbone. Opening sightlines pulls daylight deeper, while built-in storage tucks away life’s clutter. Layered lighting—downlights, wall washes, and warm task pools—adds depth after dark. Finish with oak, stone, and soft matte paint, and your space feels calm, current, and complete.
About the Author