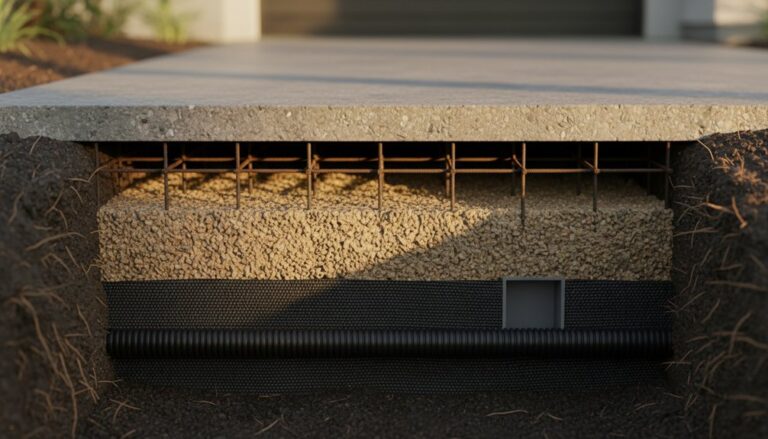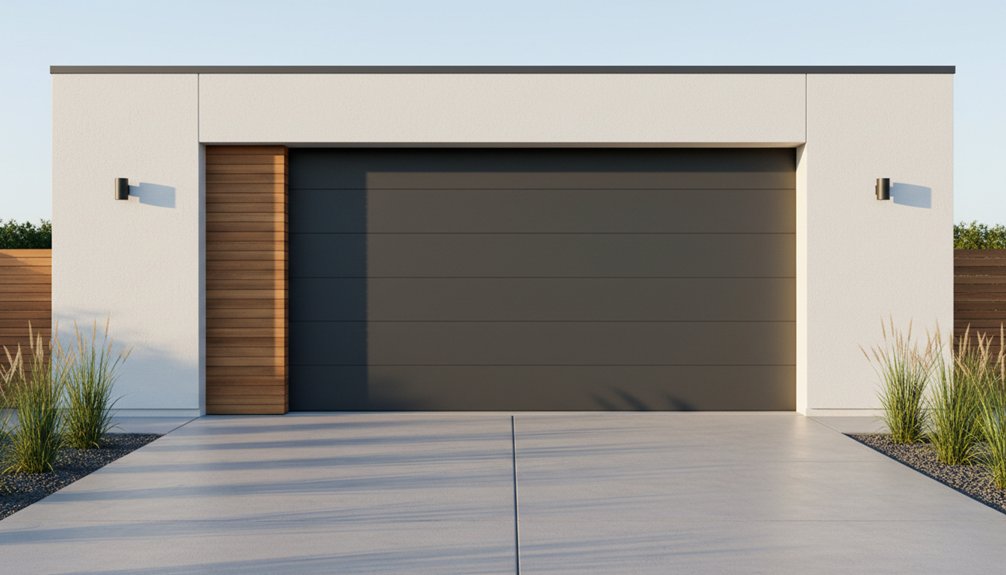
Start by clearing exterior clutter and relocating hoses, bikes, and tools into wall tracks or cabinets so your elevations read clean. Limit the facade to two or three finishes, keep textures restrained, and hold a clear 70/30 contrast ratio. Choose a flush, low-sheen, insulated garage door with minimal panel breaks and aligned window bands. Laser-align fascia, trim, and reveals to one shared datum. Place slim, warm-white lighting and hardware on consistent axes—keep going to see how to lock proportions and margins.
Key Takeaways
- Audit and remove exterior clutter, relocating hoses, bikes, and tools into organized interior storage systems to preserve clean sightlines.
- Limit finishes to two or three cohesive materials, using consistent seams and matching undertones to avoid a patchwork facade.
- Choose a flush, low-sheen, insulated garage door with minimal panel breaks, aligning any window band to adjacent openings.
- Straighten and align roofline, fascia, and trim edges with tight miters and clean caulk lines to create crisp, continuous geometry.
- Use slim, warm-white lighting and low-profile hardware, aligning numbers, sconces, and cameras on shared axes for balanced symmetry.
Audit Your Modern Garage Exterior for Clutter

Before you change finishes or add features, inspect your modern garage exterior for visible clutter that breaks clean lines. Photograph each elevation, then mark every protrusion: hoses, bins, hooks, cords, bikes, yard tools, spare trim, hardware. Treat these as Exterior clutter, not storage. Verify what’s permanent versus temporary, and note attachment points that scar panels or siding.
Next, map circulation from driveway to side door and trash pickup. Relocate items that sit in sightlines or block access. Convert exterior storage into interior Garage organization: wall-track systems, ceiling racks, closed cabinets, labeled zones. Remove redundant fixtures, consolidate utilities, and reroute wiring into conduit. Patch holes, seal penetrations, and standardize fasteners.
When you’re done, the façade reads as one uninterrupted plane.
Choose a Modern Garage Door Style and Layout

With exterior clutter cleared and penetrations patched, the garage door becomes the dominant element that sets the façade’s grid and proportion.
Choose Garage door styles that read as planar, not ornamental: flush steel, flush wood veneer, or full-view aluminum with matte glass. Keep panel breaks minimal, align reveals, and select low-sheen finishes to reduce visual noise.
Confirm Layout configurations from the street: one wide door can simplify the elevation; two narrower doors can reinforce symmetry. Match door width to bay spacing and driveway approach so the opening feels intentional, not oversized.
Set window bands in a single datum and repeat that line with adjacent fenestration. Specify hardware that’s concealed or linear. Prioritize quiet operation, tight perimeter seals, and an insulated core to support performance without adding detail.
Sharpen Trim and Fascia for Clean Lines
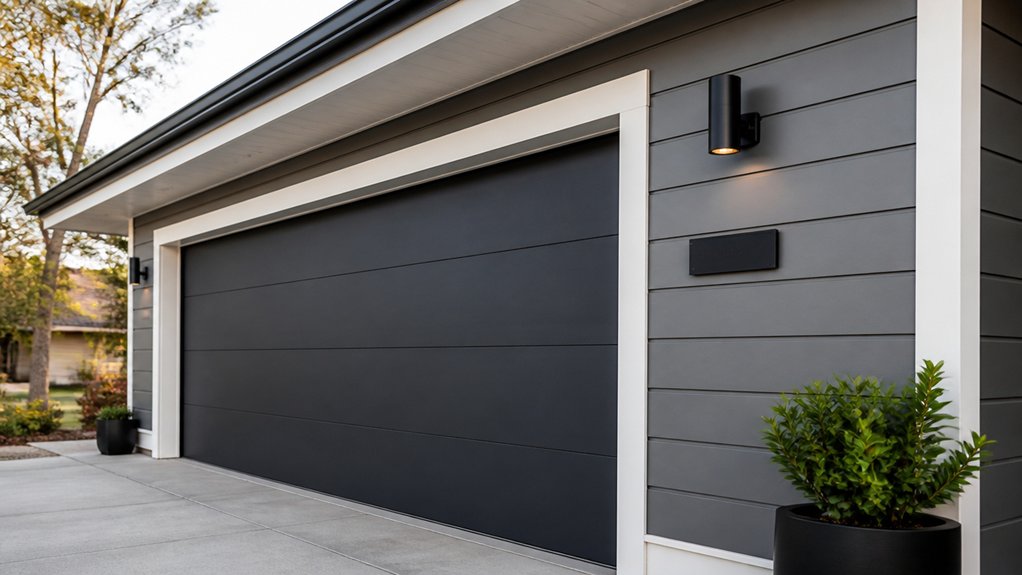
Set your fascia edges dead straight and aligned so the roofline reads as a single, clean plane.
Cut trim miters tight and true, then dry-fit to verify consistent reveals at every corner.
Caulk joints in continuous beads and tool them flush so progressions disappear under paint.
Fascia Edge Alignment
How clean can your roofline look if the fascia edge wanders or the trim steps out of plane? You can’t fake straightness; light will trace every ripple.
Start by establishing a reference line: snap a chalk line at the intended reveal, then verify with a laser along the eave.
Measure rafter tails and shim or plane them to a single plane before you fasten fascia stock.
Keep the fascia edge consistent by using story poles at corners and mid-span.
Clamp, predrill, and fasten from center out to prevent bowing.
Check alignment accuracy every 4 feet with a straightedge; correct immediately, not later.
Seal joints, then prime edges so movement doesn’t telegraph.
Your roofline reads deliberate, modern, controlled.
Crisp Trim Miter Cuts
After you’ve locked the fascia into a true plane, crisp miter cuts keep the trim reading as one continuous, sharp edge. You’re chasing geometry, not forgiveness. Set your saw to dead-on 45°, verify with a digital angle gauge, then cut test blocks from the same stock. If the corner opens, correct the miter, not the fasteners.
You’ll get tighter results by controlling fiber tear-out. Use a fine-tooth blade, support the exit side, and score the cut line.
For wide fascia returns, lock the workpiece against a long fence and clamp it so it can’t creep. Dry-fit every corner, then mark face-reference lines so both pieces register the same way.
Done right, sophisticated molding looks planar, and precise miter cuts disappear.
Seamless Caulked Transitions
Because even perfect miters telegraph gaps once the siding and light hit them, you need caulk to act as a controlled fillet—not a cover-up.
Choose paintable, exterior-grade elastomeric caulk for trim-to-siding and fascia-to-soffit joints; it moves without cracking. Mask both edges for razor lines, then cut the nozzle small and pull a consistent bead—don’t push.
Tool once with a damp finger or radius tool, applying light pressure to seat the bead and create seamless gradations. Remove tape immediately for a clean break.
Keep joints shallow; you’re defining planes, not building volume. Backer rod goes in gaps over 1/4 inch so the bead bonds to two sides, not three.
Prime bare end grain, then caulk, then topcoat. These caulking techniques keep shadow lines sharp.
Combine Modern Garage Exterior Materials With Restraint
Keep your material palette tight—two, maybe three exterior materials max—so the garage reads as a single, controlled volume.
Assign one statement finish (charred wood, standing-seam metal, or a saturated door color) and keep everything else neutral and matte.
You’ll get contrast and depth without visual noise.
Limit Material Palette
Even if you want a modern mix of wood, metal, and masonry, you’ll get a cleaner garage exterior by limiting the palette to two or three primary materials and repeating them with consistent proportions.
Start with material selection based on durability, exposure, and maintenance cycles, then lock the set. Use one cladding, one trim or frame material, and one hard surface for base or paving.
Keep joint types consistent, and align seams across elevations to reduce visual noise. Control finish sheen: matte reads flatter and more monolithic; gloss breaks continuity.
For color coordination, choose one dominant tone and one secondary tone, then repeat them on door, fascia, and gutters. Match undertones (warm vs cool) to prevent conflict and preserve clean modern lines.
Highlight One Statement Finish
While a tight material palette keeps the elevation calm, you still need one statement finish to set hierarchy and add depth. Choose a single high-impact plane: the door face, a recessed surround, or a parapet band. Specify it in one contrasting material, not multiple accents, so the read stays clean.
Use restrained contrast: matte charcoal metal against light stucco, or vertical cedar against smooth fiber cement. Control surface textures by keeping the statement finish either clearly linear or clearly monolithic. Align panel joints with door reveals, and keep module sizes consistent. Treat corners with clean returns, not trim buildup.
Dial in finishing details: flush fasteners, tight shadow gaps, and continuous edge profiles. Let lighting wash that surface, and keep all other planes quiet.
Pick Minimal Lighting and Hardware for the Garage Exterior
If you strip the garage exterior down to clean planes and simple lines, the lighting and hardware should match that restraint. Choose minimal lighting with slim, rectilinear fixtures that sit tight to the wall and throw controlled beams.
Aim for warm-white LEDs (2700–3000K) with high CRI for accurate material rendering, and use full cutoff optics to reduce glare. Place sconces symmetrically or align them to door edges for visual order.
Put them on a photocell plus timer so you don’t overlight.
For hardware selection, pick low-profile pulls or recessed handles with consistent geometry. Keep finishes uniform across hinges, numbers, and mailbox. Specify corrosion-resistant metals and concealed fasteners for a clean read. Match scale to door panel grid precisely.
Use Color Contrast to Define a Modern Garage Exterior
Once you’ve kept lighting and hardware quiet and disciplined, use color contrast to do the heavy lifting on the facade. Start with a two-tone Color pairing: a dark door against a light wall, or the inverse, to sharpen edges and reduce visual noise. Keep undertones consistent; match warm grays with taupes, cool grays with blue-based whites.
Apply contrast techniques with controlled ratios. Use 70/30 or 80/20 so one field reads dominant and the other reads as a cut line. Choose low-sheen finishes for large planes and reserve satin for trim to prevent glare and highlight geometry.
If you use wood or metal cladding, treat it as an accent band, not a patchwork. Test samples in morning and late light before committing.
Tie the Modern Garage Exterior Together With Alignment
After you establish clean contrast, lock the facade together with alignment. Set a primary datum line at the door head, then carry it across trim, lighting, and cladding joints. Keep reveals consistent, and snap all verticals to one module so panels and battens read as one system.
Center key elements to reinforce garage symmetry, or offset them deliberately with equal counterweight. Align house numbers, sconces, and camera to the same axis, not “near” it. Match the soffit depth to the door frame depth to avoid visual steps.
Confirm margins: equal side gaps, equal top and bottom bands, controlled corner returns. When every edge shares a reference, you get exterior balance without extra materials.
Frequently Asked Questions
Do I Need a Permit to Change My Garage Exterior?
You likely need a permit if you change structural elements, openings, or electrical work; cosmetic updates usually don’t. Check your city’s building department and HOA rules before starting.
Replacing doors, adding windows, altering siding, or modifying rooflines often triggers review.
New Garage lighting typically requires an electrical permit.
Swapping Exterior paint options, trim, or fixtures rarely does, unless you’re in a historic district or regulated zone.
Verify setbacks, materials, and inspections.
How Much Does a Modern Garage Exterior Remodel Typically Cost?
You’ll typically spend $5,000–$25,000 on a modern garage exterior remodel; coincidence: that’s often what you’d budget right after noticing peeling trim in daylight.
A basic refresh (paint, minor cladding, Exterior lighting) runs $5k–$10k.
Mid-range updates (new Garage door, windows, upgraded lighting, soffit/fascia) hit $10k–$18k.
Premium re-skinning with metal/composite, insulation, electrical, and masonry can reach $18k–$40k depending on labor and region.
What’s the Best Way to Improve Garage Insulation During Exterior Updates?
Upgrade insulation by air-sealing first, then adding continuous exterior rigid foam when you re-skin siding. You’ll cut thermal bridging and boost Energy efficiency fast.
Choose Insulation types by assembly: polyiso/XPS foam outside, mineral wool for fire resistance, or closed-cell spray foam for rim joists and leaks.
Add a sealed, insulated garage door (R-12+), weatherstripping, and a thermal break at framing.
Verify with a blower-door or smoke test.
How Can I Modernize a Garage Exterior While Meeting HOA Rules?
You modernize a garage exterior under HOA rules by starting with the covenants, approved palette, and submittal process. Then choose compliant upgrades.
Match Garage color to the HOA’s approved neutrals, but shift to higher-contrast trim if allowed.
Select Door styles that mirror neighborhood proportions: flush panels, narrow windows, or carriage overlays in approved tones.
Upgrade lighting to dark, low-profile fixtures, and add tidy house numbers, with no new massing.
Which Contractors Should I Hire for a Garage Exterior Transformation?
Hire a general contractor to lead, like a conductor keeping every trade on tempo.
Add a garage door specialist for Garage door upgrades, a carpenter/framer for openings and trim, and a siding installer to evaluate siding options and flashing.
Bring in an exterior painter or finisher for coatings, plus an electrician for lights and sensors.
Use a structural engineer if you alter headers or widen bays.
You’ll coordinate permits, inspections, and HOA submittals.
Conclusion
You strip the clutter, and the garage reads like a blank blueprint. You choose a door with disciplined panels; trim and fascia tighten into crisp edges. Materials stay restrained—metal, wood, cement—each joint deliberate. Lighting and hardware act like punctuation, not decoration. You set contrast to carve the volume: dark field, light line. Finally, you align seams, reveals, and planes. The exterior becomes a calibrated instrument—quiet, exact—signaling order before you even enter.
About the Author