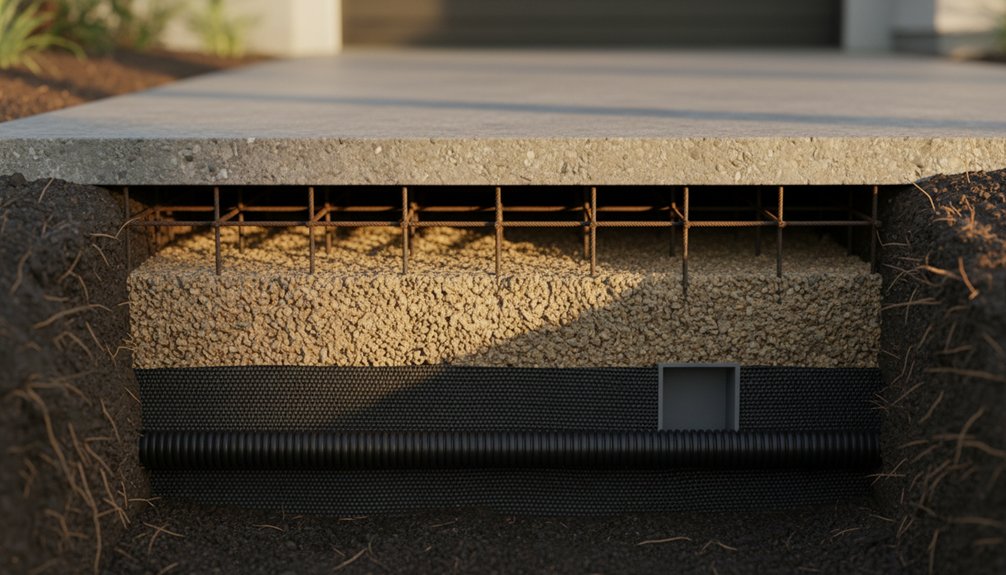
Let’s dig deep into Modern Driveway Surfaces and what they bring to a property. Beneath your driveway, you’re relying on a mini pavement system. You strip organics, moisture-condition soil near optimum (ASTM D698), then compact to about 95% maximum dry density (ASTM D6938). If subgrade CBR is low or groundwater’s high, you place an AASHTO M288 geotextile separator. You build 4–6″ crushed-stone lifts to a soil- and load-based thickness, then grade 1–2% for drainage and frost control. There’s more you can optimize.
Key Takeaways
- Subgrade soil is stripped, moisture-conditioned, and compacted to 95% density so the driveway won’t settle or pump fines.
- Weak soils are strengthened with lime/cement stabilization, geogrids, or separator geotextiles that stop mixing and improve bearing capacity.
- Layered crushed-stone bases in compacted lifts spread vehicle loads, resist rutting, and are thickened for clays, freeze–thaw, or heavy traffic.
- Drainage engineering—1–2% surface slope, channel drains, and underdrains—keeps water out of the base to prevent softening and frost heave.
- Joints and edge restraints control cracking and lateral spread, protecting vulnerable edges where traffic and freeze–thaw stresses concentrate.
Driveway Subgrade: Soil Prep and Compaction
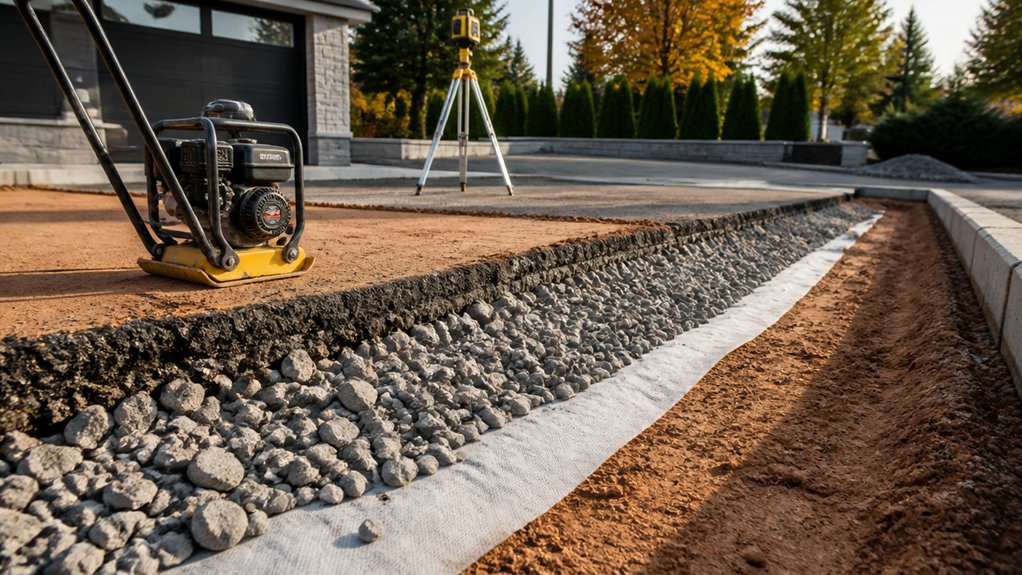
Although you won’t see it once the surface goes down, the driveway’s subgrade controls most of the long-term performance. Start by stripping organics and soft spots until you reach firm, uniform soil. Verify moisture near optimum (per ASTM D698) so you don’t compact mud or dust.
If soils are clayey or wet, plan Soil stabilization with lime, cement, or geogrids to raise bearing capacity and cut shrink-swell. Shape the subgrade to shed water and keep groundwater from pumping fines.
Then apply compaction techniques matched to soil type: vibratory plate or roller for granular soils, sheepsfoot for cohesive soils. Target 95% of maximum dry density (ASTM D698), and confirm with density tests (ASTM D6938) to reduce rutting and settlement.
Driveway Base Layers: Crushed Stone and Thickness
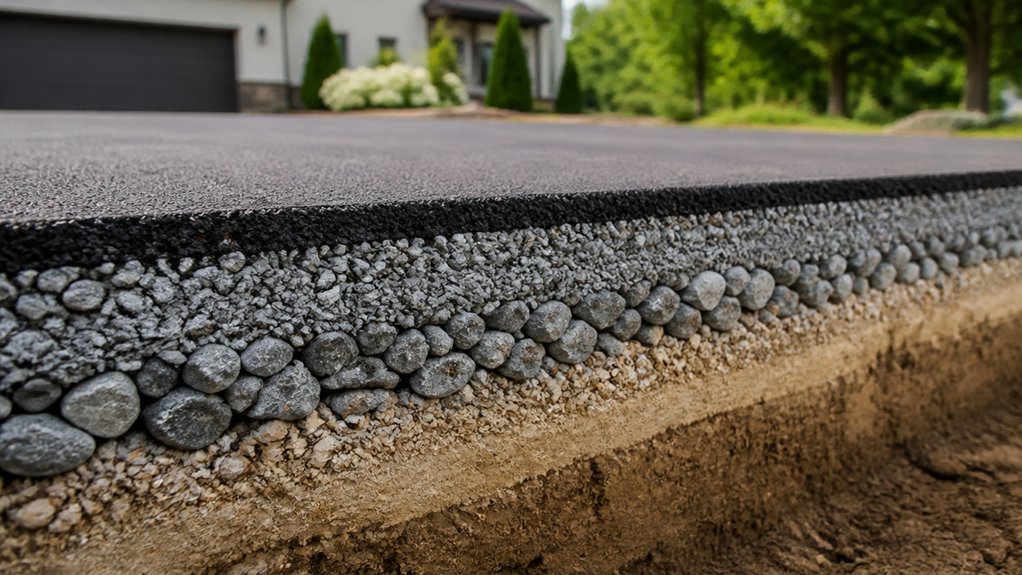
Once you’ve hit density on the subgrade, the base layer becomes your primary load-spreading and drainage system, so you need the right aggregate and enough thickness for your soil and traffic.
Specify well-graded crushed stone (e.g., 3/4″ minus with fines) to meet local DOT gradation and abrasion limits; angular faces lock under compaction for material durability. Place it in 4–6″ lifts and compact to a verified target (often 95% of Standard Proctor) to prevent rutting.
For stable, well-drained sands, you can often use 6–8″ total; for silts/clays or freeze–thaw zones, plan 10–14″, and increase for heavy vehicles.
Cap with a finer leveling course to tighten surface tolerance and support aesthetic enhancement.
Driveway Geotextile Fabric: When to Use It
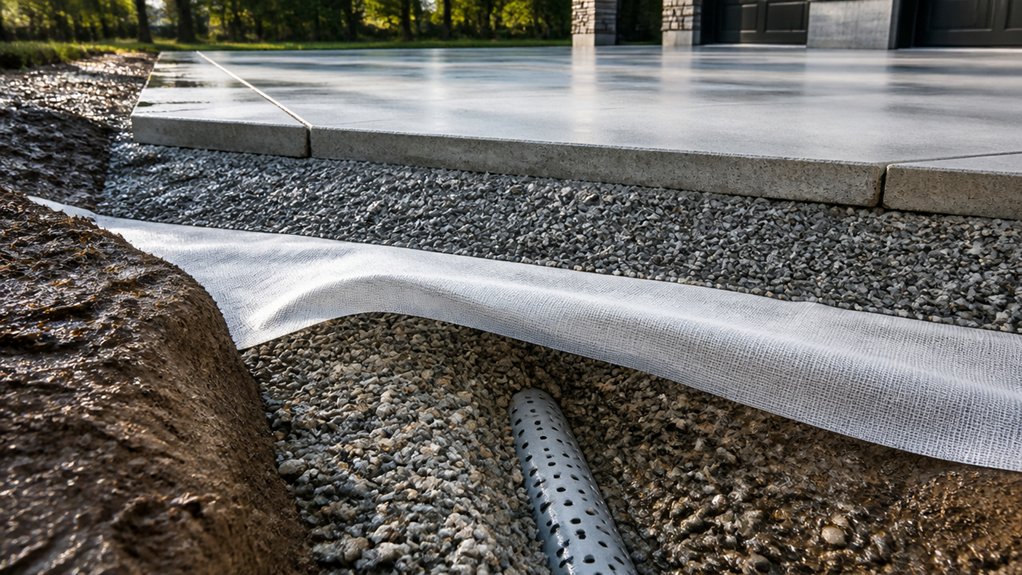
When your subgrade shows low bearing strength (e.g., soft clays/silts with CBR < 5), high groundwater, or you’re building over mixed fill, you should install a separation/stabilization geotextile between the soil and the crushed-stone base to stop fines from pumping upward and aggregate from punching downward under traffic.
Specify a nonwoven or woven fabric meeting AASHTO M288 survivability for the installation stresses and the traffic class you expect. Match apparent opening size to gradation so it retains soil yet maintains material permeability, typically with permittivity ≥ 0.1 s⁻¹.
Use it when you can’t economically over-excavate, or when repeated wetting makes rutting likely. Overlap 12–24 inches, avoid wrinkles, and place stone promptly to prevent UV damage.
Driveway Drainage: Slope, Drains, and Frost Control
You’ll keep your driveway stable by setting a measurable pitch (typically 1–2%) that moves runoff away from the slab and off low-permeability soils.
Where sheet flow can’t meet code or site constraints, you’ll specify channel drains and inlets sized for local design storms and tied to a compliant outlet.
In frost zones, you’ll control water in the base and subgrade with positive drainage and capillary breaks so saturated soil can’t feed heave.
Proper Slope And Pitch
Because water follows the steepest path, your driveway’s slope and pitch act as the first—and most code-relevant—drainage control: most standards call for about a 2% cross-slope (roughly 1/4 inch per foot) to move runoff off the pavement, while keeping grades compatible with garage slabs, sidewalks, and accessible routes.
Keep longitudinal grade modest—often 1%–5%—so you don’t trap water at the apron or overload soil at the toe.
On clayey subgrades, you’ll want tighter tolerances and well-compacted base to limit pumping; on sandy soils, you’ll still prevent raveling by controlling edge confinement.
Set decorative edging to the designed elevations, not “by eye,” and place solar powered lighting after final grading so posts don’t become unintended dams.
Channel Drains And Inlets
Even if your driveway hits the target 2% cross-slope, a channel drain or inlet becomes the code-friendly fail-safe at low points—especially at garage thresholds and apron breaks where ponding triggers icing and seepage.
Size the run using local design rainfall and tributary area; many jurisdictions reference rational-method flow checks and require positive discharge to an approved point.
You’ll get better capture when you place Channel inlets where flow lines converge and keep the grate flush with the surface to avoid tire impact.
Specify load-rated grates (ASTM A536 ductile iron or equivalent) for passenger vehicles, and choose polymer concrete or HDPE bodies where soils stay wet or chloride exposure is likely.
Tie the outlet into stormwater management with a sump basket or sediment trap so fines don’t clog downstream piping.
Frost Heave Water Control
While winter damage looks like a pavement problem, frost heave starts as a water-management problem in the subgrade. When frost-susceptible silts and fine sands sit near saturation, ice lenses can lift slabs by inches under ASTM D5918 conditions.
You reduce risk by keeping the subgrade unsaturated and giving water a fast exit path. Set driveway grades to shed runoff (target 2% cross-slope where feasible) and keep downspouts off the pavement edge.
Specify a free-draining base (ASTM C33 aggregates) over a separator geotextile to prevent fines migration, and add an underdrain where perched water tables form.
In cold regions, place insulation or increase non-frost-susceptible cover to meet local frost depth guidance. That’s practical frost heave water control.
Driveway Joints and Edging: Controlling Cracks and Spread
You control cracking by placing contraction joints where stress concentrates—re-entrant corners, radius returns, and regular panel spacing—so shrinkage breaks on your layout, not at random.
You limit movement with expansion joints and compressible fillers at fixed interfaces (garage slabs, walls, utility structures), sized for temperature swing and local frost-driven soil heave.
You keep the slab from spreading by installing continuous edging or a thickened edge over properly compacted subgrade, so weak or wet soils don’t let traffic loads push the pavement laterally.
Joint Placement Strategies
Because concrete and asphalt move with temperature swings and soil moisture changes, joint layout becomes your primary crack-control tool—not a cosmetic afterthought. You’ll space control joints to match slab thickness and panel geometry: ACI guidance targets joint spacing at 24–36 times slab thickness, and you’ll keep panels near-square to limit curling and random fracture.
You’ll place joints at re-entrant corners, changes in width, and where the driveway meets fixed features like garage slabs or drains, so stress concentrates where you choose. In expansive or frost-susceptible soils, you’ll shorten spacing and align joints with base transitions to avoid differential movement.
You’ll plan for joint sealing to block incompressibles and water. Then you’ll schedule joint maintenance to preserve load transfer and edge integrity year-round.
Expansion Control Methods
As seasonal expansion and contraction build compressive stress at slab edges, you’ll control movement with true expansion joints, isolation joints, and rigid edging that’s detailed to the soil and climate.
Specify compressible fillers meeting ASTM D1751/D1752 at fixed structures, and keep joint widths consistent so they actually absorb strain.
Use isolation joints around garages, steps, and utility collars to prevent restraint cracking.
Where standards call for load transfer, you’ll pair joints with dowels or keyways sized per slab thickness and expected axle loads.
Don’t ignore subgrade stabilization: weak, pumping bases amplify joint faulting.
Manage soil moisture with drainage, vapor breaks, and properly compacted granular layers so differential heave doesn’t pry joints open.
Seal joints to limit incompressibles and water intrusion, too.
Edging For Lateral Support
Where do driveway slabs actually fail first under traffic and freeze–thaw cycles? At the edges, where wheel loads create high tensile stress and unconfined base material can ravel outward. If you don’t lock the perimeter, joints open, slabs spread, and cracks propagate from corners.
You prevent that with edging for lateral support. Specify edging design that matches your pavement type: concrete thickened edges or curb-and-gutter. For pavers, ASTM C936 units need a restrained edge per ICPI guidance so bedding sand doesn’t migrate.
Tie edging into a compacted base (≥95% Standard Proctor) and verify subgrade CBR or stabilization on weak soils. Add drainage so saturated fines don’t pump. You’ll still get aesthetic borders, but they’ll be structural, not decorative.
Driveway Surfaces: Concrete, Asphalt, Pavers (and Their Base Needs)
Even though concrete, asphalt, and pavers can all look “finished” on day one, their performance still hinges on the same hidden variables: subgrade strength, drainage, and base thickness built to spec.
If your subgrade is clayey, expansive, or wet, you’ll need stabilization or undercut plus geotextile to meet target compaction (often 95% Proctor) and prevent pumping.
Concrete wants uniform support; a 4–6 in crushed aggregate base over well-draining soils reduces curling and slab cracking.
Asphalt tolerates slight flex but needs thicker base where CBR is low, since rutting starts below the mat.
Pavers demand the tightest gradation control: dense-graded base, then 1 in bedding sand, plus edge restraints.
Done right, you gain Gateway security and long-term aesthetic enhancements.
Frequently Asked Questions
How Do Driveway Underdrains Connect to Municipal Stormwater Systems?
You connect driveway underdrains to municipal systems by running a perforated pipe in subsurface drainage gravel to a solid outlet line.
Then, tie it into an approved curb inlet, manhole, or storm lateral using a permitted Stormwater connection.
You maintain minimum slopes (often 1–2%), add cleanouts, and use geotextile to match soil fines and prevent clogging.
You include check valves where backflow risk exists, and follow local MS4 and utility standards.
Can Buried Sensors Monitor Driveway Movement, Moisture, or Freeze-Thaw Cycles?
Yes—you can embed sensors to track driveway movement, moisture, and freeze-thaw cycles; they act like a stethoscope for your pavement. You’ll use buried monitoring nodes (strain gauges, moisture probes, thermistors) set at subgrade and base layers.
To protect sensor accuracy, you’ll calibrate to ASTM/ISO methods, log temperature-compensated readings, and validate against field density and soil gradation.
You’ll place them below frost depth where soils heave.
What Utility Clearances Are Required Before Excavating a Driveway Replacement?
Before you excavate, you’ll request a utility locate (call 811) and follow local utility regulations and clearance standards.
You’ll keep excavation outside marked tolerance zones—often 18–24 inches each side of a line—then hand-dig or vacuum within that zone.
You’ll confirm minimum vertical separation from utilities per code, especially near gas and electric.
In wet, expansive, or frost-susceptible soils, you’ll widen buffers and control dewatering.
How Do Radiant-Heated Driveways Integrate With Insulation and Base Layers?
You integrate radiant heat by placing hydronic tubes or electric mats above a compacted, soil-aware base and below the slab/asphalt. Then add thermal insulation beneath and at edges to curb heat transfer into subgrade.
Yes, you’re basically heating the Earth—brilliant.
You’ll compact to 95% Proctor, use 4–8 in. well-graded aggregate, geotextile on weak soils, and follow manufacturer spacing, cover, and R-value specs.
What Permits or Inspections Apply to Driveway Excavation and Drainage Changes?
You’ll typically need a driveway/ROW excavation permit, a grading permit, and often a stormwater or drainage modification permit.
Your jurisdiction may require utility locates, erosion-control measures per local BMPs, and inspections for subgrade compaction, pipe slope, and connection to approved outfalls.
Soil type and infiltration rates drive requirements.
Material selection and aesthetic enhancements can trigger zoning or HOA review, plus ADA/curb-cut inspection if near sidewalks.
Conclusion
You don’t just park on a slab—you rely on a layered system that starts with soil you’ve tested, dried, and compacted to spec, then a base you’ve placed to the right thickness, separated with geotextile when soils are weak, and shaped for drainage and frost. One striking stat: poor drainage can cut pavement life by up to 50%. If you build to standards—slope, joints, edging, and proper base—your surface lasts, not just looks good.
About the Author